background image

87

MENU

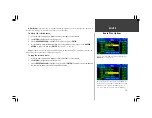
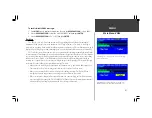
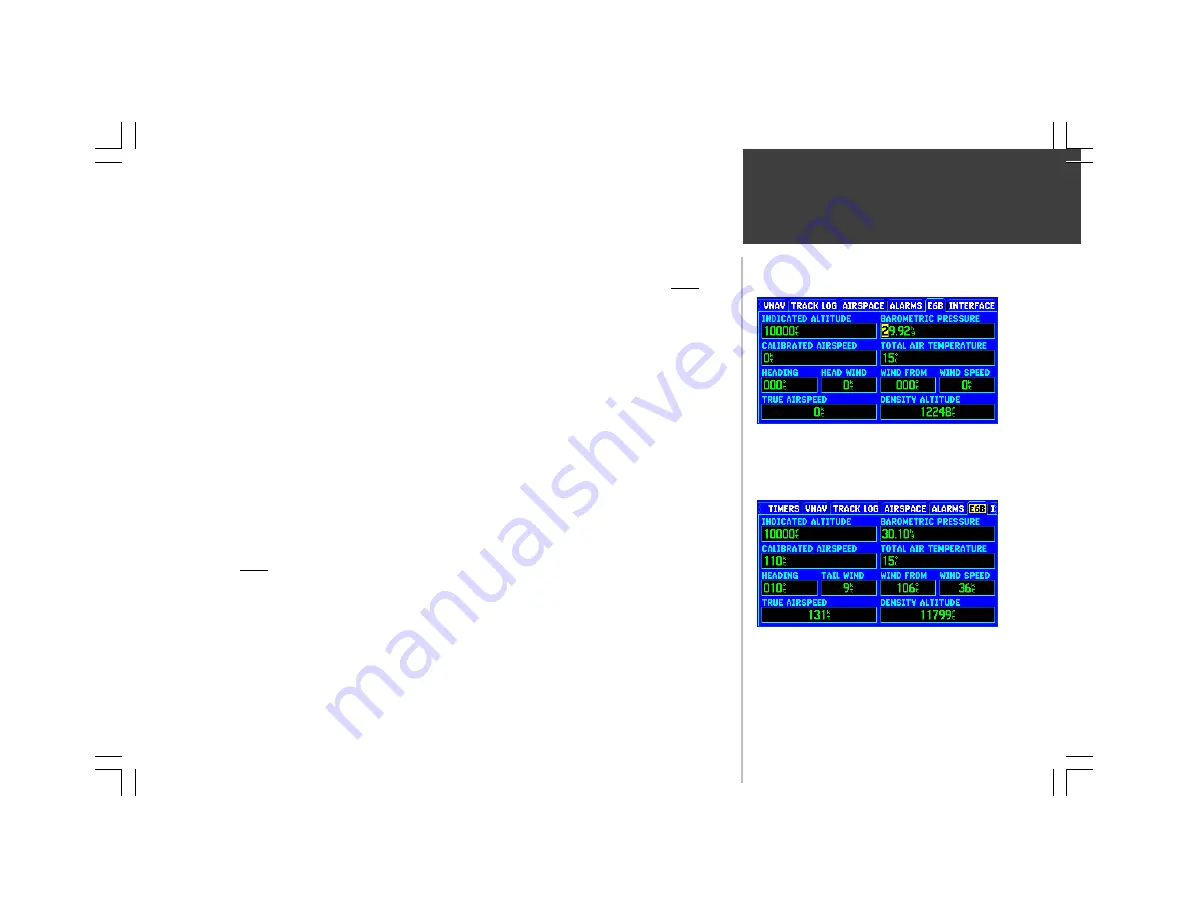
To calculate density altitude and true airspeed:

1. Press 

MENU

 twice to display the Main Menu, then use the 

ROCKER KEYPAD

 to select ‘E6B’.

2. Use the 

ROCKER KEYPAD

 to select the INDICATED ALTITUDE field and press 

ENTER

. Use the

ROCKER KEYPAD

 to enter the altitude from your altimeter and press 

ENTER

 once the entire

altitude reading has been entered.

3. Use the 

ROCKER KEYPAD

 to select the CALIBRATED AIRSPEED field and press 

ENTER

. Use the

ROCKER KEYPAD

 to enter the airspeed from your airspeed indicator and press 

ENTER

.

4. Use the 

ROCKER KEYPAD

 to select the BARO PRESSURE field and press 

ENTER

. Use the

ROCKER KEYPAD

 to enter the current altimeter setting (barometric pressure) and press 

ENTER

.

5. Use the 

ROCKER KEYPAD

 to select the TOTAL AIR TEMPERATURE field and press 

ENTER

. Use the

ROCKER KEYPAD

 to enter the TAT and press 

ENTER

.

6. The calculated figures for DENSITY ALTITUDE and TRUE AIRSPEED will now be displayed.

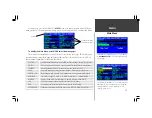
To calculate winds aloft:

1. Follow the steps above to determine TRUE AIRSPEED. Or, use the 

ROCKER KEYPAD

 to select the

TRUE AIRSPEED field, press 

ENTER

, use the 

ROCKER KEYPAD

 to enter the true airspeed (as

derived from an alternate source) and press 

ENTER

.

2. Use the 

ROCKER KEYPAD

 to select the HEADING field and press 

ENTER

. Use the 

ROCKER

KEYPAD

 to enter the heading from your directional gyro or compass, and press 

ENTER

 once the

entire heading has been entered.

3. The calculated figures for HEAD/TAIL WIND, WIND FROM and WIND SPEED will now be displayed.

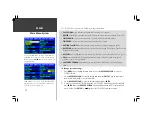
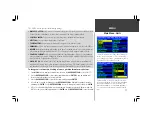
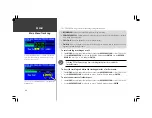
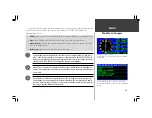
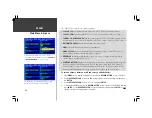
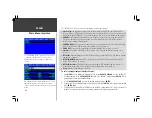
Main Menu: E6B

Enter each item required for the calculation. As you enter
the figures, the GPSMAP 295 will calculate the result.

The HEAD/TAIL WIND figure will automatically select
head wind or tail wind and display the wind component.

Summary of Contents for GPSMAP 295

Page 1: ...Introduction 1 GPSMAP 295 Pilot s Guide Reference...

Page 2: ...2 Introduction...

Page 3: ...ssion to download a single copy of this manual and of any revision to this manual onto a hard drive or other electronic storage medium to be viewed and to print one copy of this manual or of any revis...

Page 4: ...you begin check to see that your GPSMAP 295 package includes the following items If you are missing any parts please contact your GARMIN dealer immediately Standard Package GPSMAP 295 Unit with Detach...

Page 5: ...r in a place where the driver or passengers are likely to have an impact with it in an accident or collision The mounting hardware provided by GARMIN is not warranted against collision damage or the c...

Page 6: ...enced radio TV technician for help The GPSMAP 295 does not contain any user serviceable parts Repairs should only be made by an authorized GARMIN service center Unauthorized repairs or modifications c...

Page 7: ...HER RESULT ING FROM THE USE MISUSE OR INABILITY TO USE THIS PRODUCT OR FROM DEFECTS IN THE PRODUCT Some states do not allow the exclusion of incidental or consequential damages so the above limitation...

Page 8: ...n the Map and or HSI pages 19 27 De clutter the Map Page 18 Display the nearest airports list 60 Display the database information location runways frequencies for any airport or navaid 40 46 Select an...

Page 9: ...lite Status Page 7 10 Satellite Status Page Options 10 12 Position Page 12 13 Position Page Options 13 14 Map Page 15 18 Map Page Options 19 25 HSI Page Aviation Mode 26 HSI Page Options 27 30 RMI Pag...

Page 10: ...tions 66 67 Route Plan Page 68 69 Route Editing 70 Route Plan Options 70 74 MENU 75 88 Main Menu 75 Main Menu System 76 Main Menu Units 77 Main Menu Timers 78 Main Menu VNAV 79 81 Main Menu Track Log...

Page 11: ...KEYPAD Controls the movement of the cursor is used to select options and positions and to enter data D WPT Allows you to retrieve Jeppesen database information and or select a destination waypoint vi...

Page 12: ...n and press ENTER to select the action corresponding to that button An example of an on screen button is the GOTO button appearing at the bottom of the waypoint information pages SCROLL BAR When viewi...

Page 13: ...are occasionally needed to triangulate your position and even if not needed to determine a position additional satellites will also improve position accuracy During normal use expect a position fix in...

Page 14: ...ws you to quickly select the desired page For example to quickly jump from the Map Page to the HSI Page press PAGE To return from the HSI Page to the Map Page press QUIT You may find it desirable to c...

Page 15: ...ing settings 2 Press the UP DOWN portion of the ROCKER KEYPAD to change the backlighting settings UP will increase backlight intensity DOWN will decrease backlight intensity 3 Press the LEFT RIGHT por...

Page 16: ...Course determined when GOTO is initiated Independent from Land Mode user defined settings for Distance Speed North reference true or magnetic Arrival Alarm Land Data appearing on Map Aviation Data app...

Page 17: ...a fix has been calculated the GPSMAP 295 will then update your position ground track and ground speed by selecting and using the best satellites in view Sky View and Signal Strength Bars The sky view...

Page 18: ...The status will be shown as one of the following conditions Searching the GPSMAP 295 is looking for any available satellites in view AutoLocate the GPSMAP 295 is initializing and collecting new almana...

Page 19: ...ndicator located in the bottom right corner which displays the condition of the unit s batteries The battery indicator is replaced by an external power icon when operating from an external power sourc...

Page 20: ...tions Many features of the GPSMAP 295 are menu driven Each of the main pages has an options menu allowing you to custom tailor the corresponding page to your preferences and or select special features...

Page 21: ...ve relocated a long distance greater than 500 miles from the last location the GPSMAP 295 was used In such instances without initialization the GPSMAP 295 may otherwise be looking for the wrong group...

Page 22: ...graphic heading display at the top of the page indicates the direction you re heading or ground track only while you re moving Directly below the graphic heading display are present position and time...

Page 23: ...ange Fields allows you to choose the data types displayed on the eight user selectable data fields along the right hand side of the Position Page Available data types are Altitude Odometer Speed Maxim...

Page 24: ...ll trip computer maximum speed and odometer readouts To reset all trip computer maximum speed odometer readouts use the ROCKER KEYPAD to highlight Reset All and press ENTER Restore Default resets all...

Page 25: ...rner displaying distance to next destination waypoint and ground speed along with a graphic HSI directly below the data fields From the Map Page Options each data field may be configured to display an...

Page 26: ...f available map detail Extra caution should be used in overzoom since some detail such as roads are drawn using widely spaced points and the actual layout of these details may differ from the map pres...

Page 27: ...rently exists at the map pointer position a new waypoint called MAP will be created at the pointer s location before the GOTO is initiated You can also create a waypoint on the Map Page without select...

Page 28: ...Map option described on the following page You may however wish to temporarily remove some map detail in congested areas There are three declutter settings which will remove the background detail lake...

Page 29: ...to Next waypoint DIS NEXT ETA to final Destination ETA DEST ETA to Next waypoint ETA NEXT ETE to final Destination ETE DEST ETE to Next waypoint ETE NEXT Estimated Time to VNAV ETV Glide Ratio GR Gli...

Page 30: ...Local Highways Local Roads Road Names POINT Geographic Landmarks Marine Navaids Highway Exits Points of Interest AREA Rivers Lakes Parks Metro Areas Other Areas Descriptive Text TOPO Major Intermediat...

Page 31: ...s brighter colors for operation in well lit conditions Auto will select the appropriate mode based upon the GPSMAP 295 s internally calculated sunrise and sunset times using current time and position...

Page 32: ...feature and press ENTER Select the maximum scale at which the feature should appear on screen or select Off to never display the feature Press ENTER to accept the settings As you may have noticed from...

Page 33: ...ys version and map name s for any MapSource CD ROM data stored on an installed cartridge A box appears to the immediate left of each map name directly under SHOW When the box is checked the designated...

Page 34: ...with eight small character data fields along the right hand side Select the desired data items using the Change Fields option on page 19 To select the number of data fields to display add an HSI or RM...

Page 35: ...ance between two points 1 With the Map Page displayed press MENU to display the Map Page options 2 Use the ROCKER KEYPAD to highlight Measure Distance and press ENTER An on screen pointer will appear...

Page 36: ...fault setting is 1 25 which represents the distance from the center of the CDI to full left or right limits As you reach your destination a TO FROM indicator at the center of the HSI will indicate way...

Page 37: ...to Next waypoint DIS NEXT ETA to final Destination ETA DEST ETA to Next waypoint ETA NEXT ETE to final Destination ETE DEST ETE to Next waypoint ETE NEXT Estimate Time to VNAV ETV Glide Ratio GR Glid...

Page 38: ...edle and desired course pointer will now provide steering guidance to the selected course To cancel the OBS course and reset a direct course to the waypoint press D WPT followed by ENTER or re activat...

Page 39: ...R KEYPAD and press ENTER The bug indicator will remain fixed on the selected heading until a new bug heading is chosen VNAV Indicator Off allows you to disable enable the vertical navigation indicator...

Page 40: ...he full scale limits of the course deviation scale and needle The default setting is 1 25 nautical mile statute mile kilometer but can also be set to 0 25 or 5 0 ranges The current setting is always d...

Page 41: ...ler map display using the RMI Page Options RMI Page Options Much like the HSI Page the RMI Page has an options menu allowing you to custom tailor the RMI Page to your preferences and or select special...

Page 42: ...ge the name of the active route review information on a route waypoint edit the route or bypass route waypoints and GOTO any waypoint in the route To change the name of the active route 1 With the Act...

Page 43: ...e ROCKER KEYPAD to select the new waypoint UP DOWN to select the highlighted character and RIGHT to move to the next character field and press ENTER once all characters for the new waypoint have been...

Page 44: ...enu driven Each of the main pages has an options menu allowing you to custom tailor the corresponding page to your preferences and or select special features which specifically relate to that page To...

Page 45: ...pproach 2 With the Active Route Page displayed press MENU to display the Active Route Page Options 3 Use the ROCKER KEYPAD to highlight Select Approach and press ENTER A pop up window will appear list...

Page 46: ...appear adjacent to the first approach waypoint To activate the final approach course for an approach in the active route 1 With the Active Route Page displayed press MENU to display the Active Route...

Page 47: ...oint from the active route Place the panning pointer on the desired route waypoint and press ENTER From the pop up window use the ROCKER KEYPAD to highlight Remove and press ENTER 6 To insert a waypoi...

Page 48: ...See page 95 for descriptions of these terms To change a data field 1 With the Active Route Page displayed press MENU to display the Active Route Page Options 2 Use the ROCKER KEYPAD to highlight Chan...

Page 49: ...ntry position latitude longitude frequency and co located weather broadcast availability Intersections identifier nearest VOR radial and distance from nearest VOR position latitude longitude and regio...

Page 50: ...o select the identifier facility name or city field in that order identifier only for intersections and press ENTER 4 Use the ROCKER KEYPAD to enter the identifier facility name or city UP DOWN to sel...

Page 51: ...To select the waypoint as a GOTO destination 1 With the desired airport or navaid displayed use the ROCKER KEYPAD to highlight the on screen GOTO button and press ENTER A course is plotted from your p...

Page 52: ...ICAO identifiers to designate airports In the United States the prefix letter for airports is K This applies to airport identifiers that are letters only For example LAX becomes KLAX Airport identifi...

Page 53: ...pop up window will appear listing all runways for the selected airport This window is not available if the airport only has one runway 2 Use the ROCKER KEYPAD to highlight the desired runway and press...

Page 54: ...elected use the ROCKER KEYPAD to highlight any frequency with usage restrictions as denoted by an asterisk and press ENTER A Usage Restrictions Page will appear describing the restrictions for the sel...

Page 55: ...AD to highlight the approach name field and press ENTER A pop up window will appear listing the available approaches to the selected airport 2 Use the ROCKER KEYPAD to select the desired approach and...

Page 56: ...nta double line On the Active Route Page a Vector to Final symbol will appear adjacent to the first approach waypoint Goto FAF activates a direct course from present position to the first approach way...

Page 57: ...oint have been entered 3 Use the ROCKER KEYPAD to highlight the SYMBOL field and press ENTER A list of available symbols will appear in a pop up window Use the UP DOWN portion of the ROCKER KEYPAD to...

Page 58: ...the name of waypoint you wish to delete and press ENTER 4 Use the ROCKER KEYPAD to highlight the on screen DELETE button and press ENTER Press ENTER again to confirm To edit an existing user waypoint...

Page 59: ...er waypoint and all waypoints with the same corresponding symbol will be deleted from memory Delete All deletes all user waypoints currently stored in memory To delete all user waypoints or all waypoi...

Page 60: ...000 Small Town approximate population is less than 5 000 or population size is unknown To select a city and view the information 1 Press D WPT to display the waypoint information pages 2 Use the ROCK...

Page 61: ...list of exits 4 To select exits for a different highway highlight the highway name field and press ENTER Use the ROCKER KEYPAD to select the desired highway and press ENTER Press ENTER again to retur...

Page 62: ...nt based upon the following criteria All Types Live Theater Bar Nightclub Movie Theater Casino Golf Course Skiing Center Resort Bowling Center Ice Skating Swimming Pool Sports Fitness Center Public Sp...

Page 63: ...interest for the specified criteria will be listed use the ROCKER KEYPAD to select a desired point UP DOWN to select the highlighted character and RIGHT to move to the next character field and press...

Page 64: ...isplayed press ENTER 6 Use the ROCKER KEYPAD to scan through additional entries in the street name list and press ENTER once the desired street name is highlighted 7 To further narrow the search you m...

Page 65: ...the first available entry in the MapSource data Once the desired street name is displayed press ENTER 6 Use the ROCKER KEYPAD to scan through additional entries in the street name list and press ENTER...

Page 66: ...lso be used to add a waypoint to the list Selecting this button will display the waypoint information pages where you can search for the desired waypoint by name To display the list of favorite waypoi...

Page 67: ...the waypoint you wish to replace or the waypoint following the list location where you wish to add a new waypoint and press ENTER 3 A pop up menu will appear Select Change or Insert and press ENTER 4...

Page 68: ...ER and use the ROCKER KEYPAD to enter the desired waypoint name Press ENTER once all characters for the waypoint name have been entered 3 To select a different waypoint symbol which will appear on the...

Page 69: ...bility NDB nine nearest with identifier bearing to and distance frequency and co located weather broadcast availability INT nine nearest with identifier bearing to and distance USER nine nearest with...

Page 70: ...a second time to quickly display the nearest airports list Additional information for airports navaids user waypoints cities highway exits and points of interest are available from the waypoint inform...

Page 71: ...wing the steps on the preceding page 2 Press MENU to display an options window then press ENTER A pop up window will appear with the current settings for runway surface and minimum runway length 3 Wit...

Page 72: ...nts Nearest Airspace Information When an airspace alert is provided the Nearest Pages automatically default to display nearby airspace information This information includes name time to entry if appli...

Page 73: ...to your current position Use the ROCKER KEYPAD to scroll through the exit list To view highway exit information 1 Select the Nearest Pages and the EXIT file tab using the steps described on page 60 2...

Page 74: ...OCKER KEYPAD to select the desired category and press ENTER 4 Use the RIGHT portion of the ROCKER KEYPAD to highlight the search criteria field and press ENTER A second pop up window will appear allow...

Page 75: ...ROCKER KEYPAD to select the waypoint UP DOWN to select the highlighted character and RIGHT to move to the next character field and press ENTER once all characters for the identifier facility name city...

Page 76: ...Or select No to cancel Route List Options Highlight any route on the Route List and press MENU to display an options window The following options are available Activate Copy Delete Activate selects th...

Page 77: ...ed by a number Delete removes the highlighted route from memory Any user created waypoints contained in the route will remain in memory when you delete the route Only the route itself is deleted To de...

Page 78: ...ime figures and fuel requirements when used in conjunction with a selectable flow rate figure To change the name of a saved route 1 Follow the steps above to display the Route Plan Page for a saved ro...

Page 79: ...formation for a route waypoint 1 Follow the steps on the previous page to display the Route Plan Page for a saved route 2 Use the ROCKER KEYPAD to highlight the waypoint you wish to review and press E...

Page 80: ...ight the waypoint you wish to move and press ENTER 3 A pop up menu will appear Select Move and press ENTER 4 Use the ROCKER KEYPAD to move the waypoint to the desired place in the list and press ENTER...

Page 81: ...and add the waypoints to the route the final destination in the route must be an airport with a published approach To add an approach for the destination airport in the route 1 Follow the steps on pa...

Page 82: ...hour fuel flow figure 3 Use the ROCKER KEYPAD to enter the fuel flow rate UP DOWN to change the highlighted character and RIGHT to move to the next character then press ENTER The units of measure for...

Page 83: ...ected route to another route memory location The copied route will have the same name as the original route followed by a number To copy the selected route 1 Follow the steps on page 69 to display the...

Page 84: ...ht the data field you wish to change and press ENTER 5 Use the ROCKER KEYPAD to select the type of data you want to appear on this field and press ENTER 6 Press QUIT to exit the Change Fields function...

Page 85: ...ime for current day VNAV Vertical Navigation settings for target altitude climb descent rate distance TRACK LOG Recording On Off Memory Used buttons for clearing memory TracBack AIRSPACE On Off by cat...

Page 86: ...mation only displays current date based upon Time Format Time Zone and Daylight Savings settings BATTERY selects Alkaline or NiCad battery type for proper display of battery level see page 9 WAAS enab...

Page 87: ...u are using a map or chart which specifies a different datum To change units of measure heading reference position format or map datum 1 Press MENU twice to display the Main Menu then use the ROCKER K...

Page 88: ...Main Menu then use the ROCKER KEYPAD to select the TIMERS file tab 2 Use the ROCKER KEYPAD to select the USER TIMER or BATTERY TIMER field and press ENTER A pop up window will show the available sett...

Page 89: ...lock to prevent changes in speed from altering the profile Keep this in mind since the VNAV feature will not take into account any changes in groundspeed that occur during the transistion from level f...

Page 90: ...KEYPAD to enter the target altitude and press ENTER once all characters have been entered If necessary select the field in the right column press ENTER and choose Above Waypoint or Above MSL Then pre...

Page 91: ...vating the route in reverse order along those points Once activated a TracBack route will lead you to the oldest track log point stored in memory so it s a good idea to clear existing track log memory...

Page 92: ...KEYPAD to select On or Off and press ENTER Selecting Off will prevent you from recording track points for use with the TracBack feature To clear the track log and define the starting point for a TracB...

Page 93: ...ce is charted in AGL the GPSMAP 295 will alert you at any altitude below the upper limit However if the actual upper limit is also charted in AGL the GPSMAP 295 will provide the alert at all altitudes...

Page 94: ...le if the buffer is set to 500 feet and you are more than 500 feet above or below an airspace you will not be notified with an alert message If you are less than 500 feet from the floor ceiling limits...

Page 95: ...PAD to select ALARMS 2 Use the ROCKER KEYPAD to select the APPROACH ALARM ARRIVAL ALARM COURSE DEVIATION ALARM or CLOCK ALARM field and press ENTER A pop up window will show the available settings 3 F...

Page 96: ...nd total air temperature TRUE AIRSPEED calculated figure or user entered determined from entry of calibrated airspeed baro pressure and total air temperature Also can be entered directly for winds alo...

Page 97: ...TURE field and press ENTER Use the ROCKER KEYPAD to enter the TAT and press ENTER 6 The calculated figures for DENSITY ALTITUDE and TRUE AIRSPEED will now be displayed To calculate winds aloft 1 Follo...

Page 98: ...d RTCM format and also provides NMEA 0183 version 2 30 output RTCM In Text Out allows DGPS input using a standard RTCM format and also provides a standardized fixed column ASCII output with data for p...

Page 99: ...hese two tabs and rotate the top of the unit into the bracket until it snaps into place There is a single wide tab at the top of the unit bracket which will secure the unit in the bracket when properl...

Page 100: ...nd on the Signal Strength Bars see page 7 Once correction data is received from the WAAS satellite a D will appear in the signal strength bars of all satellites for which correction data is available...

Page 101: ...satellites involves considerable microprocessor activity You may notice a decrease in overall performance when the WAAS feature is enabled as indicated by slower response times and a slower map screen...

Page 102: ...AA alkaline batteries Usage 6 watts max battery life up to 2 5 hours Memory Capacity User Waypoints up to 500 with selectable map symbol Routes up to 30 with up to 30 waypoints per route Interfacing T...

Page 103: ...hich requires an optional data card and MapSource data Messages Data Transfer Complete Transfer of data to the unit for database update or using the PC software has been completed Database Error A use...

Page 104: ...to stay on course Sunrise Switching To Day Mode The map is switching to the Day Mode display Messages Sunset Switching to Night Mode The map is switching to the Night Mode display Timer Has Expired T...

Page 105: ...al ETE Estimated Time Enroute ETV Estimated Time to VNAV FLOW Fuel Flow Rate FOB Fuel On Board FPM Feet Per Minute FR From FSS Flight Service Station FT Feet FT Full Time GL Gallons GPS Global Positio...

Page 106: ...Route RX Receive Only SEC Seconds SID Standard Instrument Departure SPD Ground Speed SRFC Surface STAR Standard Terminal Arrival Route STR Steer To TACAN Tactical Air Navigation Aid TAS True Airspeed...

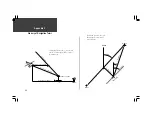
Page 107: ...rtical descent for every 6000 horizontal distance traveled Glide Ratio to Target GRT The glide ratio required to descend from your present position and altitude to the target altitude at the location...

Page 108: ...Course Track V N A V P R O F I L E GLIDE RATIO TO TARGET DISTANCE TO TARGET DISTANCE TO PROFILE TARGET ALTITUDE AIRPORT This diagram illustrates some of the terms used with the vertical navigation VNA...

Page 109: ...83 Near and Ahead 83 OtherSUA s 84 Restricted Areas 84 Towers Control Zones 84 Airspace Information Retrieving 18 Alarms 85 Approach Alarm 85 Arrival Alarm 85 Clock Alarm 85 Course Deviation Alarm 85...

Page 110: ...rival ETA 32 Estimated Time Enroute ETE 32 F Favorite Waypoints List 56 57 Fuel Flow Set 72 G Glide Ratio GR 97 98 Glide Ratio To Target GRT 97 Glossary of Navigation Terms 97 Gridlines 97 GOTO Functi...

Page 111: ...Screen Map 24 Restore Default 25 Setup Map 20 23 Map Panning and GOTO s 16 Map Zooming 16 Map Scales 16 MapSource Maps On Off 23 MARK Key 1 Marking Present Position 58 Measuring Bearing and Distance 2...

Page 112: ...utes 65 74 Activating 66 Copying 67 73 Creating 65 Deleting 66 67 73 Deleting Route Waypoints 69 Displaying A Route Plan 68 Editing 37 70 Inserting Route Waypoints 70 Inverting 71 Moving Route Waypoin...

Page 113: ...ge Full 82 Clear Track 82 Track Memory 81 Trip Timer 13 Trip and Fuel Planning 72 Trip Odometer 13 Turn TRN 97 U Unit Settings 77 Units of Measure 77 Usage Mode Select Aviation Land 76 User Timer 78 U...

Page 114: ...104 Appendix G...

Page 115: ...Appendix G 105...

Page 116: ...urope Ltd Unit 5 The Quadrangle Abbey Park Industrial Estate Romsey SO51 9AQ U K GARMIN Asia Corporation No 68 Jangshu 2nd Road Shijr Taipei County Taiwan www garmin com Part Number 190 00174 00 Rev C...

Reviews: