1. RADAR OPERATION
1-75
1.39
Brilliance of Screen Data
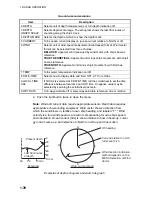
You can adjust relative brilliance levels of various markers and alphanumeric
readouts displayed on the screen.
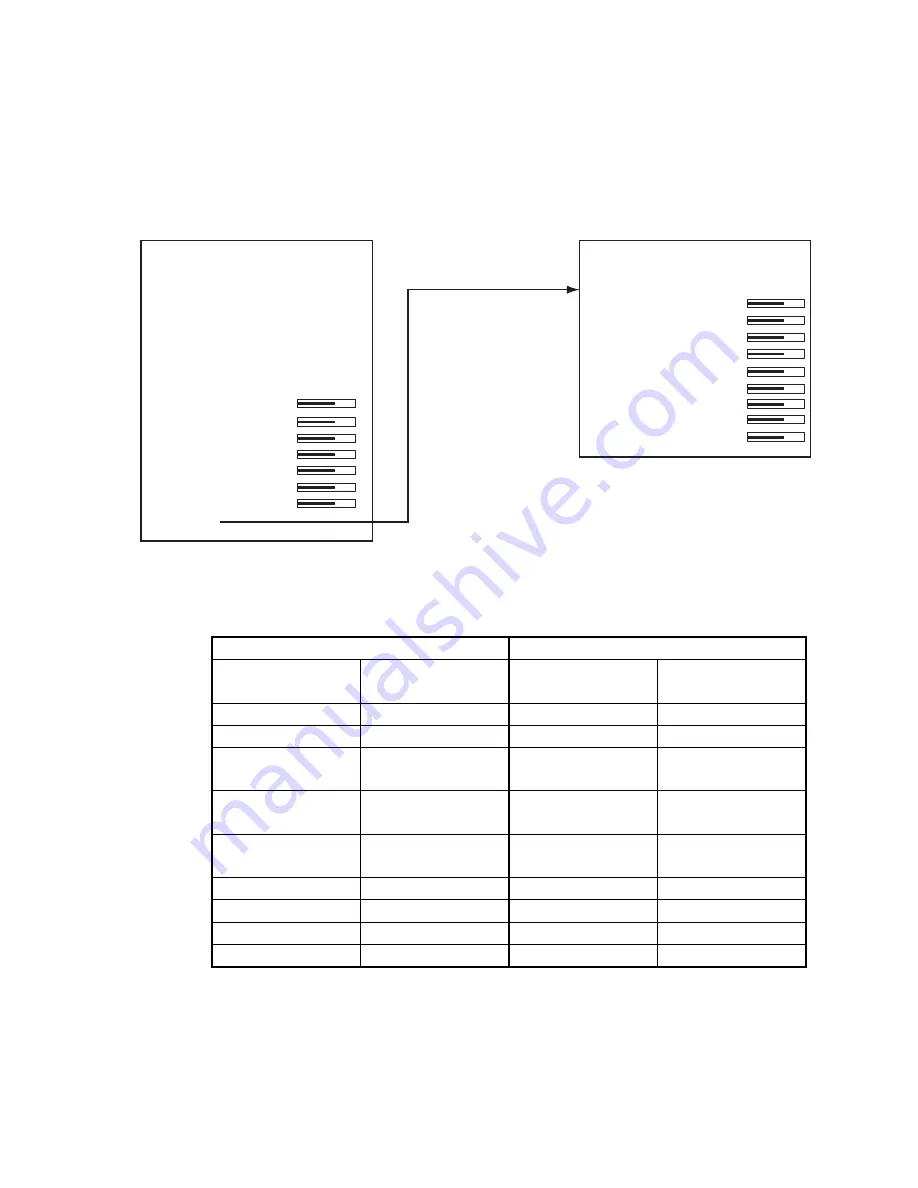
1. Right-click the BRILL box at the bottom left corner of the screen to show the
BRILL menu.
[BRILL1 MENU (2/2)]
1 BACK
2 BRG CURSOR
3 EBL
4 VRM
5 PI LINE
6 TT SYMBOL
7 AIS SYMBOL
8 L/L GRID
9 MARK
0 CHART*
Choose 0 NEXT
to show page 2
of the BRILL menu.
[BRILL1 MENU (1/2)]
1 ECHO COLOR
YEL/GRN/
WHT/COLOR*
2 PALETTE
DAY-GRY/DAY-BLU/
DUSK-GRY/DUSK-BLU/
NIGHT-GRY/NIGHT-BLU/
3 PANEL DIMMER
4 CHARACTER
5 CURSOR
6 ECHO
7 TRAIL
8 HL
9 RING
0 NEXT
* Not available
on IMO or A type
Note:
Four brilliance and color sets are
provided. For further details see
section 1.49.
BRILL menu
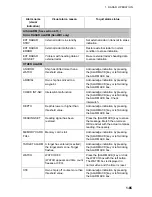
2. Select item you wish to adjust. (To go to the second page of the BRILL menu
select 0 NEXT and push the scrollwheel.)
Page 1
Page 2
Item Adjusts
brilliance of;
Item Adjusts
brilliance of;
1 ECHO COLOR
See section 1.49.
2 BRG CURSOR
Bearing cursor
2 PALETTE
See section 1.49.
3 EBL
EBLs
3 PANEL
DIMMER
Backlighting of
control unit
4 VRM
VRMs
4 CHARACTER
All alphanumeric
characters
5 PI LINE
PI lines
5 CURSOR
Cursor (+) and
arrow
6 TT SYMBOL
TT symbols
6 ECHO
Radar echoes
7 AIS SYMBOL
AIS symbols
7 TRAIL
Target trails
8 L/L
Chart grid
8 HL
Heading line
9 MARK
All marks
9 RING
Range rings
0 CHART
Chart
3. Roll the scrollwheel to set brilliance level. The range of adjustment for items
except "HL" and "CURSOR" is 0-100%. The range of adjustment for HL and
CURSOR is 50-100%.
4. Push the right button once or twice to close the menu.


