9
F type
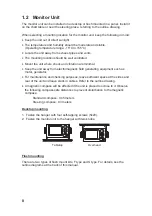
Use the optional flush mount kit OP20-29.
Name Type
Code
No.
Qty
Cosmetic panel
20-016-1051
100-251-370
1
Self-tapping screw
5X20
000-802-840
4
Hexagon-head bolt
M6X12
000-862-127
2
Spring washer
M6
000-864-260
2
1. Prepare a cutout in the mounting location whose dimensions are 183 (W) X 92
(H) mm.
2. Attach the cosmetic panel (20-016-1051) to the unit with two hex head bolts
(M6X12) and two spring washers (M6).
3. Fix the unit to the mounting location with four self-tapping screws (5X20).
S type
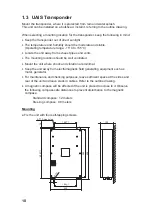
Use the optional flush mount kit OP20-17.
.
Name Type
Code
No.
Qty
Fixing plate
20-007-2401
100-183-190
2
Hexagon-head bolt
M6X12
000-862-127
2
Wing bolt
M4X30
000-804-799
4
Wing nut
M4
000-863-306
4
Spring washer
M6
000-864-260
2
1.
Prepare a cutout in the mounting location whose dimensions are 167 (W) X 92
(H) mm.
2. Insert the unit to the cutout.
3. Attach two fixing plates (20-007-2401) to the unit with two hex bolts (M6X12)
and two spring washers (M6).
4. Screw four wing bolts (M4X30) to wing nuts (M4).
5. Fasten the unit with four wing bolts and nuts.
Summary of Contents for FA-150
Page 2: ...This page left intentionally blank ...
Page 4: ...This page left intentionally blank ...
Page 5: ...Revision history manual Rev A B C Description Date dd mm yyyy Sign A A 06 05 2015 HAB ...
Page 6: ...This page left intentionally blank ...
Page 8: ...This page left intentionally blank ...
Page 9: ...Index divider Section 1 N ...
Page 10: ......
Page 12: ...PRINTED IN JAPAN UAIS TRANSPONDER FA 150 ...
Page 53: ...Antenna Cable Set CP20 02700 004 381 160 CP20 02710 004 381 170 A 8 ...
Page 54: ...Antenna cable Set CP24 00300 000 041 938 CP24 00310 000 041 939 A 9 ...
Page 55: ...Y Hatai D 1 ...
Page 56: ...Y Hatai D 2 ...
Page 57: ...Y Hatai D 3 ...
Page 58: ...Y Hatai D 4 ...
Page 59: ...Feb 19 03 D 5 ...
Page 60: ...May 20 03 D 6 ...
Page 61: ...Feb 22 05 D 7 ...
Page 62: ...Jan 9 03 D 8 ...
Page 63: ...Mar 11 04 H Hayashi D 9 ...
Page 64: ...Feb 02 05 D 10 ...
Page 65: ...Nov 28 03 D 11 ...
Page 66: ...Oct 02 03 D 12 ...
Page 67: ...H Hayashi Mar 10 05 D 13 ...
Page 69: ...Index divider Section 2 N ...
Page 70: ......
Page 72: ...This page left intentionally blank ...
Page 129: ...Index divider Section 3 N ...
Page 130: ......
Page 187: ...Index divider Section 4 N ...
Page 188: ......
Page 190: ...TECHNICAL MANUAL A100K11209 v 1 3 Sound Reception System VSS V2 Installation User Manual ...
Page 204: ...15 VSS V2 Technical Manual A100K11209 v 1 3 4 7 Cable Connection Diagram ...
Page 206: ...17 VSS V2 Technical Manual A100K11209 v 1 3 5 2 VSS V2 Master Panel Dimensions in mm ...
Page 207: ...18 A100K11209 v 1 3 VSS V2 Technical Manual 5 3 VSS V2 Slave Panel Dimensions in mm ...

