


2-3
Chapter 2 Network System Construction
Wired Network System
CAUTION
When the DS-LAN setup is changed, make sure that the same setting is made on the
central monitor.If the setting is different, proper communication cannot be performed.The
following central monitors can connect to DS-LANII network only. When connecting these
central monitors, make sure all monitors in the same wired network is set to DS-LANII
.DS-5700, DS-5800N/NX/NX
MB
, DS-7600/7600W (software version of V05 and prior)
To validate the DS-LAN setting, it is necessary to restart the system.Make sure to restart
the system when the setting is changed.
REFERENCE
Select the DS-LAN network type.
1
Press the key for "DS-LAN Setup".
The dropdown list will be displayed.
2
Select from [DS-LANII(10Mbps)]/[DS-LANIII(100Mbps)].
3
Set the Room ID/Bed ID.
CAUTION
The Bed ID is factory set to 000. If connected to the wired network with the ID unchanged,
monitoring on the central monitor will not be possible.
When connected to the wired network, make sure that there are no other bedside
monitors with the same Bed ID. If the Bed ID is duplicated, monitoring on the central
monitor is not possible.
When connecting to the DS-LANII network, set the ID in the range from 001 to 048. When
connecting to the DS-LANIII network, set the ID in the range from 001 to 100.
NOTE
Make sure to set the Room ID/Bed ID when connecting to the wired network. The set
Room ID/Bed ID will be stored even after the power is turned OFF.
1
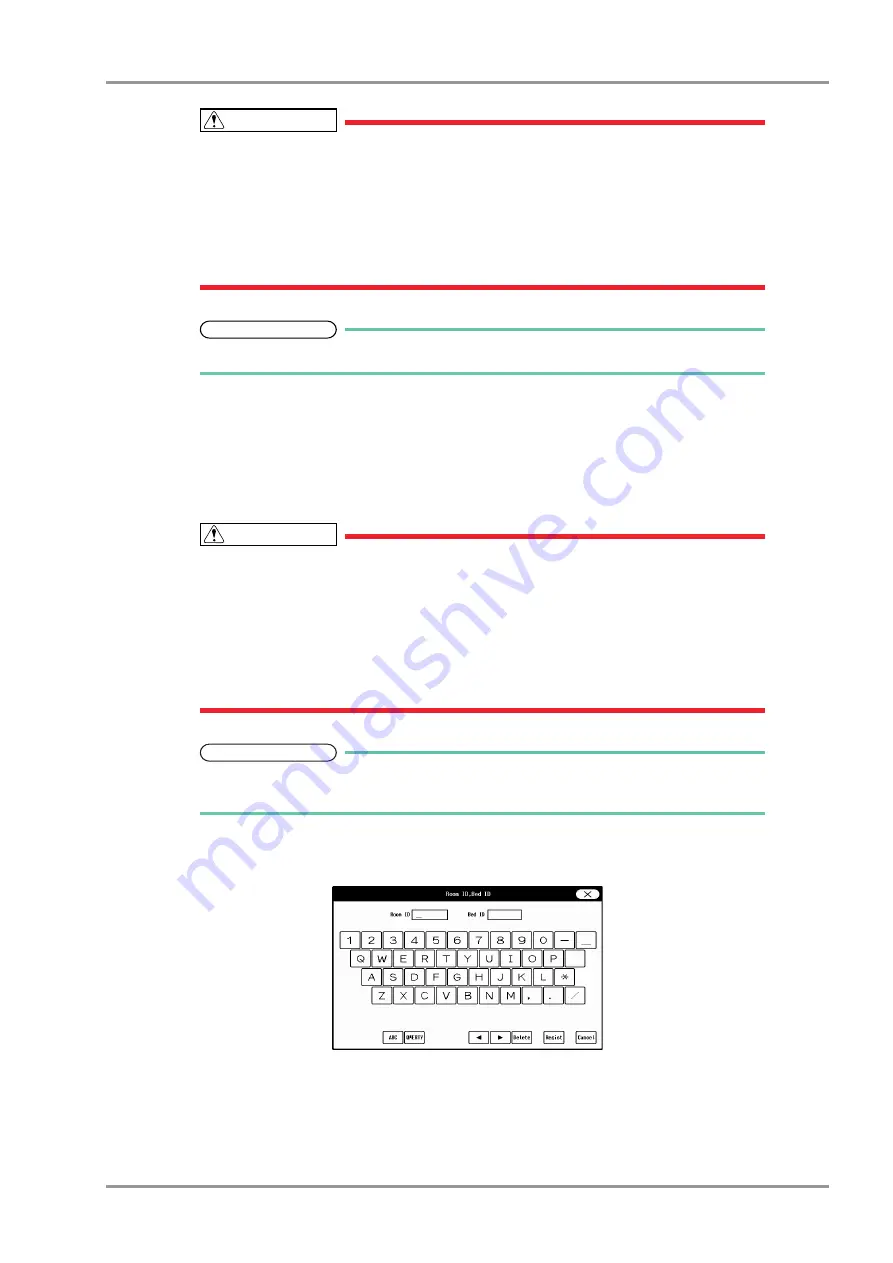
Press the key for "Room ID, Bed ID".
The "Room ID, Bed ID" window will be displayed.
2
Enter the Room ID using the alphanumeric keypad.
The entered ID will be displayed on the upper left of the screen.
3
Press the input area for the Bed ID.
The keypad will change to allow entering the Bed ID.
Summary of Contents for 8000 Series
Page 1: ......
Page 2: ......
Page 8: ...6 Contents ...
Page 10: ...Contents ...
Page 16: ...Contents ...
Page 46: ...xxx Safety Electromagnetic Compatibility ...
Page 48: ...Chapter 1 Installation of the Unit Contents ...
Page 70: ...Chapter 2 Network System Construction Contents ...
Page 82: ...2 12 Chapter 2 Network System Construction Wireless Network ...
Page 84: ...Chapter 3 Using the CF card Contents ...
Page 90: ...3 6 Chapter 3 Using the CF card Formatting the SD Card ...
Page 92: ...Chapter 4 Connection to the External Devices Contents ...
Page 124: ...4 32 Chapter 4 Connection to the External Devices Connection with the Laser Printer ...
Page 126: ...Chapter 5 Initial Settings Contents ...
Page 158: ...5 32 Chapter 5 Initial Settings User Mode Registration ...
Page 160: ...Chapter 6 Setup Item Default Value Contents ...
Page 200: ...Chapter 7 Replacement Parts Contents ...
Page 204: ...Chapter 8 Cleaning Disinfecting Storing Contents ...
Page 212: ...8 8 Chapter 8 Cleaning Disinfecting Storing Cleaning the Equipment and Sensors ...
Page 214: ...Chapter 9 Maintenance Check Contents ...
Page 228: ...Index 2 Index ...
Page 229: ......
Page 230: ......


