1.
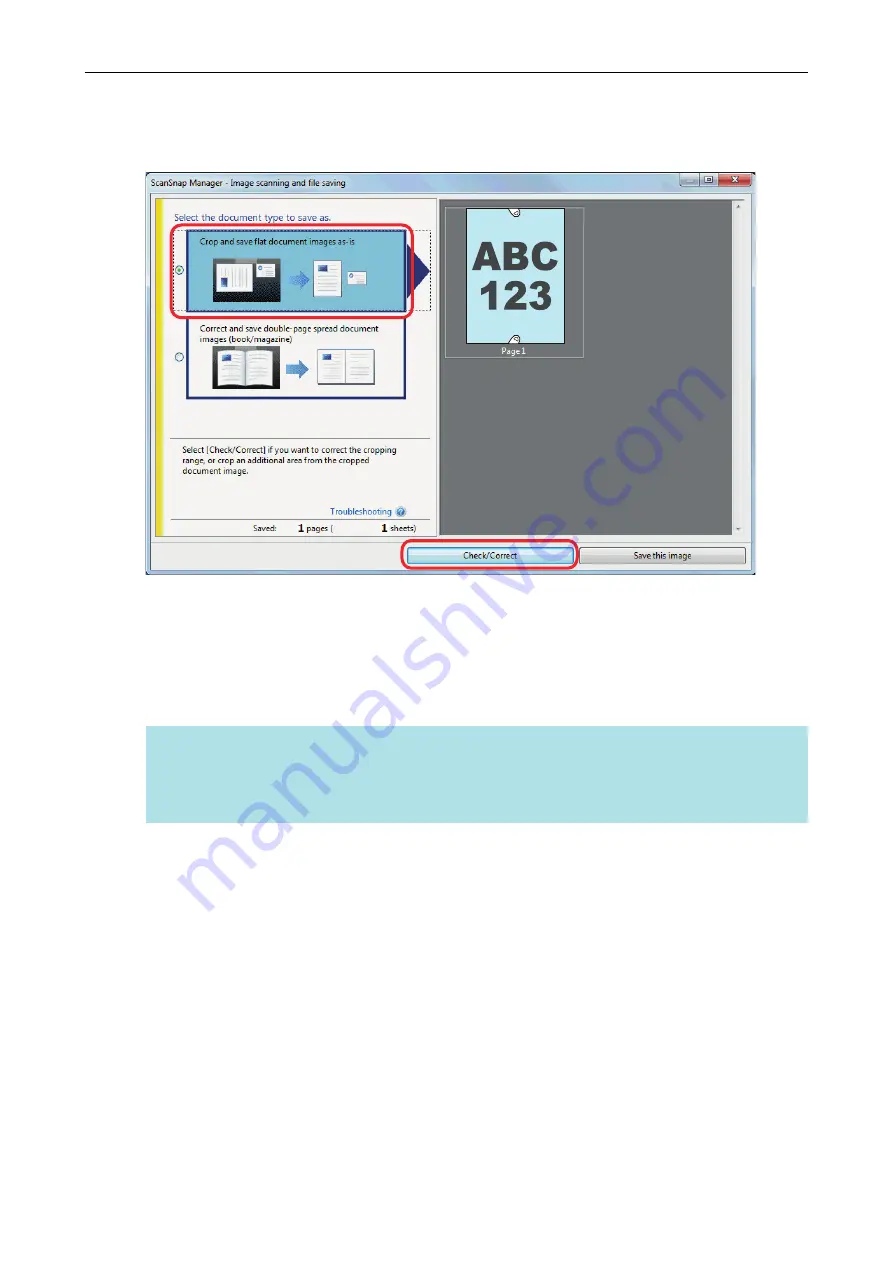
On the window that appears after a document is scanned, select [Crop and
save flat document images as-is] and click the [Check/Correct] button.
For details about how to perform a scan, refer to
"Scanning Documents (SV600)" (page 264)
a
The [ScanSnap Manager - View cropped images] window is displayed.
2.
Select a scanned image to fill in fingers captured in the image.
3.
Select the [Continue with Point Retouch] checkbox and click the [Next]
button.
HINT
The orientation of the scanned image and the crop area cannot be corrected in the [ScanSnap
Manager - Book Image Viewer] window. Modify them in the [ScanSnap Manager - View cropped
images] window beforehand.
When a Document Is Scanned (SV600)
375
Summary of Contents for SV600
Page 1: ...P3PC 6912 01ENZ2 Basic Operation Guide Windows ...
Page 54: ...What You Can Do with the ScanSnap 54 ...
Page 66: ...What You Can Do with the ScanSnap 66 ...
Page 87: ...Example When SV600 and iX1500 are connected to a computer Right Click Menu 87 ...
Page 89: ...ScanSnap Setup Window 89 ...
Page 245: ...For details refer to the Advanced Operation Guide Scanning Documents with iX100 245 ...
Page 320: ...For details refer to the Advanced Operation Guide Scanning Documents with S1100i 320 ...

