33
PRIMERGY RX200 S2 User’s Guide
1
Overview
■
Cautions for Turning the Power On/Off (for a Windows OS)
• For Windows Server 2003
"Do Nothing", "Prompt Input", "Standby", "Hibernation", or "Shutdown" can be specified as the
operating mode of the power switch in the OS settings (normally, "Shutdown" is specified).
• For Windows 2000 Server
"Standby", "Hibernation", or "Power Off" can be specified as the operating mode of the power switch
in the OS settings (normally, "Power Off" is specified).
On this server, functions corresponding to "Standby" and "Hibernation" are supported as BIOS and
hardware functions. However, some drivers and software installed in the server do not support these
functions. For this reason, functions corresponding to "Standby" and "Hibernation" are unavailable on
this server.
When the operating mode is set to "Standby" or "Hibernation", the system may operate improperly or
hard disk data may be corrupted.
For details about operating mode settings, refer to the manual supplied with the OS.
1.4.4 Inserting and Ejecting a Floppy Disk
■
Cautions
When using a floppy disk, note the following points.
• Do not expose the disk to any fluids.
• Do not open the shutter of the floppy disk and touch the disk surface.
• Do not bend the floppy disk or place heavy objects on it.
• Do not expose the floppy disk to strong magnetic fields.
• Do not drop the floppy disk on hard surfaces.
• Do not store the disk in extremely hot or cold conditions.
• Do not put layers of labels on the floppy disk.
• Keep the disk away from condensation or water droplets.
■
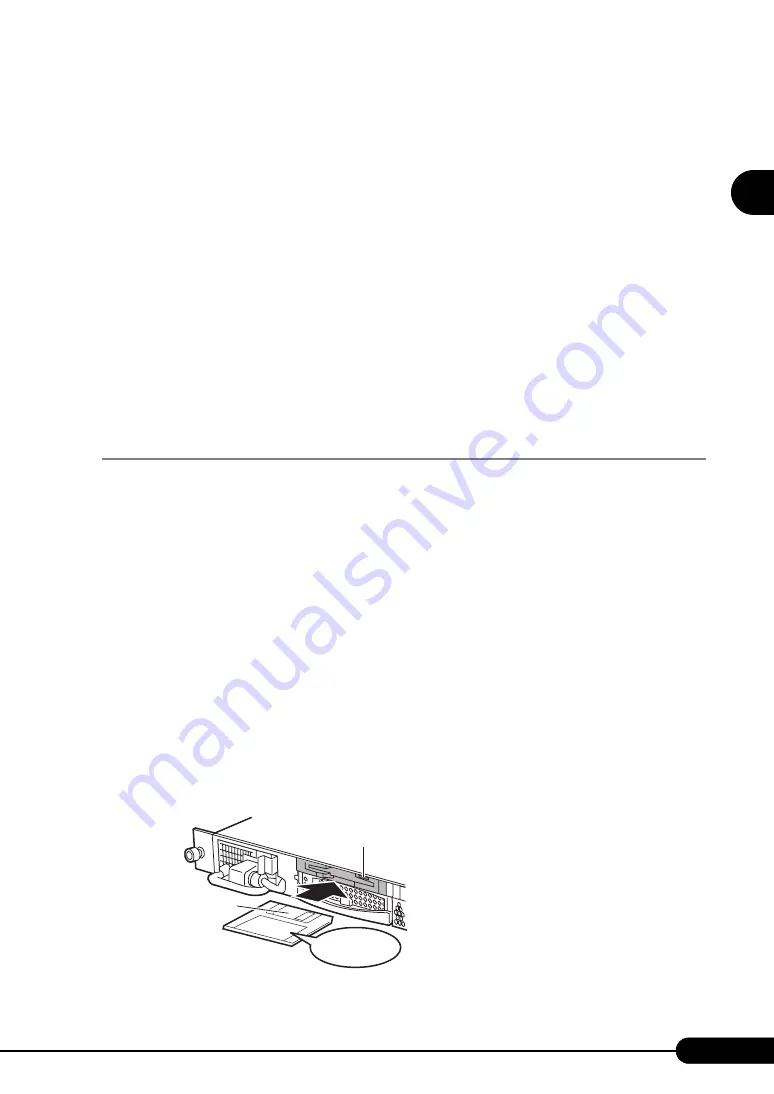
Inserting the Floppy Disk
1
Insert the floppy disk into the floppy disk drive from the shutter side.
When clicking into place, the floppy disk eject button pops out.
Label side up
Floppy disk
eject button
Shutter
Summary of Contents for PRIMERGY RX200 S2
Page 6: ...6 ...
Page 38: ...38 Chapter 1 Overview ...
Page 52: ...52 Chapter 2 Checking before OS Installation ...
Page 108: ...108 Chapter 3 OS Installation Using ServerStart ...
Page 126: ...126 Chapter 4 Manual OS Installation ...
Page 158: ...158 Chapter 5 Operations after OS Installation ...
Page 204: ...204 Chapter 7 Installing Internal Options ...
Page 246: ...246 Chapter 8 Hardware Configuration Utilities ...
Page 302: ...302 D Recycling ...


