Thr
ee
U s i n g Y o u r L i f e B o o k E S e r i e s
L i f e B o o k E S e r i e s f r o m F u j i t s u
35
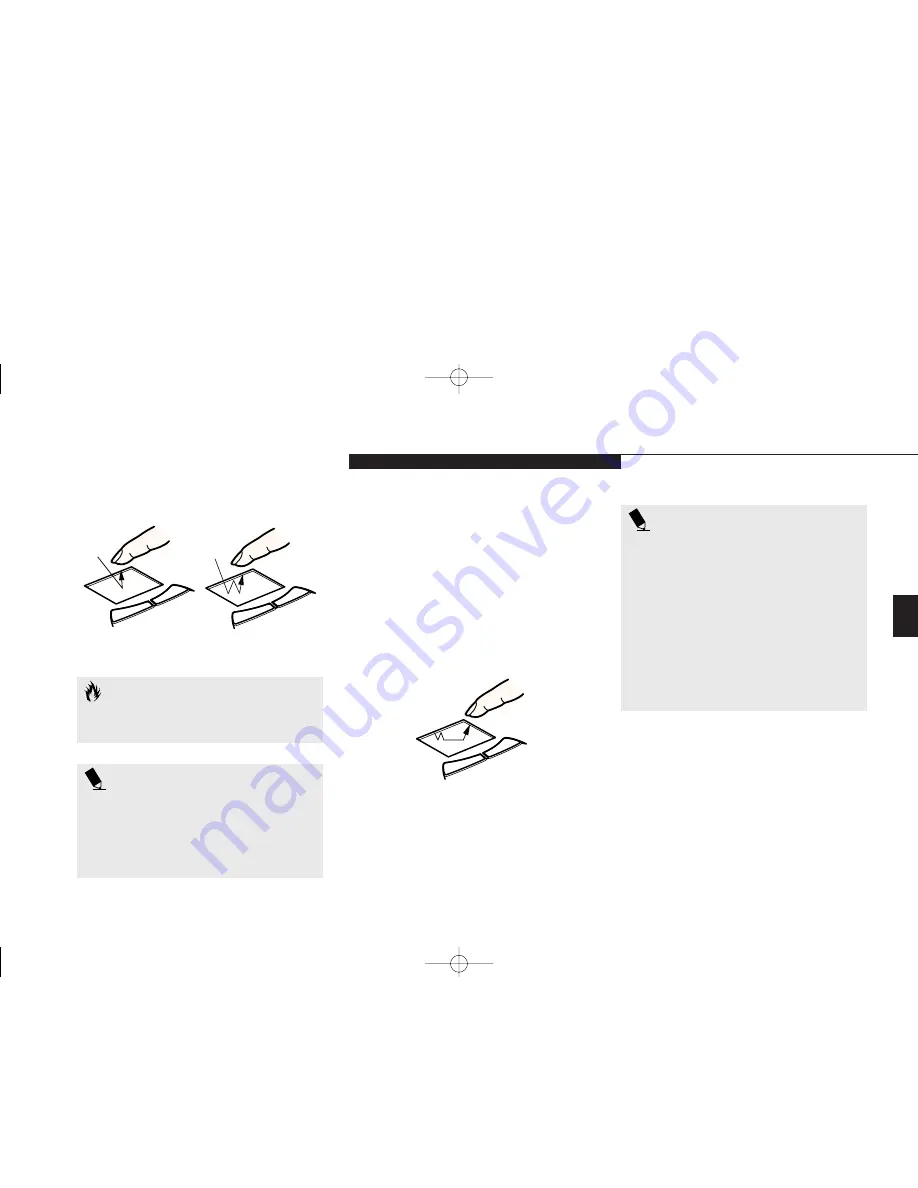
Figure 3-7 Clicking
Left-Click
Left Double-Click
Figure 3-8 Dragging
C A U T I O N
If the interval between clicks is too long,
the double-click will not be executed.
P O I N T
The interval between clicks for double
clicking, and other parameters of pointing
and selecting, can be adjusted with the
selections in the dialog box of the mouse
icon in your Windows Control panel.
Dragging
Dragging means selecting an item with the
pointing cursor, and while keeping the left
pointing device button depressed, moving the
cursor to the desired new location, then releas-
ing the button.
(Figure 3-8.)
Dragging can also
be done on the TouchPad – two light taps end-
ing with your fingernail on the pad and then
moving, or holding the left button down and
moving your fingernail on the pad.
Integrated Pointing Device
Control Adjustment
The Windows Control Panel provides customiz-
ation of your pointing device from the mouse
icon. There are four (4) aspects of pointing
device operation which you can adjust.
■
Buttons – This lets you set up the buttons for
right or left handed operation and set the
time interval for double clicking.
P O I N T
For your convenience, we have included
the Alps GlidePoint mouse driver for your
integrated Touchpad device on our
Recovery CD. Locate your Recovery CD
in the accessories box. Insert the
Recovery CD into your system while the
operating system is active and through
My Computer or Windows Explorer,
locate the directory D:\Drivers\Touchpad.
Follow the directions in the readme file in
this direcotry to install the optional driver.
F Three Using.qxd 10/28/98 10:14 AM Page 35
Summary of Contents for Lifebook E330
Page 6: ...Black White of Cover to come A Copyright qxd 10 28 98 9 50 AM Page 7 ...
Page 7: ...T a b l e o f C o n t e n t s B TOC qxd 10 28 98 9 52 AM Page i ...
Page 10: ...T a b l e o f C o n t e n t s iv B TOC qxd 10 28 98 9 52 AM Page iv ...
Page 11: ...LifeBook E Series from Fujitsu P r e f a c e C Preface qxd 10 28 98 10 00 AM Page v ...
Page 14: ...P r e f a c e viii C Preface qxd 10 28 98 10 00 AM Page viii ...
Page 26: ...S e c t i o n O n e 12 D One SettingUp qxd 10 28 98 10 04 AM Page 12 ...
Page 40: ...S e c t i o n T w o 26 E Two Starting qxd 10 28 98 10 08 AM Page 26 ...
Page 80: ...S e c t i o n T h r e e 66 F Three Using qxd 10 28 98 10 15 AM Page 66 ...
Page 140: ...S e c t i o n F o u r 126 G Four Configuring qxd 10 28 98 10 21 AM Page 126 ...
Page 194: ...S e c t i o n S e v e n 180 J Seven Care_Maintain qxd 10 28 98 10 35 AM Page 180 ...
Page 208: ...A p p e n d i c e s 194 K Appendicies_Glossary qxd 10 28 98 10 39 AM Page 194 ...
Page 209: ...I n d e x L Index_E qxd 10 28 98 10 41 AM Page 195 ...
Page 218: ...I n d e x 204 L Index_E qxd 10 28 98 10 41 AM Page 204 ...


