Scanning
217
8
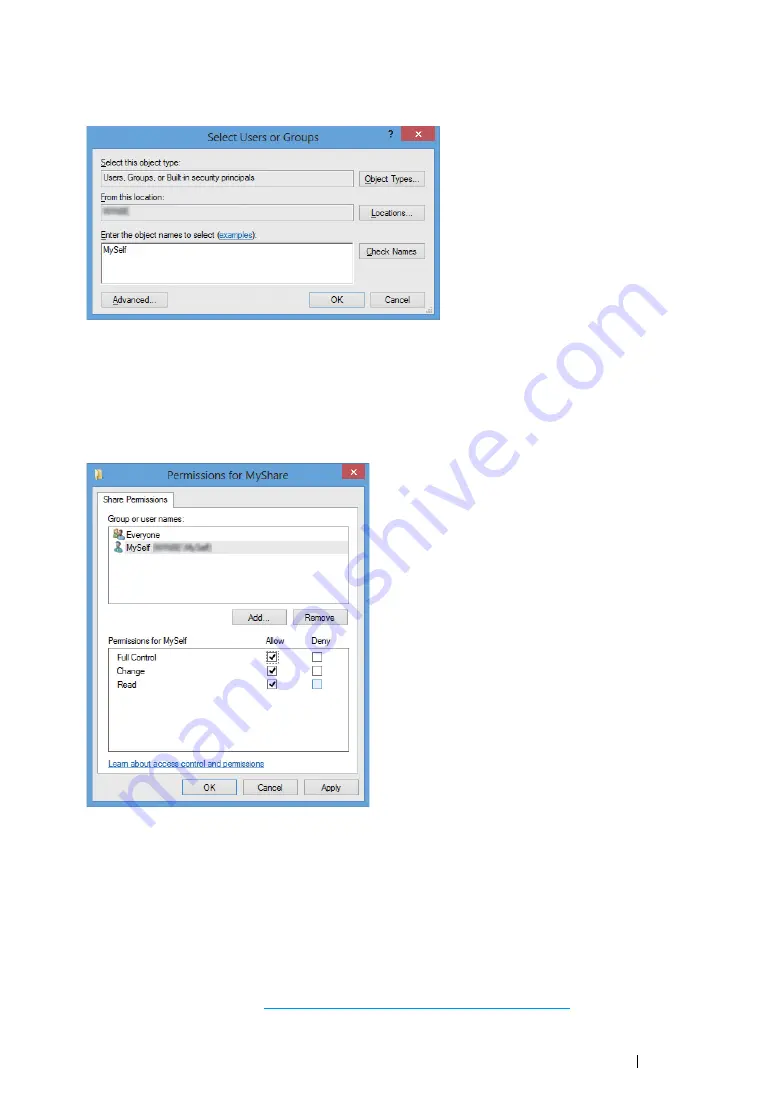
Search user login name by clicking
Advanced
, or enter the user login name in the
Enter the
object names to select
box and click
Check Names
to confirm (Example of user login name:
MySelf
).
9
Click
OK
.
10
Click the user login name that you have just entered. Select the
Full Control
check box. This will
grant you permission to send the document into this folder.
NOTE:
•
Do not use
Everyone
as the user login name.
11
Click
OK
.
12
Click
OK
to exit the
Advanced Sharing
dialog box.
13
Click
Close
.
NOTE:
•
To add sub-folders, create new folders in the shared folder you have created.
Example: Folder name:
MyShare
, Second-level folder name:
MyPic
, Third-level folder name:
John
You should now see
MyShare\MyPic\John
in your directory.
After you created a folder, go to
"Configuring the Printer Settings" on page 219
.
Summary of Contents for DocuPrint CM215 b
Page 1: ...1 DocuPrint CM215 Series User Guide ...
Page 4: ...4 Preface ...
Page 32: ...32 Product Features ...
Page 42: ...42 Specifications ...
Page 66: ...66 Printer Management Software ...
Page 126: ...126 Printer Connection and Software Installation ...
Page 168: ...168 Printing Basics ...
Page 192: ...192 Copying ...
Page 272: ...272 Faxing DocuPrint CM215 f CM215 fw Only ...
Page 330: ...330 Troubleshooting 4 Lower the levers to their original position 5 Close the rear cover ...
Page 333: ...Troubleshooting 333 7 Lower the levers to their original position 8 Close the rear cover ...
Page 380: ...380 Troubleshooting ...
Page 406: ...406 Maintenance ...
Page 410: ...410 Contacting Fuji Xerox ...
Page 415: ...Index 415 Y Your Fax Number 268 286 ...
Page 416: ...416 Index ...
Page 417: ......


