background image

2 Product Overview

42

P

ro

d

u

c

t O
ver

view

2

4

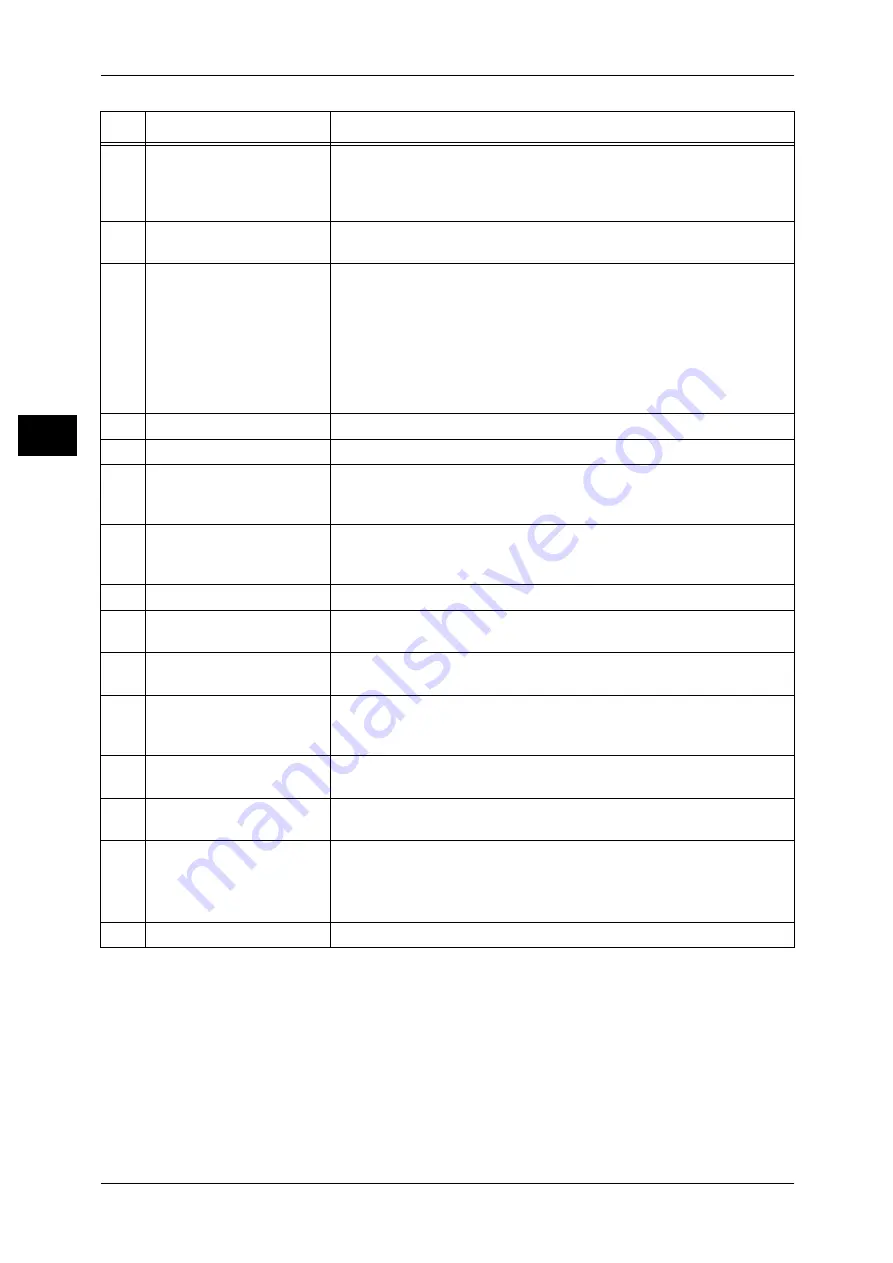
<Power Saver> button

If the machine is not operated for a certain specified period of time, the 
machine's power consumption is lowered to enter the power saver 
mode. In the power saver mode, this button lights up. To cancel the 
power saver mode, press this button again.

5

<Clear All> button

Returns the statuses of all displayed services to their default values. 
The machine will be reset to this state after it is turned on.

6

<Interrupt> button/indicator

Press this button to temporarily stop a continuous copy job or printing to 
give another job higher priority. During an interrupt, the interrupt 
indicator lights up. Pressing the <Interrupt> button again cancels the 
interrupt and the previous operation is resumed.
In this manual, this button is indicated as the <Interrupt> button.

Some jobs cannot be executed during the interruption. For detail information, 
refer to "15 Appendix" > "Notes and Restrictions" > "Notes and Restrictions in 
the Interrupt Mode" in the Administrator Guide.

7

<Stop> button

Press this button to stop the current copy job or communications.

8

<Start> button

Press this button to start copying or scanning.

9

Numeric keypad

Press these buttons to enter the number of copies, passwords and other 
numerical values.
In this manual, these buttons are indicated as the “numeric keypad”.

10

<C (Clear)> button

Press this button if you have entered the wrong numerical value with the 
numeric keypad.
In this manual, this button is indicated as the <C> button.

11

<Dial Pause> button

Used to insert a pause into a destination number.

12

<Log In/Out> button

Press this button to display the user ID input screen for System 
Administration mode or Login Setup/Auditron Administration.

13

<Machine Status> button

Press this button to confirm the machine status and meters, check the 
state of consumables, and print reports.

14

<Review> button

Press this button to open the [Review] screen. In this screen, you can 
check a list of the status of copy and scan features whose settings have 
changed from the defaults.

15

<Job Status> button

Press this button to confirm or cancel currently executing or completed 
jobs, or to confirm or print saved documents.

16

Brightness dial

Adjusts the brightness of the touch screen. Use this dial to enhance or 
decrease the contrast.

17

<Job in Memory> indicator

Lights when data is stored in the machine's memory.

You can check stored documents in [Stored Documents List]. For information 
on [Stored Documents List], refer to "4 Job Status" > "Printing and Deleting 
Stored Documents" in the Administrator Guide.

18

<Online> indicator

Lights when the machine is sending or receiving data to or from a client.

No.

Component

Function

Summary of Contents for DocuCentre-II 6000

Page 1: ......

Page 2: ...orporation and Fuji Xerox Co Ltd All Xerox and Fuji Xerox product names are either registered trademarks or trademarks of Xerox Corporation and Fuji Xerox Co Ltd The data saved in the hard disk of the...

Page 3: ...9 Regulatory Information for RFID 19 Environment 20 Legal Notice 21 2 Product Overview 23 Machine Components 24 Power On Off 30 Powering On 30 Powering Off 30 Circuit Breaker 31 Power Saver Mode 32 Ch...

Page 4: ...ment 71 Mixed Sized Originals Scanning Different Size Documents Simultaneously 72 Edge Erase Erasing Edges and Margin Shadows of the Document 73 Image Shift Shifting the Image Copy Position 73 Image R...

Page 5: ...a 111 Operations during Scanning 112 Stopping the Scan Job 112 Changing the Scan Settings 113 E mail 114 Address Book 114 Keyboard 116 Add Me 117 Recipient s 117 From 118 Subject 119 Message 119 Scan...

Page 6: ...p 1 Opening the Send from Mailbox Screen 140 Step 2 Selecting a Mailbox 140 Step 3 Checking Selecting Mailbox Documents 140 Step 4 Operating Mailbox Documents 141 Selecting a Mailbox 142 Checking Sele...

Page 7: ...ple Recipients 182 Specifying a Destination Using the Address Book 182 Specifying a Destination Using the Keyboard Screen 183 Removing Confirming Specified Recipient 183 General Settings 185 Lighten D...

Page 8: ......

Page 9: ...describes how to use this guide as well as safety notes and legal notice you need to read before using the machine z Preface 8 z Types of Manuals 9 z Using This Guide 10 z Safety Notes 12 z Regulatio...

Page 10: ...ing your network environment refer to the Administrator Guide For information about optional accessories for the printer functionality also refer to the guide provided with each optional accessory In...

Page 11: ...olving problems that may occur with the machine Quick Reference Guide Introduces the basic operations of the machine as well as daily management and maintenance Manual HTML A guide for installing prin...

Page 12: ...to work with mailboxes 6 Stored Programming Describes the stored programming feature 7 Computer Operations Describes operations performed from a computer such as printing documents importing scanned d...

Page 13: ...tly Mailbox Indicates a path to a certain item within a procedure on a computer Example When you see a procedure to search for files and folders select Start Search For Files or Folders this means tha...

Page 14: ...for more information Used for item that if not followed strictly can lead death or severe or fatal injuries and the possibility to do it is comparatively high Used for items that if not followed stric...

Page 15: ...It may cause electric shock Do not place an object on the power cord Always keep the plug connection free of dust The dusty and damp environment may bring about minute electric current in a connector...

Page 16: ...ause electric shock or a fire accident Never locate this product in the following places z Near radiators or any other heat sources z Near volatile flammable materials such as curtains z In the hot hu...

Page 17: ...e and condition always use it in the following environment z Temperature 10 32 C zHumidity 15 85 When the product is left in a chilly room and the room is rapidly warmed up by heater dew condensation...

Page 18: ...s z Metal parts such as staples or clips z Heavy objects If liquid is spilled over or metal parts are slipped into the product it may cause electric shock or a fire accident Do not use conductive pape...

Page 19: ...oller Otherwise it may cause injuries or burns Switch off the product promptly and contact your local Fuji Xerox representative Never touch the paper output area of the finisher during operation It ma...

Page 20: ...uji Xerox representative for its disposal Keep the toner cartridges out of the reach of children If a child accidentally swallows toner spit it out rinse mouth with water drink water and consult a phy...

Page 21: ...l interference to radio or television reception which can be determined by turning this product off and on the user is encouraged to try to correct the interference by one or more of the following mea...

Page 22: ...6000 Toner Black that is recommended for this product z For environmental protection and efficient use of resources Fuji Xerox reuses returned toner cartridges to make recycle parts recycle materials...

Page 23: ...tems that may be illegal to copy or print in your country z Currency z Banknotes and checks z Bank and government bonds and securities z Passports and identification cards z Copyright material or trad...

Page 24: ......

Page 25: ...such as the names of components how to switch on and off how to use the touch screen and how to set the power saver feature z Machine Components 24 z Power On Off 30 z Circuit Breaker 31 z Power Save...

Page 26: ...ol Panel P 36 4 Power switch Switches the power of the machine on off 5 Front cover Open this cover to access the insides of the machine to clear paper jams or replace consumables 6 Tray 1 2 3 4 Accom...

Page 27: ...opened Open this cover widely to clear paper jams 15 Top cover Open this cover to access the insides of the machine to clear paper jams 16 Confirmation indicator This indicator lights to confirm that...

Page 28: ...n a current leakage is detected 23 Waste toner bottle cover Open this cover to access the insides of the machine to replace the waste toner bottle 24 Waste toner bottle Used to collect waste toner 25...

Page 29: ...the insides of the machine to clear paper jams 4 Finisher tray Stapled or punched documents are delivered 5 Staple cartridge Contains staples Pull out the cartridge to clear staple jams or replace st...

Page 30: ...ies 5 Circuit breaker This breaker automatically turns the machine off when a current leakage is detected 6 Booklet output tray 1 Receives copies when you select Bi Fold or Bi Fold Stapling 7 Booklet...

Page 31: ...s the scraps from the puncher Open throw away the scraps 13 Tri Fold output tray 2 Receives copies when you select Tri Fold In or Tri Fold out 14 Tri Fold output tray button 2 Press this button to ope...

Page 32: ...used during warming up While warming up the machine is not ready to copy documents even if it displays the initial screen on the control panel Powering Off The procedure for turning the power off is...

Page 33: ...he breaker will automatically cut off the power circuit to prevent any leakage or fire from occurring The circuit breaker is normally pressed to the upper side as shown in the figure on the right If t...

Page 34: ...er Saver feature is cancelled Sleep Mode In this mode the power is lowered more than in the Low Power mode The touch screen goes out and the Power Saver button on the control panel lights To use the m...

Page 35: ...Low Power Mode after the last operation Note The default for From Last Selection to Low Power Mode is 1 minute The Low Power Mode cannot be disabled From Last Selection to Sleep Mode Set the time to m...

Page 36: ...wing describes how to exit the Power Saver mode The Power Saver mode is exited in the following instances z Pressing the Power Saver button z Receiving data z Selecting Apply in CentreWare Internet Se...

Page 37: ...3 Connect the other end of the USB interface cable to a computer 4 Switch on the machine 5 Restart the computer For details of setting items refer to 8 Printer Environment Settings Installing When Us...

Page 38: ...ting or completed jobs or to confirm or print saved documents 6 Review button Press this button to open the Review screen In this screen you can check a list of the status of copy and scan features wh...

Page 39: ...n to stop the current copy job or communications 14 Start button Press this button to start copying or scanning 15 Numeric keypad Press these buttons to enter the number of copies passwords and other...

Page 40: ...he Initial Screen Set the screen to be displayed after turning the machine on or canceling the Power Saver mode This section describes how to set the Send from Mailbox screen as the initial screen as...

Page 41: ...d Programming z Language z Setup Menu z Print Mode The following is the procedure to change the Language button displayed at the upper right corner of the first page of the All Services screen to the...

Page 42: ...atures displayed on the All Services screen and Language Attach the labels included in this product when you have changed the assignment If you have used a feature for which no label is provided use a...

Page 43: ...Copy Custom 2 Custom 3 buttons Used to call their associated features To the buttons you can assign Language or any features displayed on the All Services screen For information on assigning features...

Page 44: ...rds and other numerical values In this manual these buttons are indicated as the numeric keypad 10 C Clear button Press this button if you have entered the wrong numerical value with the numeric keypa...

Page 45: ...Attributes under Customize Paper Supply Screen in the System Settings the specified size detection method is displayed Options for Standard Size of Tray 5 Bypass 12 paper sizes are preset Image Qualit...

Page 46: ...Printed Separator 2 Sided Copies on the both sides when inserting separators You can insert separators for the first document set Covers The machine does not copy on a cover when using the Build Job f...

Page 47: ...ure changed location Changes Document List screen List and Thumbnail are added z List Lists the documents stored in the mailbox with their stored dates and pages z Thumbnail Displays the images and na...

Page 48: ...Enabled for Paper Color under Customize Paper Supply Screen Paper Tray Attributes on Setup Menu The button name displayed on the Setup Menu screen is Paper Tray Attributes Tray 5 Bypass Paper Size Def...

Page 49: ...ion Bottom Center z Stamp Position Bottom Right Date Position The name is changed from Data Position on Side 2 Advanced settings are available z Date Position Top Left z Date Position Top Center z Dat...

Page 50: ...Infrastructure Settings SSL TLS Settings Device Certificate Server Device Certificate Client and Remote Server Certificate Validation are added Use the numeric keypad or keyboard displayed on the scr...

Page 51: ...mize the screen layouts for the following features listed on the All Services screen z Copy z E mail z Scan to Mailbox z Scan to PC For information on how to change the settings refer to 6 System Sett...

Page 52: ...racters numerals letters and symbols Item Description Entering letters and numerals If you select Shift capital letters appear To return to lowercase select Shift again Entering symbols Select Symbol...

Page 53: ...scribes the basic copy procedures and the copy features provided by the machine z Copying Procedure 52 z Operations during Copying 57 z Copy 60 z Image Quality 67 z Layout Adjustment 69 z Output Forma...

Page 54: ...documents input the size in the Original Size screen For information on entering document sizes refer to Original Size Specifying the Scan Size for the Document P 71 Note The standard document sizes t...

Page 55: ...y detects standard size documents For non standard size documents input the size in the Original Size screen For information on entering document sizes refer to Original Size Specifying the Scan Size...

Page 56: ...ayed may vary depending on the model you are using To use the Login Setup feature or Auditron Administration feature a user ID and passcode may be required Ask your system administrator for the user I...

Page 57: ...hold down the document while it is being conveyed Copies cannot be made if a copy protection code is detected Note If a problem occurs an error message appears in the touch screen Solve the problem i...

Page 58: ...rtain period of time the machine automatically assumes that there are no more documents 3 Load the next document 4 Press the Start button If you have more documents repeat Steps 3 and 4 5 When all doc...

Page 59: ...or the Stop button on the control panel 2 Select Cancel Note If two or more jobs are in progress a confirmation screen appears for each job Select Start or Cancel depending on whether you want to sta...

Page 60: ...ad The new quantity must include the number of copies that have already been printed When reducing the quantity you cannot enter a number less than the number of copies that have already been printed...

Page 61: ...c keypad 4 Press the Start button 5 After you have finished making the interrupt copy press the Interrupt button Note The interrupt indicator goes out to indicate that the interrupt is cancelled Remov...

Page 62: ...g the and buttons 100 Copies are made at the same size as the original document Auto The copy ratio is automatically set based upon the document and paper sizes specified in Paper Supply and the docum...

Page 63: ...s added Important If you select Copy All when you do not want to erase the edges of the document set the amount of edge erase to 0 mm Note that if the amount is set to 0 mm the edges of the copied doc...

Page 64: ...y size length value in the Original Size and Copy Size of Y length and select Next Note To change the copy ratios you have entered select Next move the mark and enter the new values X width Y length T...

Page 65: ...propriate paper Trays 1 2 3 4 6 and 7 Select a tray from 6 trays Note The fixed paper sizes are set for Tray 3 and Tray 4 To change the paper size for Tray 3 and Tray 4 contact our Customer Support Ce...

Page 66: ...ng of the Layout Adjustment screen are the same 1 Select any item 1 J 1 Sided Makes a copy of a 1 sided document on one side of the paper 1 J 2 Sided Makes a copy of a 1 sided document on both sides o...

Page 67: ...the same orientation z Head to Toe Select this item when the first and second sides of the document are of the opposite orientation This item appears when 2 J 2 Sided or 2 J 1 Sided is selected Copies...

Page 68: ...n Shadows of the Document P 73 Lighten Darken Adjusting the Copy Density You can adjust the copy density to one of 7 levels The copy density becomes darker when you move to the left and lighter when y...

Page 69: ...ype that matches the document 1 Select Original Type 2 Select the original type Text Select to make sharp copies of text Sharp copies of graphs illustrations etc are also made in this mode Photo Text...

Page 70: ...ect from five sharpness levels between Soften and Sharpen The nearer the level is to Sharpen the sharper the contours of images The nearer the level is to Soften the softer the contours of images Back...

Page 71: ...ation Specifying the Orientation of Loaded Documents 76 1 On the All Services screen select Copy 2 Select the Layout Adjustment tab and then select a feature on the Layout Adjustment screen Book Copyi...

Page 72: ...g Erase Erases the shadow from the center section of the document You can set the binding erase width within the range from 0 to 50 mm in 1 mm increments 2 Sided Book Copy Making 2 Sided Copies of Fac...

Page 73: ...hen Left Page then Right or Right Page then Left is selected z Top Page Bottom Page You can select these items when Top Page then Bottom is selected End Page Select the copy end page from the followin...

Page 74: ...of the document Mixed Sized Originals Scanning Different Size Documents Simultaneously When using the document feeder you can simultaneously scan different size documents and make copies onto paper t...

Page 75: ...cessary amount z Top Bottom Erase Shadows at the top and bottom of the document are erased Edges at the top and bottom are erased in accordance with the direction that the document was loaded You can...

Page 76: ...ch the positioning of Side 1 Image Shift Side 1 Screen You can set the image shift of Side 1 1 Select any item No Shift The position of the document image is not shifted Auto Center The center of the...

Page 77: ...1 mm increments Image Rotation Making Copies with the Image Rotated Vertically or Horizontally If the orientation of the paper currently loaded in the tray differs from that of the document loaded th...

Page 78: ...mixed orientations the image will be rotated so that the top edge of a landscape document is aligned with the right edge of a portrait document Invert Image Making Reversed Copies of Images Copies ca...

Page 79: ...Images Select this item when placing the top of the document facing the inner side of the document glass or document feeder Sideway Images Select this item when placing the top of the document facing...

Page 80: ...96 Preset Repeat Image Making Multiple Copies on a Single Sheet 97 Output Orientation Specifying Face Up or Down 97 ID Card Copying Copying Both Sides of an ID Card 98 1 On the All Services screen se...

Page 81: ...creen P 79 Hole Punching Displays the Finishing Hole Punching screen Refer to Finishing Hole Punching Screen P 80 Z Fold The machine folds the output copies in Z fold Z fold can be applied to B4 A3 11...

Page 82: ...document and the Original Orientation setting of the Layout Adjustment screen are the same 1 Sets the position for punching No Punching No punch position is selected Punch Position C Finisher C Finis...

Page 83: ...n contact our Customer Support Center Binding Shift Displays the Booklet Creation Binding Shift screen Refer to Booklet Creation Binding Shift Screen P 82 Covers Displays the Booklet Creation Covers s...

Page 84: ...ody Tray and Covers Tray Select trays with paper of the same size and orientation for the copy paper and the cover When Bypass is selected the Tray 5 Bypass screen appears Refer to Tray 5 Bypass Scree...

Page 85: ...about 6 000 pages if the document size is A4 Xerox standard document This figure could be used only as a guide since the maximum number of the document pages depend of the types sizes and direction of...

Page 86: ...d When loading transparencies make sure that the paper for the separators or for distribution is loaded at the same orientation as that of the transparencies Important Use V516 Xerox film no border tr...

Page 87: ...other than Auto Paper for the paper tray of Paper Supply on the Copy screen 1 Select Multiple Up 2 Select any item 1 Page Up Multiple Up is not applied 2 Pages Up Two document sheets are copied togeth...

Page 88: ...peatedly for a specified number of times When the copy ratio is set to Auto the repeated copies of the image are reduced to fit on the selected paper You can also specify how the repeated copies of th...

Page 89: ...the tab paper in the Tray 5 Bypass load the paper with the side to be copied facing up and with the edge opposite to the tab to be fed first 1 Select Tab Margin Shift 2 Select any item Note If using i...

Page 90: ...e can scan the document already scanned cannot be printed In this case cancel the job following the message displayed The number of the document pages that can be scanned is 999 pages per job For mult...

Page 91: ...text refer to 6 System Settings Copy Mode Settings Annotation Create Stamps in the Administrator Guide Position Displays the Stamp Position screen You can select from 9 positions for the stamp Print...

Page 92: ...a prefix string and the number of page number digits Style Displays the Page Number Style screen Refer to Page Number Style Screen P 91 Print On Displays the Page Number Print On screen Refer to Page...

Page 93: ...99 Page1 Page2 Page3 Page is added in front of the page number Example Page1 Page2 Page Number Print On Screen You can specify the page s to add a page number 1 Select any item All Pages A page number...

Page 94: ...documents for distribution at conferences you can use sequential numbering to associate distribution copies to people Important When you set this feature the machine will not print jobs if the total n...

Page 95: ...ct On 2 Select any text Off No text is printed On Text is printed You can select the text for stamp You can specify text from 3 preset text or the text set in the System Administration mode For inform...

Page 96: ...serial number of the machine is printed 1 Select On Off The serial number is not printed On The serial number is printed Watermark Text Effect Screen You can set the text effect If you set a text effe...

Page 97: ...ditions For more information contact our Customer Support Center Note that we assume no responsibility for a damage caused by using or being not able to use the Secure Watermark feature By using the S...

Page 98: ...elect any item Off Does not print hidden text On Prints hidden text You can select any text from the three preset text or from text registered in the System Settings For information on how to register...

Page 99: ...ct Preset Repeat Image 2 Select any item 1 Page Up Preset Repeat Image is not applied 2 Pages Up Two copies of the document image are made on a single sheet of paper 4 Pages Up Four copies of the docu...

Page 100: ...opying Both Sides of an ID Card This feature allows you to copy both sides of a small undetectable original such as an ID card onto one side of paper Important Use the document glass when copying The...

Page 101: ...hange and save settings individually for each document page or stack and then to finally make copies of documents with different settings as one job Note To copy on the tab paper when using Covers Tab...

Page 102: ...Separators Screen P 100 Change Settings The Copy screen appears and you can change the settings for the loaded document After setting the features press the Start button on the control panel to start...

Page 103: ...after copying the first set and then copy the second set Sample Set Checking the Finished Output of the Copy When making multiple sets of copies you can print a sample set to check the finished output...

Page 104: ...glass and have the machine process the pages as one job Next Original that is usually displayed while scanning documents with the document feeder is always selected in this mode In addition when usin...

Page 105: ...s of the subsequent pages Note If the machine is set to detect Secure Watermark this feature may not be used depending on the type of a form image For details contact our Customer Support Center For d...

Page 106: ...d the Y axis is set as the direction of length You can specify a value within the range of 0 to 432 mm for the width X and the length Y in 1 mm increments Note Specify the 2 coordinates from the top r...

Page 107: ...6 System Settings Network Settings in the Administrator Guide Important The scan features are not available for some models An optional package is necessary For more information contact our Customer S...

Page 108: ...ard size documents input the size in the Original Size screen For information on entering document sizes refer to Original Size Specifying an Original Size P 132 Note The standard document sizes that...

Page 109: ...matically detects standard size documents For non standard size documents input the size in the Original Size screen For information on entering document sizes refer to Original Size Specifying an Ori...

Page 110: ...in advance For information on how to create a mailbox refer to 6 System Settings Setup Menu Mailbox in the Administrator Guide Scan to PC Scans a document and sends the scanned data to a network compu...

Page 111: ...ortant If the document has been set in the document feeder do not hold down the document while it is being conveyed Scanning cannot be performed if a copy protection code is detected Note If a problem...

Page 112: ...e no more documents When using the document feeder load the next document after the machine has finished scanning the first document You can change the scan settings of the next document by selecting...

Page 113: ...ation Uses a network scan driver Refer to Importing to a TWAIN Compatible Application P 167 Import using Mailbox Viewer2 Uses Mailbox Viewer2 Fuji Xerox application software Refer to Importing Using M...

Page 114: ...control panel 2 Select Cancel Note If two or more jobs are in progress a confirmation screen appears for each job Select Start or Cancel depending on whether you want to start or cancel the job If th...

Page 115: ...ge Settings 3 Set Scan Resolution Original Size 2 Sided Originals Lighten Darken and Original Type For each setting refer to Scan Resolution Specifying a Scanning Resolution P 131 Original Size Specif...

Page 116: ...All Services screen 2 On the E mail screen specify a recipient using the Address Book or the keyboard Important Recipients cannot be specified by Address Numbers using the numeric keypad One Touch but...

Page 117: ...Selected 1 Select a recipient from the local address list Note Select to return to the previous screen or to move to the next screen Go to Enter a recipient number using the numeric keypad to display...

Page 118: ...rtment A department name is used for the keyword search z Change Settings Select a custom item and select this button Then the keyword entry screen appears Up to 60 characters are allowed Enter Change...

Page 119: ...s address to CC BCC Adds the sender s address to BCC Recipient s Allows you to confirm delete or change recipients using the pop up menu displayed 1 Select the recipient to be deleted confirmed or ch...

Page 120: ...e mail address registered in user information is automatically set as a sender s address For more information on user information refer to 6 System Settings Login Setup Auditron Administration Create...

Page 121: ...a user defined subject 1 Select Subject 2 Enter a subject of up to 128 characters using the displayed keyboard For information on how to enter characters refer to Entering Text P 50 Message Enter the...

Page 122: ...e mailbox the passcode entry screen may appear Enter the passcode and select Confirm If you have forgotten the passcode set the mailbox passcode in the System Administration mode again Mailbox Select...

Page 123: ...essary For more information contact our Customer Support Center Transfer Protocol 121 Address Book 121 Browse 122 Specifying a Destination 122 1 Select Scan to PC from the All Services screen 2 Specif...

Page 124: ...ify a save destination by tracing the hierarchy 1 Select Browse 2 Select the destination in which data is to be stored You can move to another level by pressing Previous or Next Important You can spec...

Page 125: ...er Protocol Enter Host Name Shared Name Directory Name Up to 260 characters are allowed User Name Enter the user name of the computer you are forwarding to When a user name is not required for the des...

Page 126: ...t a feature on the General Settings screen Lighten Darken Adjusting the Scan Density You can select the scan density from seven levels Moving to the upper position makes the scan density lower and mov...

Page 127: ...f the document Load the document in the Head to Left orientation when File Format is set to TIFF When viewing the scanned document on a computer the document is displayed in the Head to Top orientatio...

Page 128: ...o a single file in TIFF format TIFF Saves each page into a different file in TIFF format PDF Saves scanned data in PDF format DocuWorks Saves scanned data in DocuWorks format Note To browse or print D...

Page 129: ...128 bit RC4 Encrypts by the 128 bit RC4 method Files encrypted by this method can be opened with Adobe Acrobat 5 0 or later z 128 bit AES Encrypts by the 128 bit AES method Files encrypted by this met...

Page 130: ...ears Configure whether to allow to copy the file contents such as text and images File Format DocuWorks Security Screen Allows you to encrypt a Docuworks file with a password and assign the access pri...

Page 131: ...the password is required The access privileges set in Restricted Operations are assigned You can enter a password up to 32 characters Full Access Password The DocuWorks Security Full Access Password s...

Page 132: ...ess 1 Select Image Options 2 Select and and adjust any item Lighten Darken You can select from among 7 density levels between Lighten and Darken The scan density increases the nearer the level is to D...

Page 133: ...a feature on the Layout Adjustment screen Scan Resolution Specifying a Scanning Resolution You can set the resolution for the documents to be scanned As the value increases the scan becomes more detai...

Page 134: ...ect this item when Left Page then Right or Right Page then Left is selected Top Page Only Scans the top page only in page order You can select this item when Top Page then Bottom is selected Bottom Pa...

Page 135: ...ously scan different size documents with the respective sizes You can also specify a size to scan different size documents with the same size Important Always load the A5 size documents in portrait or...

Page 136: ...bottom left and right and center of the document 4 Select Original Orientation Normal The edge erase amount is set to 2 mm for the top and bottom and left and right If you do not want to erase edges...

Page 137: ...elect the ratio or specify the ratio Proportional Select a ratio from the preset ratios or specify a value within the range from 25 to 400 in 1 increments To specify a value touch the window displayin...

Page 138: ...l feature This feature is not available unless recipients support the MDN feature Note When multiple mails are sent using Split Send then read receipts is requested for each mail Read receipts are ret...

Page 139: ...rmat xdw To set the file name 1 Select File Name 2 Enter a name of up to 128 characters using the displayed keyboard For information on how to enter characters refer to Entering Text P 50 Note When sa...

Page 140: ...ny item Cancel Job The job is cancelled and the file is not saved Change Name and Save The file name is automatically changed and saved The machine adds a number 0001 9999 to the end of the file name...

Page 141: ...feature is not available for some models An optional package is necessary For more information contact our Customer Support Center z Mailbox Operating Procedure 140 z Selecting a Mailbox 142 z Checkin...

Page 142: ...the All Services button 2 Open the next screen and select Send from Mailbox Step 2 Selecting a Mailbox Selectable mailboxes depend on the settings on the user authentication feature For information on...

Page 143: ...nd from Mailbox 5 Step 4 Operating Mailbox Documents The following shows the reference sections for operations available on the Send from Mailbox screen Printing Deleting Documents in the Mailbox 144...

Page 144: ...w Sheets and Mailboxes Types of Mailboxes in the Administrator Guide 1 Select a mailbox Note Select to return to the previous screen and select to move to the next screen An arrow is displayed next to...

Page 145: ...cument icon indicating the order in which it was selected Documents are processed in this order 3 Select any item Refresh Displays the refreshed information Document s Displays the number of documents...

Page 146: ...a print driver is printed the settings specified on the control panel or CentreWare Internet Services will override the settings specified on the print driver except the Multiple Up Skip Blank Pages...

Page 147: ...els An optional package is necessary For more information contact our Customer Support Center The following table shows the stapled punched positions with the example of 1 Staple for stapling and 2 Ho...

Page 148: ...tation setting of Edge Erase or the 2 Sided Originals setting of Layout Adjustment tab are the same Reset Resets the print settings Print Prints the selected document Original Original Orientation Sta...

Page 149: ...rs are authenticated are displayed on the Job Flow Sheets screen Features that can be registered are listed below Print Documents in a mailbox can be printed 1 On the Document List screen select docum...

Page 150: ...te Displays the Create Job Flow Sheet screen Refer to 6 System Settings Setup Menu Job Flow Sheets Create Job Flow Sheet in the Administrator Guide Edit Delete Displays the Details screen For details...

Page 151: ...button Note Select to return to the previous screen or to move to the next screen You can sort the list in ascending or descending order by pressing either Name or Updated At the left of the name an i...

Page 152: ...n the System Settings Searches job flow sheet that fully corresponds with the keyword for registered keywords when job flow sheet is created Job Flow Restrictions Job flows can be assigned to a specif...

Page 153: ...This chapter describes the Stored Programming features for recording procedures provided by the machine z Stored Programming Overview 152 z Registering Deleting Renaming Stored Programs 153 z Calling...

Page 154: ...the screen Stored Programming stores feature settings and a series of operations This enables you to record the hierarchy of displayed screens for each step For example Stored Programming can be used...

Page 155: ...e and the Watermark value is changed If any registered feature becomes disabled due to its value change under System Settings If the stored program has an operation for a mailbox and the mailbox passc...

Page 156: ...Note Once a job is stored to a button it cannot be overwritten Select to return to the previous screen or to move to the next screen 3 Set the feature you want to register Note Press the Interrupt but...

Page 157: ...to register or change a name Note Select to return to the previous screen or to move to the next screen 3 Enter a name and select Save Assigning Changing Icons for Stored Programs The following is th...

Page 158: ...the All Services button 2 Display the next screen and select Stored Programming 3 Select the number of a stored program containing the features you want to use Note You can only select registered num...

Page 159: ...your computer Note Some models do not support the features described in this chapter An optional package is necessary For more information contact our Customer Support Center The computer screen image...

Page 160: ...o Printing P 164 Note Some features are not available unless you perform optional component settings in the Printer tab The unavailable features are grayed out Multiple Up Prints multiple pages onto o...

Page 161: ...For information on how to print refer to Printing Deleting Documents in the Mailbox P 144 E mail Printing When the E mail feature is available allows you to send e mail with the TIFF PDF or JPEG JFIF...

Page 162: ...twork Scanner Utility2 allows you to import scan documents stored on the device s mailbox onto a network computer There are two types of Network Scanner Utility2 Note Use the included CD ROM of the Dr...

Page 163: ...formation appearing in the right and upper left frames changes depending on the feature Selecting a feature displays its available features and information in these frames Left Center Frame Displays t...

Page 164: ...using this service ensure the following settings on your browser The following is the setting procedure for Internet Explorer 6 0 SP1 1 Select Internet Options from the Tools menu 2 In the General tab...

Page 165: ...to access CentreWare Internet Services Starting CentreWare Internet Services To use this service perform the following procedure on your computer 1 Start up the computer and a web browser 2 Enter the...

Page 166: ...For details refer to the documentation provided with the application To learn about print features click Help on the print driver screen to see the print driver s online help 1 Select Print from the F...

Page 167: ...e using Outlook Express as an example 1 Use your e mail software to create an e mail body and then attach a document to the e mail if necessary Important Only plain text is permitted for the e mail bo...

Page 168: ...F direct print when Print Processing Mode of the PDF direct print is set to PDF Bridge Default values of the logical printer configured by Logical Printer Number of PostScript in Emulation Settings of...

Page 169: ...online help 1 Launch application software to which documents are imported Important The application must support TWAIN TWAIN is a standard for scanners and other input devices Note For information on...

Page 170: ...that is scanned in pages and whose forwarding operation has not been completed For most applications except DocuWorks Network Scan Driver expands the compressed data and transfers the data to the appl...

Page 171: ...ify the directory instead of above 2 From the displayed list click the scanner name of the machine and click Select Scanner Note If no items are shown in the list click Refresh The application searche...

Page 172: ...box click Help to see the Mailbox Viewer2 online help Changing the display of scanner names You can change the display of scanner names listed To change the display of scanner names click Change Displ...

Page 173: ...name For example if the host name is myhost and the domain name is example com then the Internet address is myhost example com Ask your system administrator for the IP address or Internet address Whe...

Page 174: ...ch as EasyOperator The documents in a mailbox can be listed displayed with thumbnails The WebDAV protocol uses an HTTP port If HTTP communication is encrypted WebDAV communication for importing scanne...

Page 175: ...e Important The Server Fax features are not available for some models An optional package is necessary For more information contact our Customer Support Center z About Server Fax 174 z Fax Procedure 1...

Page 176: ...d set the network environment refer to the Administrator Guide and the manual on the Driver CD Kit CD ROM Important While the Fax Server feature is enabled the Fax feature is detected as not installed...

Page 177: ...ndard size documents input the size in the Original Size screen For information on entering document sizes refer to Original Size Specifying the Scan Size for the Original P 188 Note The standard docu...

Page 178: ...ly detects standard size documents For non standard size documents input the size in the Original Size screen For information on entering document sizes refer to Original Size Specifying the Scan Size...

Page 179: ...erver feature is enabled Note Features displayed may vary depending on the model you are using To use the Login Setup feature or Auditron Administration feature a user ID and passcode may be required...

Page 180: ...using the address book refer to Specifying a Destination Using the Address Book P 182 Step 4 Starting the Fax Job 1 Press the Start button Important If the document has been set in the document feeder...

Page 181: ...uments You can change the scan settings of the next document by selecting Change Settings displayed after selecting Next Original 3 Load the next document 4 Press the Start button If you have more doc...

Page 182: ...on on the control panel 2 Select Cancel Note If two or more jobs are in progress a confirmation screen appears for each job Select Start or Cancel depending on whether you want to start or cancel the...

Page 183: ...ver Fax 8 4 Select the job to cancel and then select Cancel Changing the Scan Settings You can change the scan settings while scanning the document 1 Select Next Original 2 Select Change Settings 3 Se...

Page 184: ...t one time is 50 1 Select the first recipient 2 Select Next Recipient Note Depending on the settings the screen to re enter the recipient may be displayed after specifying the recipient and selecting...

Page 185: ...fied when address numbers are registered Click the A C DEF GHI JKL M O P R S U V X YZ or 0 9 button to specify index characters on the screen that appears Specifying a Destination Using the Keyboard S...

Page 186: ...ient to be removed or confirmed from Address Recipient 2 Select any item from the pop up menu Remove Removes the recipient Details The Recipient Details screen is displayed You can confirm recipients...

Page 187: ...just the fax density from seven levels 1 Use and to select the density level 2 Sided Originals Transmitting 2 sided Originals This feature enables you to scan and then transmit both sides of a documen...

Page 188: ...item when transmitting a document that contains only text Photo Text Select this item when transmitting a document that contains both text and photos The machine automatically distinguishes the text...

Page 189: ...1 Select the resolution Standard Select this item when transmitting standard documents Approx 200 x 100 pels 25 4 mm Fine Select this item when transmitting documents with small text or detailed imag...

Page 190: ...Auto Size Detect button can be changed in the System Administration mode For information on how to change the default values refer to 6 System Settings Scan Fax Mode Settings in the Administrator Gui...

Page 191: ...her with A3 documents loaded in landscape orientation or A4 documents loaded in portrait orientation load B5 documents in portrait orientation The recommended document size combinations are A4 portrai...

Page 192: ...ans the left page only You can select this item when Left Page then Right or Right Page then Left is selected Right Page Only Scans the right page only You can select this item when Left Page then Rig...

Page 193: ...specify a value touch the window displaying a value and then use the numeric keypad or the and buttons Auto In Output Size select the output size of the scanned document The machine automatically calc...

Page 194: ...rned on Note You can specify a time within 24 hours in 1 minute increments You cannot specify a date You can set Delayed Start separately for each address number For information on how to register add...

Page 195: ...9 Glossary This chapter contains a list of terms used in this guide z Glossary 194...

Page 196: ...ter binding area of documents Book Scanning A feature that copies the left and right pages of an unfolded document onto two separate sheets of paper Collate A feature that delivers each copy set in th...

Page 197: ...eaker after dialing and until you are connected Local Device This term refers to this machine This is a general term for terminals such as personal computers Low Toner Alert Tone A tone the device sou...

Page 198: ...ed ROM Read Only Memory It is a storage device memory specific for the retrieval of information ROS Raster Output Scanner It is a device for writing image signals to a drum light sensitive A ROS is of...

Page 199: ...copies on transparency films or inserts a sheet of blank or copied paper between transparency films UNC UNC Universal Naming Convention is a way to specify a path describing the location of a network...

Page 200: ......

Page 201: ...cover 24 brightness dial 42 Broadcast Send 182 Build Job 99 C C Clear button 37 42 Calculator 62 calling stored programs 156 CentreWare Internet Services 160 171 Change Recipient Settings 118 Chapter...

Page 202: ...130 Image Quality 67 130 Image Rotation 75 Image Shift 73 134 Independent X Y 61 inserting blank sheets between transparencies 84 interposer 28 Interrupt button 37 42 Interrupt indicator 37 42 J Job...

Page 203: ...Poster 85 158 Power Saver button 36 42 Power Saver mode 32 power switch 24 36 Preset Repeat Image 97 Print 164 print driver 158 Print from Mailbox 159 printing control number on the background 92 Pri...

Page 204: ...the orientation of the loaded documents 76 specifying the scan ratio for the original 190 specifying the scan size for the document 71 specifying the scan size for the original 188 specifying the sca...

Page 205: ...DocuCentre II 7000 6000 User Guide DE3676E2 1 Edition 1 June 2007 Fuji Xerox Co Ltd Copyright 2007 by Fuji Xerox Co Ltd...

Page 206: ......

Reviews: