Service-Manual_artista_630_640_english_V4.01_032069_50_04.doc
68
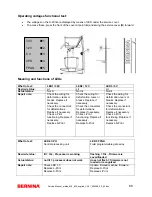
Operating voltages functional test:
•
The voltages on the S-Print are displayed by means of LED under the service cover.
•
To access these, press the front of the cover at point (
A
) and swing the service cover (
B
) forward.
Meaning and functions of LEDs
What to test:
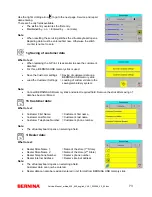
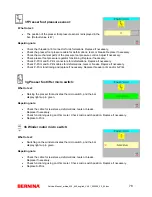
LED1 / 30V
LED2 / 12V
LED3 / 5V
Desired status:
Lit Lit Lit
Actual status:
Not lit
Not lit
Not lit
Repair note:
Check the wiring for
deformation, tears or
breaks. Replace if
necessary.
Check the connectors
for deformations.
Replace if necessary.
Check L-Print
functioning. Replace if
necessary.
Replace S-Print
Check the wiring for
deformation, tears or
breaks. Replace if
necessary.
Check the connectors
for deformations.
Replace if necessary.
Check L-Print
functioning. Replace if
necessary.
Replace S-Print
Check the wiring for
deformation, tears or
breaks. Replace if
necessary.
Check the connectors
for deformations.
Replace if necessary.
Check L-Print
functioning. Replace if
necessary.
Replace S-Print
What to test:
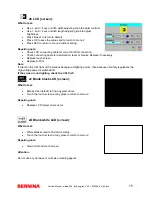
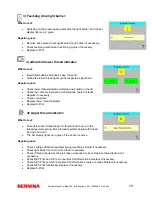
LED 4 CPU
Central processing unit
LED 5 FPGA
Field programmable gate array
Desired status:
lit = O.k., Processor is working
flashing = O.k., Firmware is
saved/loaded
Actual status:
not lit = processor does not work
does not flash = firmware is not
loaded or recognized
Repair note:
Check LED 1-3
Replace L-Print
Replace S-Print
Update. Reload machine firmware.
Replace S-Print
Replace L-Print
30 V
z
1
12 V
z
2
5 V
z
3
CPU
z
4
FPAG
z
5


