3.
Inspect water evacuation components.
3.1
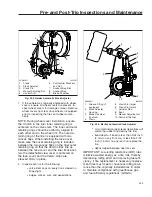
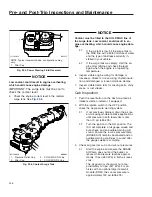
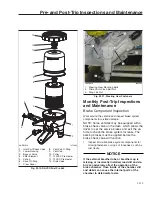
Inspect the vacuator valve(s) installed on
the hood interior and air cleaner. Make
sure the lips of each valve are undam-
aged and pliable, free of debris, and re-
main closed during inspection. See
3.2
Inspect the rain tray installed at the base
of the windshield. Ensure that the seal on
the forward edge of the rain tray is in
good condition.
3.3
Inspect the drain hoses installed on the
rain tray. Both hoses should be securely
attached to the rain tray and direct water
down the aft side of the front fenders.
4.
If the vehicle is equipped with an Allison auto-
matic transmission, check the automatic trans-
mission fluid level.
5.
Check for water in the fuel/water separator, if
equipped.
IMPORTANT: When draining fluid from a
fuel/water separator, drain the fluid into an
appropriate container and dispose of it prop-
erly. Many jurisdictions now issue fines for
draining fuel/water separators onto the
ground.
5.1
Place a suitable container under the fuel/
water separator.
NOTE: A hose may be used to direct water
into the container. Use a hose with a ½-inch
pipe thread on DAVCO models.
5.2
If the engine is equipped with a built-in
water separator, loosen the drain valve,
and allow the water to run out. Close the
drain valve, taking care not to overtighten
it.
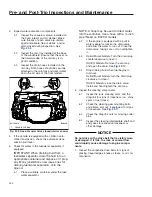
5.3
Detroit/Racor Models
: Turn the drain plug
counterclockwise to open it.
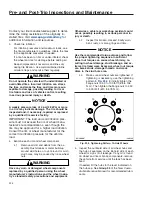
DAVCO Models
: Remove the vent cap
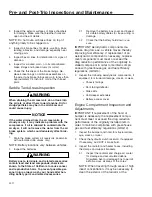
and open the drain. See
5.4
Stop draining fluid when fuel begins to
drain out.
Detroit/Racor Models
: turn the drain plug
clockwise to close it.
DAVCO Models
: close the drain valve.
Install and hand-tighten the vent cap.
6.
Inspect the steering components.
6.1
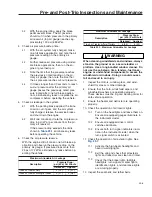
Inspect tie rods, steering arms, and the
drag link for signs of looseness (i.e., shiny
spots or rust tracks).
6.2
Check the steering gear mounting bolts
and pitman arm nut, if equipped, for signs
of looseness. See
6.3
Check the drag link nuts for missing cotter
pins.
6.4
Inspect the steering intermediate shaft and
end yokes for excessive looseness or
other damage.
NOTICE
Do not drive with a drive belt that is visibly worn
or damaged. If it fails, the lack of coolant flow
could rapidly cause damage to engine compo-
nents.
7.
Inspect the serpentine drive belts for signs of
glazing, frayed edges, breaks, cracks, or oil con-
tamination.
03/14/2016
f880940
1
1
1.
Vacuator Valves
Fig. 23.9, Hood Vacuator Valves (hood interior shown)
Pre- and Post-Trip Inspections and Maintenance
23.9
Summary of Contents for NEW CASCADIA 2016
Page 1: ... NEW CASCADIA Driver s Manual Part Number STI 500 Publication Number STI 500 8 ...
Page 5: ......
Page 11: ......
Page 38: ...f611444 10 31 2016 Fig 3 23 Sample Alert Messages Instruments 3 20 ...
Page 39: ......
Page 93: ......
Page 94: ...8 Cab and Sleeper Features Windows 8 1 Mirrors 8 1 Cab Amenities 8 1 Sleeper Amenities 8 2 ...
Page 99: ......
Page 125: ......
Page 134: ...14 Steering System Power Steering System 14 1 ...
Page 145: ......
Page 146: ...16 Manual Transmissions and Clutch Eaton Fuller Manual Transmissions 16 1 Clutch 16 1 ...
Page 149: ......
Page 150: ...17 Drive Axles Interaxle Lock Tandem Axles 17 1 Driver Controlled Differential Lock DCDL 17 2 ...
Page 164: ...19 Trailer Couplings Holland Trailer Coupling 19 1 ...
Page 177: ......
Page 191: ......
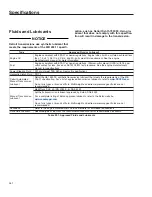
Page 198: ...25 Specifications Fluids and Lubricants 25 1 ...

