background image

20

HOW TO USE A CUSTOM PROGRAM

1. Press any button or begin pedaling to activate

the console.

See HOW TO ACTIVATE THE CONSOLE on page

12.

2. Select a custom program.

To select a custom program, first press the

Custom/Heart Rate button repeatedly until the

name of the desired custom program appears in

the main display.

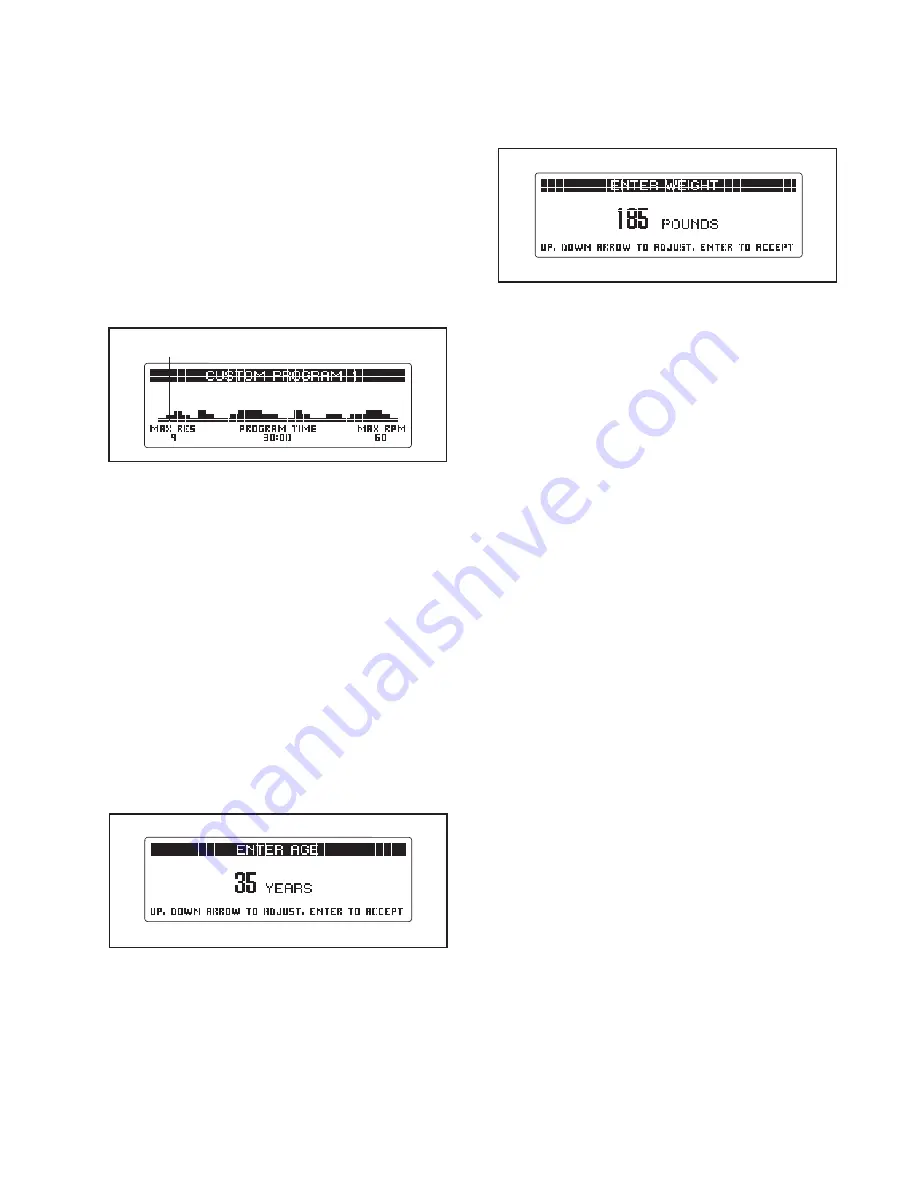
A profile of the resistance settings of the program,

the maximum resistance level, the program time,

and the maximum rpm setting for the program will

also appear in the display.

Then, press the Enter button to confirm your selec-

tion.

Note: If only a level row of indicators appears

in the program profile, see HOW TO CREATE A

CUSTOM PROGRAM on page 19.

3. Enter your age.

A moment after you select a custom program, the

words ENTER AGE and an age setting will flash in

the main display.

To enter your age, press the increase and

decrease buttons beside the Enter button. Then,

press the Enter button.

4. Enter your weight.

Next, the words ENTER WEIGHT and a weight

setting will appear in the main display.

To enter your weight (1 kilogram = 2.2 pounds),

press the increase and decrease buttons beside

the Enter button. Then, press the Enter button.

5. Start the program.

Press the Start button or begin pedaling to start the

program.

Each custom program is divided into 30 one-

minute segments. One resistance setting and one

target rpm (pace) is programmed for each seg-

ment. Note: The same resistance setting and/or

target rpm may be programmed for consecutive

segments.

During the program, the program profile will show

your progress (see the drawing to the left).

The flashing segment of the profile represents the

current segment of the workout. The height of the

flashing segment indicates the resistance level for

the current segment.

When the first segment of the workout ends, the

target rpm and the resistance level for the second

segment will appear in the display for a few sec-

onds to alert you. The next segment of the profile

will begin to flash, and the pedals will automatically

adjust to the resistance level for the next segment.

Profile

Summary of Contents for upright bike c7.7

Page 1: ...rence www freemotionfitness com Model No VFMEX2107 0 Serial No Write the serial number in the space above for reference QUESTIONS If you have questions or if parts are damaged or missing PLEASE CONTAC...

Page 2: ...THE CONSOLE 10 MAINTENANCE AND TROUBLESHOOTING 27 EXERCISE GUIDELINES 28 PART LIST 29 EXPLODED DRAWING 30 HOW TO CONTACT CUSTOMER CARE Back Cover LIMITED WARRANTY Back Cover This drawing shows the lo...

Page 3: ...and properly tighten all parts regu larly Replace any worn parts immediately 7 Keep children under age 12 and pets away from your exercise bike at all times 8 Your exercise bike should not be used by...

Page 4: ...ection of fea tures designed to make your workouts at home more effective and enjoyable For your benefit read this manual carefully before you use the exercise bike If you have questions after reading...

Page 5: ...materials until assembly is completed In addition to the included tool s assembly requires a Phillips screwdriver an adjustable wrench and a rubber mallet As you assemble the exercise bike use the dra...

Page 6: ...Rear Stabilizer with four 3 8 x 3 4 Button Screws 46 and four M10 Flat Washers 45 Tighten two Leveling Feet 18 into the under side of the Rear Stabilizer 14 45 46 46 45 17 14 18 2 48 48 1 2 Attach the...

Page 7: ...e frame wires A Slide the Upright 3 onto the Frame 1 Attach the Upright with four M8 x 20mm Flat Head Screws 41 Then slide the Upright Screw Cover 47 down ward to the bottom of the Upright 3 4 5 5 Whi...

Page 8: ...TV console a CATV cable must be connected to the exercise bike for cable TV stations to be viewed Locate the cable jack on the front of the exercise bike Connect the CATV cable to the cable jack A sa...

Page 9: ...to the level position CAUTION To reduce the risk of injury use extreme caution while moving the exercise bike Do not attempt to move the exercise bike over uneven surfaces HOW TO ADJUST THE SEAT For...

Page 10: ...tures of the Basic console see page 11 To learn about the features of the Workout TV console see the user s manual included with the Workout TV console To upgrade your console and expand the capabilit...

Page 11: ...ur workouts A watts program that changes the resistance of the pedals to keep your power output near a target level during your workout A cool down mode that will help you recover from your workout wh...

Page 12: ...exposed to cold temperatures allow it to warm to room temperature before turning on the console If you do not do this the console displays or other electronic components may become damaged HOW TO TUR...

Page 13: ...ain display This display offers several dis play modes The display mode that you select will determine which workout information is shown Press the Display button repeatedly to select the desired disp...

Page 14: ...ng against the metal contacts Avoid moving your hands or gripping the con tacts tightly When you hold the handgrip pulse sensor a small heart symbol will appear in the display Then when your pulse is...

Page 15: ...ht Next the words ENTER WEIGHT and a weight setting will appear in the main display To enter your weight 1 kilogram 2 2 pounds press the increase and decrease buttons beside the Enter button Then pres...

Page 16: ...the manual programs is resistance level 3 The program will continue in this way until the last segment of the profile flashes To stop the program at any time stop pedaling or press the Pause button To...

Page 17: ...the Enter button 4 Enter your weight Next the words ENTER WEIGHT and a weight setting will appear in the main display To enter your weight 1 kilogram 2 2 pounds press the increase and decrease button...

Page 18: ...segment of the workout ends the pedals will automatically adjust to the resistance level for the next seg ment The program will continue in this way until the last segment of the profile flashes To s...

Page 19: ...m workout is divided into 30 one minute segments You can program one resistance level and one target rpm pace setting for each seg ment To program a resistance level for the first segment simply adjus...

Page 20: ...weight Next the words ENTER WEIGHT and a weight setting will appear in the main display To enter your weight 1 kilogram 2 2 pounds press the increase and decrease buttons beside the Enter button Then...

Page 21: ...utomatically adjust to the resistance level for the next seg ment The program will continue in this way until the last segment of the profile flashes To stop the program at any time stop pedaling or p...

Page 22: ...190 Therefore if you are 30 years old a target heart rate setting of 50 is equal to 95 beats per minute 50 of 190 is 95 To enter a maximum heart rate setting press the increase and decrease buttons b...

Page 23: ...ct the constant watts program To select the constant watts program first press the Custom Heart Rate button repeatedly until the name of the custom watts program appears in the main display 3 Enter yo...

Page 24: ...nce level will appear in the display for a few seconds to alert you The program will continue in this way until the last segment of the profile flashes To stop the program at any time stop pedaling or...

Page 25: ...idle mode When the console is in the idle mode the displays will be reset to zeros and a screen saver will appear in the main display The pause timeout can occur from 1 minute to 5 minutes after the...

Page 26: ...Fit card Remove the iFit card when you are finished exer cising Store the iFit card in a secure place HOW TO USE THE SOUND SYSTEM To play music or audio books through the console sound system while yo...

Page 27: ...te when you hold the handgrip pulse sensor or if the displayed heart rate appears to be too high or too low see step 5 on page 14 HOW TO LEVEL THE EXERCISE BIKE If the exercise bike rocks slightly on...

Page 28: ...r goal is to strengthen your cardiovascular system you must perform aerobic exer cise which is activity that requires large amounts of oxygen for prolonged periods of time For aerobic exercise adjust...

Page 29: ...8 x 3 4 Button Screw 47 1 Upright Screw Cover 48 3 1 4 x 3 4 Socket Screw 49 1 Tray Insert 50 1 Tray Bracket 51 6 Keyhole Standoff 52 1 Crank Jam Nut 53 2 Hand Grip 54 2 Console Plug 55 1 Seat Post Li...

Page 30: ...23 27 28 29 30 32 33 33 36 51 52 56 57 58 59 61 65 65 65 68 69 31 31 21 21 20 46 46 45 45 45 26 26 26 17 68 68 24 39 25 25 25 26 5 9 62 71 71 48 48 51 51 70 70 24 70 24 64 30 66 70 70 55 70 72 73 26...

Page 31: ...31 3 6 11 11 12 34 35 37 37 37 37 38 38 38 38 47 49 50 43 43 43 43 42 41 41 40 40 44 53 63 67 4 60 54 54 53 EXPLODED DRAWING B Model No VFMEX2107 0 R0610A...

Page 32: ...ct 1 This warranty applies only to the original owner and is non transferable 2 The labor warranty applies only to products sold in the US and Canada Contact your authorized FreeMotion Fitness dealer...

Reviews: