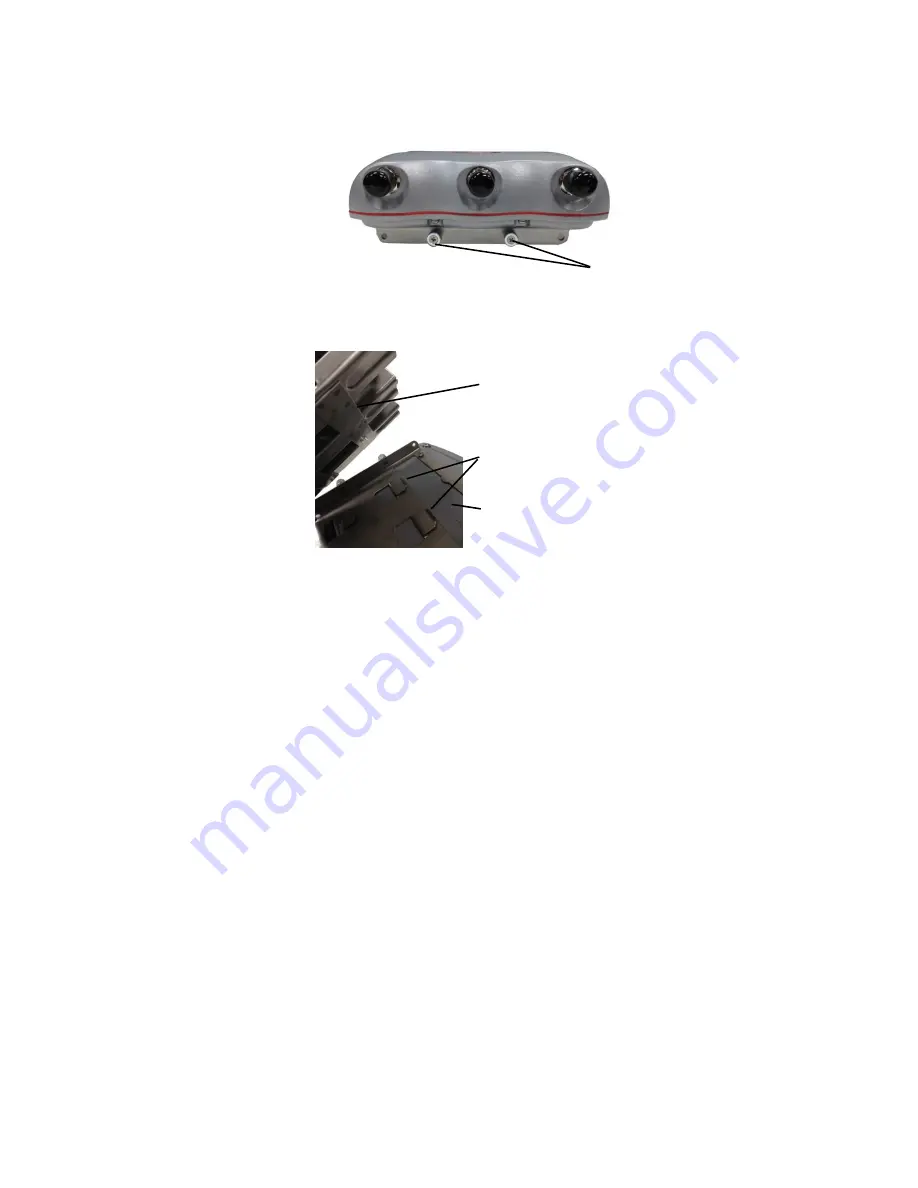
Outdoor node installation
20
Captive screws
2.
Remove the outer piece from the hooks on the node.
Rail
Hooks
Chassis
3.
Put the HotPort 5020 in a safe place while you attach the bracket to a pole or
wall.
4.
Attach the mount bracket to a pole or wall.
The next procedures list the steps to attach the bracket and node to different
surfaces.
Attaching the node to a wall
Required materials:
•
Mount bracket
•
Four screws (included in the mount kit) or masonry anchors (not included in
the mount kit)
•
node with one bracket piece with hooks
To attach a node to a wall:
1.
Use four screws or masonry anchors to attach the mount bracket securely to
the wall. Put the screws or anchors in the two holes near the top and the two
holes at the bottom of the bracket.
2.
Hang the node hooks on the rail.
The installation is correct if the node does not easily move from side to side, and
the connectors are oriented to the ground.
Note:
You can add other straps or a sling to increase durability of the attachment
to the wall.
Summary of Contents for HotPort 5020
Page 1: ...HotPort FiretideInstallationGuide HotPort 5020 Edge Nodes Published March 2014 Revised 2016...
Page 2: ......
Page 8: ......
Page 12: ...HotPort 5020 edge nodes 4...
Page 21: ...Beforeyoupermanentlyinstall 13...
Page 41: ...Troubleshooting 33...


