Exit
E3.16 Rear
screen
Replacing the rear screen
Protect all painted bodywork parts and the cabin to prevent damage when using cutting equipment and
when installing the new windscreen.
The rear screen is supplied as a spare part complete with perimeter seal, which must not be detached from the
glass.
Remove the engine compartment cosmetic shields (
E3.13
).
Remove the engine compartment lid (
E3.01
).
Remove the roof trim panels (
E4.04
).
Remove the rear screen cross member.
Remove the passenger compartment trim panels (
E4.04
).
Remove the lower and lateral rear screen trim panels.
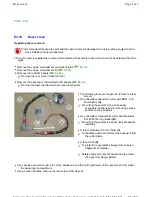
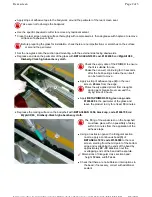
The following tools are required to remove the rear
screen:
One (Excalibur pneumatic cutter with ESM - 519
short blade)
(A)
.
For cutting the sealant in the more easily
accessible locations and for removing excess
sealant on the bodyshell.
One (Excalibur 6 pneumatic cutter with Equaliser
Pat. 4955124 long blade)
(B)
.
For cutting the sealant in deeper, less accessible
locations.
A thin metal plate (0.5 mm thick)
(C)
.
To facilitate cutting and protect the bodywork from
the cutter blade.
A face mask
(D)
.
To protect the operator's airways from airborne
fragments of material.
Safety eyewear is also recommended to protect
the eyes from flying splinters.
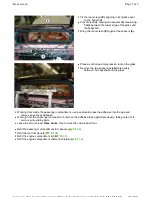
Use specific pneumatic cutters to cut the sealant around the entire perimeter of the rear screen from inside
the passenger compartment.
Using suction handles, remove the rear screen from its seat.
Page 1 of 3
Rear screen
8/5/2011
https://modiscs.ferrari.it/KnowledgeOnline/index.php?action=mo&link=link::SM_SM_E31...
Summary of Contents for 458 Italia
Page 1: ......
Page 24: ...1 7 Car Bench vehicle bench Copyright 2010 ...
Page 25: ...1 7 Car Bench vehicle bench Copyright 2010 ...
Page 26: ...1 7 Car Bench vehicle bench Copyright 2010 ...
Page 27: ...1 7 Car Bench vehicle bench Copyright 2010 ...
Page 28: ...1 7 Car Bench vehicle bench Copyright 2010 ...
Page 29: ...1 7 Car Bench vehicle bench Copyright 2010 ...
Page 30: ...1 7 Car Bench vehicle bench Copyright 2010 ...
Page 31: ...1 7 Car Bench vehicle bench Copyright 2010 ...
Page 522: ...Hook 95977564 AS 107564 for lifting the gearbox Page 5 of 5 Specific tooling and equipment ...
Page 586: ...In preparation Page 6 of 6 Engine overhaul Disassembly ...
Page 620: ...Perform the Fuel tank tightness test cycle Page 4 of 4 Fuel level sensor ...
Page 967: ...Refit the wheels D2 01 Page 10 of 10 Stabiliser bars Tie rods ...
Page 1127: ...Refit the wheels D2 01 Page 8 of 8 Wheelhouse ...
Page 1167: ...Prise out and remove the plug 4 Undo the nut 5 Undo the nut 6 Page 32 of 37 Doors ...
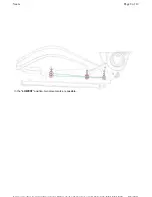
Page 1242: ...In the LOWEST position two movements are possible Page 8 of 12 Seats ...
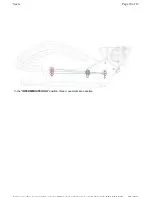
Page 1243: ...In the INTERMEDIATE LOW position three movements are possible Page 9 of 12 Seats ...
Page 1244: ...In the INTERMEDIATE HIGH position three movements are possible Page 10 of 12 Seats ...
Page 1549: ...Reconnect the battery F2 01 Page 5 of 5 Starter motor ...
Page 1721: ...Charge the air conditioning system F5 12 Page 5 of 5 Condenser ...
Page 1740: ...Refit Page 13 of 13 A C unit ...
Page 1764: ...FD0001 Fuel supply distribution 0 99999 Page 10 of 56 PDF ...
Page 1765: ...FD0001 Fuel supply distribution 0 99999 Page 11 of 56 PDF ...
Page 1773: ...FD0001 Fuel supply distribution 0 99999 Page 19 of 56 PDF ...
Page 1774: ...FD0001 Fuel supply distribution 0 99999 Page 20 of 56 PDF ...
Page 1781: ...FD0001 Fuel supply distribution 0 99999 Page 27 of 56 PDF ...
Page 1782: ...FD0001 Fuel supply distribution 0 99999 Page 28 of 56 PDF ...
Page 1789: ...FD0001 Fuel supply distribution 0 99999 Page 35 of 56 PDF ...
Page 1790: ...FD0001 Fuel supply distribution 0 99999 Page 36 of 56 PDF ...
Page 1797: ...FD0001 Fuel supply distribution 0 99999 Page 43 of 56 PDF ...
Page 1798: ...FD0001 Fuel supply distribution 0 99999 Page 44 of 56 PDF ...
Page 1803: ...FD0001 Fuel supply distribution 0 99999 Page 49 of 56 PDF ...
Page 1804: ...FD0001 Fuel supply distribution 0 99999 Page 50 of 56 PDF ...
Page 1809: ...FD0001 Fuel supply distribution 0 99999 Page 55 of 56 PDF ...


