Operation
2. Move the motion control levers out to the neutral
lock position.
3. Engage the parking brake.
4. Place the throttle midway between the “SLOW”
and “FAST” positions.
5. Disengage the PTO.
6. Allow the engine to run for a minimum of 15
seconds, then turn the ignition switch to the
“OFF” position to stop the engine.
7. Remove the key to prevent children or other
unauthorized persons from starting engine.
8. Close the fuel shut-off valve when the machine
will not be in use for a few days, when
transporting, or when the unit is parked inside
a building.
Driving the Machine
CAUTION
Machine can spin very rapidly by positioning one
lever too much ahead of the other. Operator may
lose control of the machine, which may cause
damage to the machine or injury.
•
Use caution when making turns.
•
Slow the machine down before making sharp
turns.
Important:
To begin movement (forward or
backward) the operator must be in the seat, the
brake lever must be disengaged (pushed down)
before the motion control levers can be moved in
or the engine will stop.
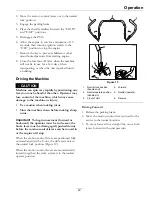
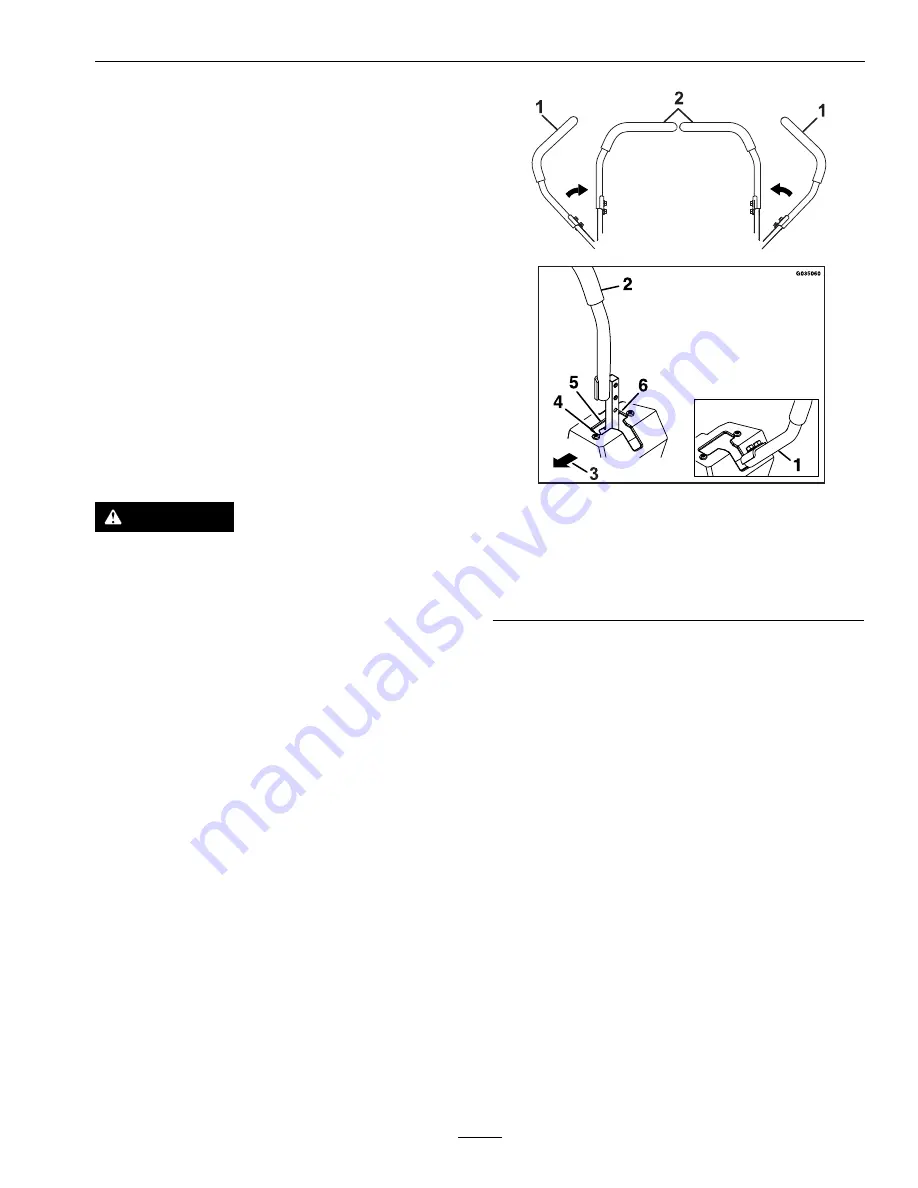
When the motion control levers are positioned fully
outward (apart) in the T-slot, the drive system is in
the neutral lock position (Figure 12).
When the motion control levers are moved directly
inward (together) the drive system is in the neutral
operate position.
Figure 13
1.
Neutral lock position
(handles out)
4.
Forward
2.
Neutral operate position
(handles in)
5.
Neutral (operate)
3.
Front of Unit
6.
Reverse
Driving Forward
1. Release the parking brake.
2. Move the motion control levers inward to the
center to the neutral position.
3. To move forward in a straight line, move both
levers forward with equal pressure.
29
Summary of Contents for RADIUS
Page 1: ...RADIUS For Serial Nos 400 000 000 Higher Part No 4502 907 Rev B ...
Page 73: ...Schematics Schematics Electrical Logic Schematic Exmark Engine 73 ...
Page 74: ...Schematics Electrical Logic Schematic Kohler Engine 74 ...
Page 75: ...Schematics Electrical Logic Schematic Kawasaki Engine 75 ...
Page 79: ...Notes 79 ...
Page 80: ...Notes 80 ...
Page 81: ...Service Record Date Description of Work Done Service Done By 81 ...
Page 82: ...82 ...


