Maintenance
removed (see Figure 66). Save the screw for
reinstallation.
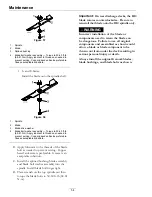
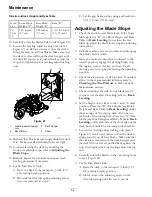
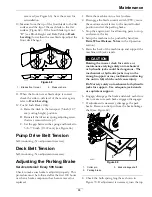
10. Measure from the tip of the front blade to the flat
surface and the tip of the rear blade to the flat
surface (Figure 68). If the front blade tip is not
“R” (see Block Height and Rake Table in
Deck
Leveling
) lower than the rear blade tip, adjust the
front deck hanger.
Figure 68
1.
Blades front to rear
2.
Measure here
11. When the front-to-rear blade slope is correct
check the side-to-side level of the mower again;
refer to
Deck Leveling
.
12. For 60 Inch Decks Only:
A. Raise the deck to the transport (5 inch (12.7
cm) cutting height) position.
B. Reinstall the lift assist spring adjusting screw
that was removed in step 9.
C. Set the gap between the spring and bracket to
3/4–7/8 inch (19–22 mm) (see Figure 66).
Pump Drive Belt Tension
Self-tensioning - No adjustment necessary.
Deck Belt Tension
Self-tensioning - No adjustment necessary.
Adjusting the Parking Brake
Service Interval: Every 500 hours
Check to make sure brake is adjusted properly. This
procedure must be followed after the first 100 hours
or when a brake component has been removed or
replaced.
1. Drive the machine onto a level surface.
2. Disengage the blade control switch (PTO), move
the motion control levers to the neutral locked
position and set the parking brake.
3. Stop the engine, wait for all moving parts to stop,
and remove the key.
4. Setup the machine to be pushed by hand (see
Drive Wheel Release Valves
in the Operation
section).
5. Raise the back of the machine up and support the
machine with jack stands.
CAUTION
Raising the mower deck for service or
maintenance relying solely on mechanical
or hydraulic jacks could be dangerous. The
mechanical or hydraulic jacks may not be
enough support or may malfunction allowing
the unit to fall, which could cause injury.
Do Not rely solely on mechanical or hydraulic
jacks for support. Use adequate jack stands
or equivalent support.
6. Engage/disengage the brake and check each drive
tire to make sure each brake engages/disengages.
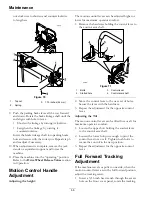
7. If adjustment is necessary, disengage the park
brake. Remove cotter pin from the brake linkage
shaft (see Figure 69).
Figure 69
1.
Cotter pin
3.
Brake linkage shaft
2.
Parking brake
8. Check the both spring lengths as shown in
Figure 70. If adjustment is necessary, turn the top
65
Summary of Contents for RADIUS
Page 1: ...RADIUS For Serial Nos 400 000 000 Higher Part No 4502 907 Rev B ...
Page 73: ...Schematics Schematics Electrical Logic Schematic Exmark Engine 73 ...
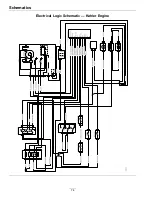
Page 74: ...Schematics Electrical Logic Schematic Kohler Engine 74 ...
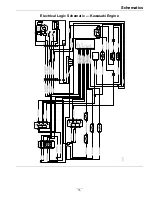
Page 75: ...Schematics Electrical Logic Schematic Kawasaki Engine 75 ...
Page 79: ...Notes 79 ...
Page 80: ...Notes 80 ...
Page 81: ...Service Record Date Description of Work Done Service Done By 81 ...
Page 82: ...82 ...


