


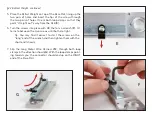
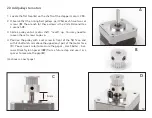
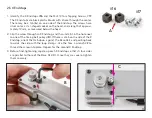


§2.4 Install the motors, continued
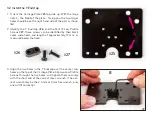
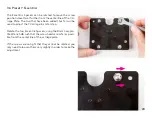
4. Set the Base Rail down on top of the two motors, and check
their orientation: The connectors on both motors should
face towards the center of the base rail (
D
).
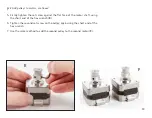
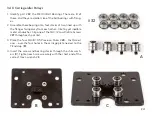
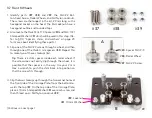
5. Identify the M3×14 Button-head Screws,
#15
. These can be
identified by their black color and length of approximately 14
mm, as measured below the head. Note that there are also
4 similar-looking but slightly longer M3×16 screws in the kit;
this step requires the 8 shorter ones.
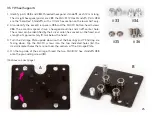
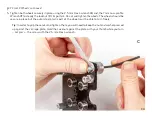
6. Slip four of the M3×14 screws through the four corner holes
around one of the stepper motors, and tighten them in place
(
E
) with the 2 mm Ball-end Hex L-wrench
#3
. Lightly snug all
four screws, then tightening all four securely.
7. Repeat this step, adding the other four M3×14 screws to se-
cure the other motor in place.
D
E
15
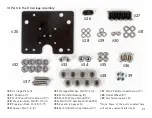
Summary of Contents for AxiDraw MiniKit 2
Page 5: ...Part 1 Tools 5...
Page 8: ...Part 2 The Base 8...
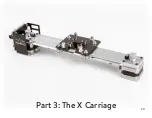
Page 20: ...Part 3 The X Carriage 20...
Page 35: ...Part 4 Y Belt and Z 35...
Page 55: ...Part 5 Servo and wiring 55...


