Upgrading The Computer
Upgrading the Hard Disk Drive(s) 6 - 3
6
Upgrading the Hard Disk Drive(s)
The hard disk drive(s) can be taken out to accommodate other 3.5" serial (SATA)
hard disk drives with a height of 26mm (h) (see
“Storage” on page D - 3
).
1.
Turn the computer off and disconnect all peripherals and cables (including tele-
phone lines).
2.
Place the computer on a flat stable surface, preferably on a protective covering to
avoid damage to the LCD screen.
3.
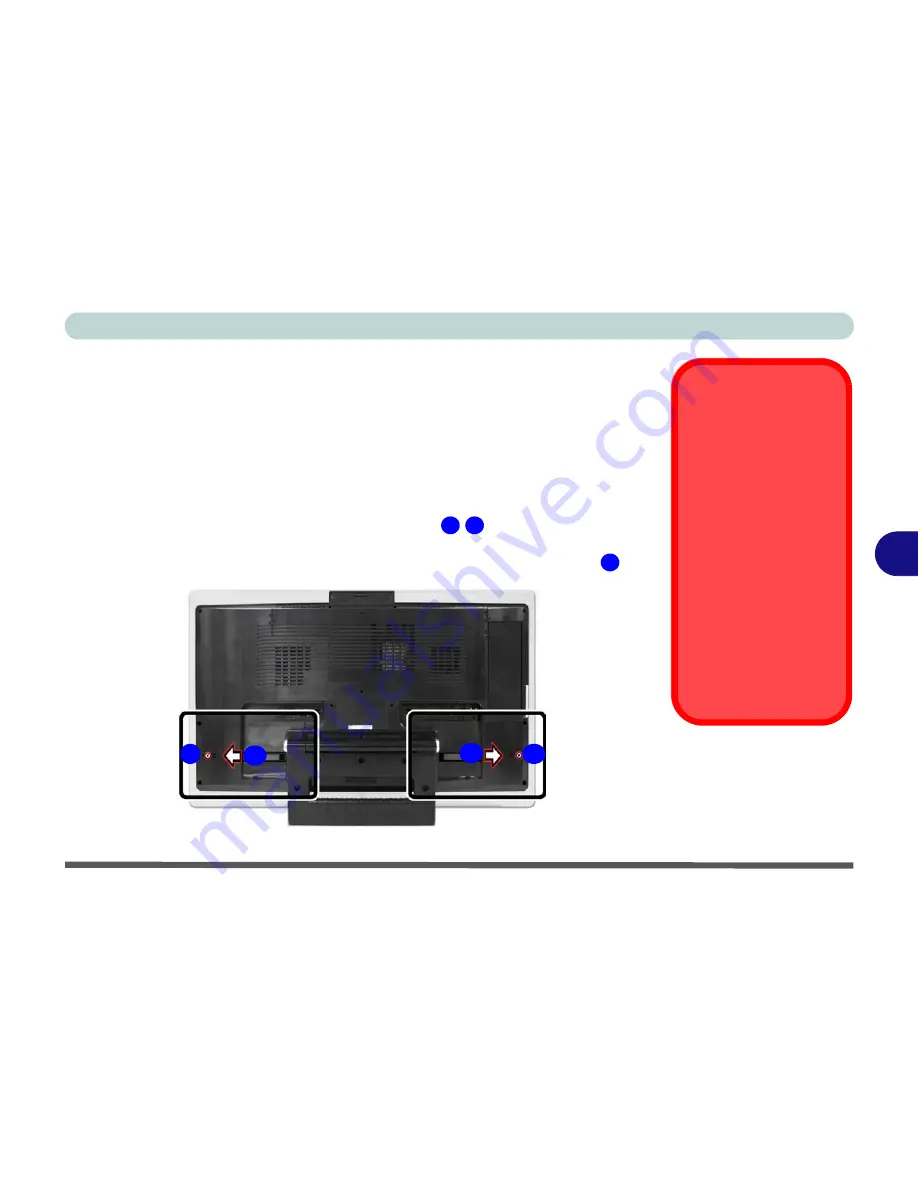
Locate the hard disk bay cover and remove screw
/
, depending on which
hard disk you want to replace.
4.
Remove the hard disk cover(s) by sliding it(them) in the direction of arrow
.
HDD System
Warning
New HDD’s are blank. Be-
fore you begin make sure:
You have backed up any
data you want to keep from
your old HDD.
You have all the CD-ROMs
and FDDs required to in-
stall your operating system
and programs.
If you have access to the in-
ternet, download the latest
application and hardware
driver updates for the oper-
ating system you plan to in-
stall. Copy these to a
removable medium.
Figure 6 - 1
Hard Disk Bay &
Screws
1
2
3
1
2
3
3
Summary of Contents for LCD PC
Page 1: ......
Page 2: ......
Page 10: ...VIII Preface ...
Page 35: ...Video Features 1 19 Quick Start Guide 1 Figure 1 10 Display Settings 2 3 1 4 5 2 3 1 ...
Page 48: ...Features Components 2 12 2 ...
Page 56: ...Power Management 3 8 3 ...
Page 64: ...Drivers Utilities 4 8 4 ...
Page 78: ...BIOS Utilities 5 14 5 ...
Page 108: ...Modules 7 20 PC Camera Module 7 Figure 7 12 Audio Setup for PC Camera Right click ...
Page 128: ...Interface Ports Jacks A 6 A ...
Page 142: ...Specifications D 6 Specifications D ...
Page 182: ...Windows XP Information E 40 PC Camera Module E Figure E 24 Audio Setup Windows XP ...


