1.
Screensaver display
Activate
or deactivate
the screensaver.
2.
Triggering
Set the waiting time before the display of the screensaver (in seconds).
3.
Transition
Set the transition time between each image (in seconds).
4.
Adjusting the default brightness of the screen
Once the change has been made, press
to return to the work screen.
2. A
DJUSTING
THE
PRECISION
OF
THE
EDGER
This menu enables you to adjust the precision of the edger. You can adjust:
•
the diameter of the finished lenses
(
F
p.50)
•
the position of the bevel and groove
(
F
p.51)
•
the diameter of drill holes
(
F
p.52)
•
the chamfer
(
F
p.53)
•
the depth and width of the groove
(
F
p.54)
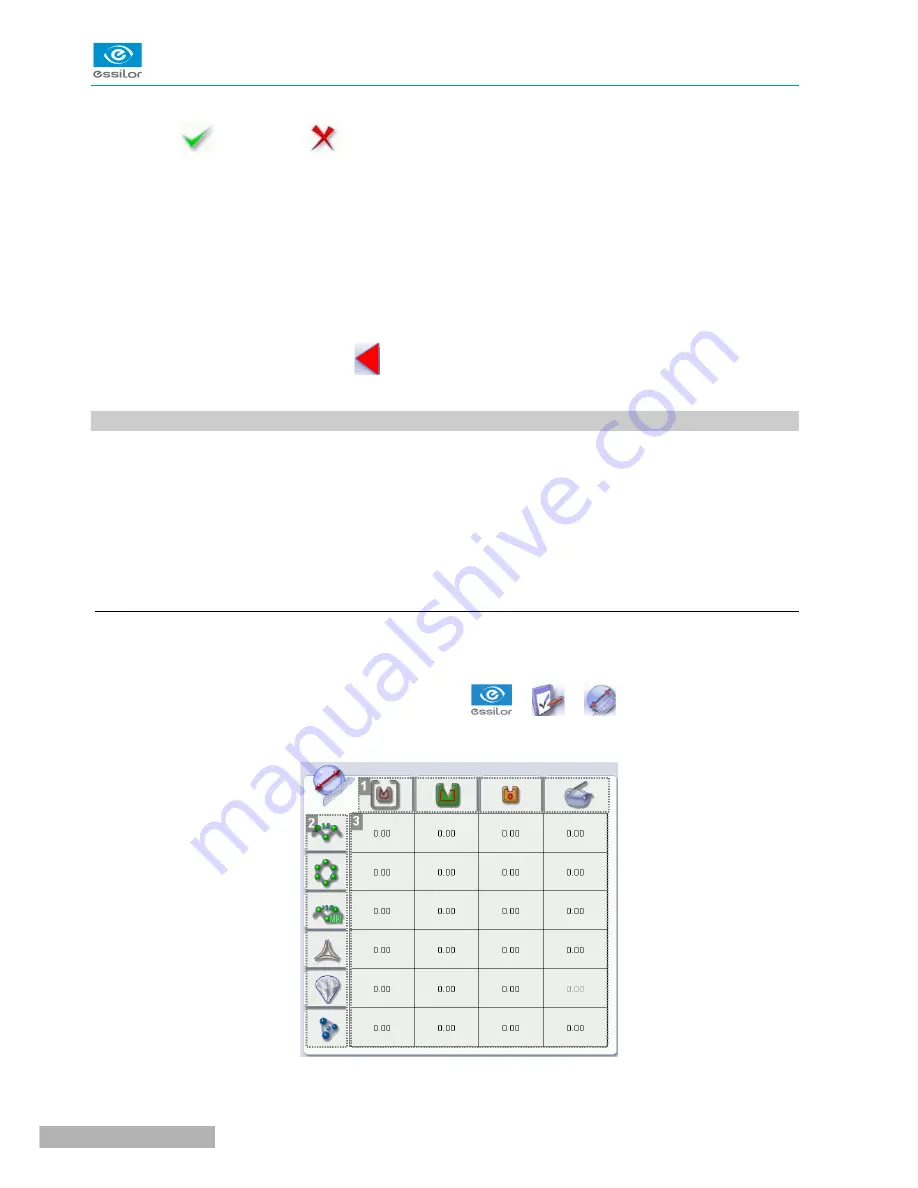
a. Adjusting the diameter of the finished lenses
If lenses of a particular material always seem too small or too big after edging, you can adjust their diameter
according to the type of frame.
To access that menu from your edger work screen, select
>
>
.
The following screen is displayed:
1.
Frame types
Neksia > v1.0 - 02.14
50
U
SER
M
ANUAL
> III. C
ONFIGURING
THE
EDGER
Summary of Contents for Neksia
Page 1: ...User Manual...
Page 2: ......
Page 6: ......
Page 7: ...I FIRST STEPS...
Page 14: ...Neksia v1 0 02 14 14 USER MANUAL I FIRST STEPS...
Page 15: ...II EDGING A LENS...
Page 45: ...USER MANUAL II EDGING A LENS 45 Neksia v1 0 02 14...
Page 46: ......
Page 47: ...III CONFIGURING THE EDGER...
Page 55: ...IV MAINTENANCE SERVICING...
Page 72: ...Neksia v1 0 02 14 72 USER MANUAL IV MAINTENANCE SERVICING...
Page 73: ...TECHNICAL DATA...
Page 76: ...Neksia v1 0 02 14 76 USER MANUAL TECHNICAL DATA...
Page 77: ...GENERAL INFORMATION...
Page 81: ...GLOSSARY...
Page 83: ......


