QX5
QXFXO4/QXISDN4/QXE1T1/QXFXS24; (SW Version 6.0.x)
35
QXFXO4/QXISDN4/QXE1T1/QXFXS24 Manual II: Administrator’s Guide
The
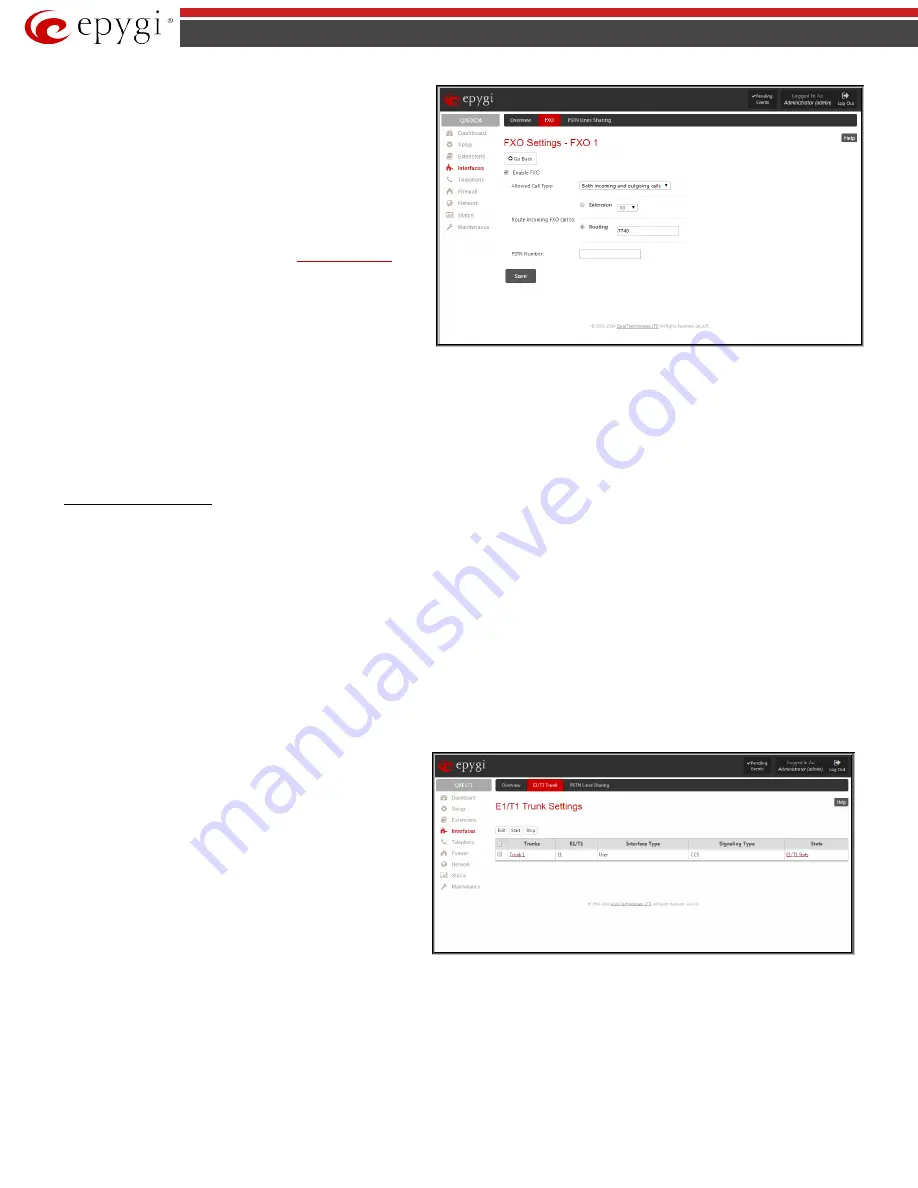
Route incoming FXO Call to
manipulation radio buttons group
allows you to define the destination where incoming calls addressed
to the corresponding FXO line will be forwarded to.
•
Extension
– this selection allows you to choose the local PBX
user or auto attendant extension to forward calls. If an inactive
extension is chosen from this list, the voice mail system will
answer the call addressed to the corresponding FXO line. If the
Auto Attendant extension is chosen, it will become the “default
user” for the corresponding FXO line on the QX.
•
Routing
– this selection allows you to forward the incoming
calls to the destination defined through
. This
selection requires you to enter a routing pattern to the
corresponding field. Based on the registered PSTN users, the
caller will be able to reach the destination according to
configurations in Call Routing Table.
Fig.II- 38: FXO Settings – FXO# page
By choosing a destination, the QX administrator virtually assigns a default number that will start ringing when a call is initiated to the QX’s PSTN number.
The
PSTN Number
text field allows you to enter the PSTN number that the current FXO line is attached to. The field value is optional and used as an
identification parameter for FXO lines. The field value can be left empty.
Alternative AC Termination Mode
appears if the local country (Germany, Israel, France, etc.) selected for QX has two COs that use different types of AC
termination. Contact your CO to learn about your AC termination mode. Selecting the checkbox may help if the voice quality over FXO is poor or an echo is
noticed.
To modify the FXO Settings
1.
Select the FXO line number from the
FXO Settings
table. The
FXO Settings -FXO#
will appear where the line settings may be modified.
2.
Enable the FXO line to receive calls from the PSTN. To reject calls from/to the PSTN, deselect the
Enable FXO
checkbox.
3.
If FXO has been enabled, select the
Call Type
from the
Allowed Call Type
drop down list and the extension from the
Route FXO Call to
drop
down list to route the FXO calls correspondingly.
4.
Insert a
PSTN number
in the same named text field to identify the FXO line.
5.
Enable
Alternative AC Termination Mode
if this is a requirement of your CO.
6.
Press
Save
to submit the FXO line settings.
E1/T1 Trunk Settings
The
E1/T1 Trunk Settings
allows QXE1T1 to be connected to a PBX or to a CO (Central Office) via E1/T1 lines, using E1/T1 CAS/CCS signaling. QXE1T1
may act as a user or as network. If connected to a private PBX, the QXE1T1 should be configured in the network mode. If an E1/T1 trunk from the CO is
connected to the QXE1T1, it should be configured as a user.
QXE1T1 has one E1/T1 trunk available.
The
E1/T1 Trunk Settings
page is used to configure the E1/T1 trunk and the timeslots settings. The page consists of the following components:
The
Trunk Settings
table lists the available E1/T1 trunks on the QX
and their settings (Trunk name, E1/T1 mode, interface, signaling
types). Clicking on the trunk will open its
Signaling Settings
page
(
Trunk CAS Signaling Settings
or
Trunk
CCS Signaling Settings
page depending on the selected signaling type) while selecting the
corresponding trunk’s checkbox and pressing
Edit
will open the
Trunk – Edit Entry
page.
E1/T1 Stats
link is displayed for every
active trunk on the board and refers to the page where E1/T1 trunk
and traffic statistics can be viewed.
Start
and
Stop
functional links are used to start/shutdown the
selected E1/T1 trunk(s). When E1/T1 trunk is shutdown state, no
E1/T1 calls could be placed and received.
Fig.II- 39: E1/T1 Trunk Settings page


