Installation 4. First Step
T-B series Rev.1
21
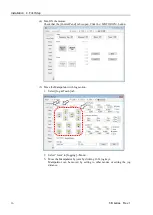
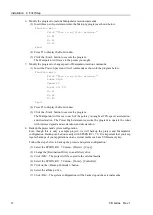
(4)
Click the [Jog & Teach] tab.
(5)
Click the <Teach> button in the lower right corner to teach point P0. You will be prompted
for a point label and description.
(6)
Click the <+Y> jog button to jog the robot in +Y direction. Hold down the button to keep
jogging. Move the Manipulator until it reaches the middle of the work envelope.
(7)
Click the <-Z> button to lower the Z axis of the Manipulator.
(8)
Select “P1” in the [Point (P)] dropdown list which is next to the <Teach> button. The
current point is set to P1.
(9)
Click the <Teach> button. You will see a confirmation message to teach the point.
(10)Click the <Yes> button.
(11)Click the <+X> button to jog the Manipulator in the +X direction.
(12)Select “P2” in the [Point (P)] dropdown list which is next to the <Teach> button. The
current point is set to P2.
(13)Click the <Teach> button. You will see a confirmation message to teach the point.
(14)Click the <Yes> button.
(15)Click the <Save Project>
toolbar button to save the changes.
Summary of Contents for T-B Series
Page 1: ...SCARA ROBOT T B series MANUAL Rev 1 EM217R4788F ...
Page 2: ...SCARA Robots T B series Manual Rev 1 ...
Page 16: ...TABLE OF CONTENTS xiv T B series Rev 1 ...
Page 18: ......
Page 40: ...Installation 5 Second Step 24 T B series Rev 1 ...
Page 42: ......
Page 58: ...T3 B T6 B Manipulator 2 Specifications 42 T B series Rev 1 2 3 Outer Dimensions 2 3 1 T3 B ...
Page 59: ...T3 B T6 B Manipulator 2 Specifications T B series Rev 1 43 2 3 2 T6 B ...
Page 77: ...T3 B T6 B Manipulator 3 Environments and Installation T B series Rev 1 61 T6 B A B ...
Page 158: ...T3 B T6 B Manipulator 18 Error Code List 142 T B series Rev 1 ...
Page 160: ......
Page 168: ......
Page 178: ...Appendix B Time and Distance of Free Running in Emergency 162 T B series Rev 1 ...
Page 182: ...Appendix C Time and Distance of Free Running When Safeguard Is Opened 166 T B series Rev 1 ...

