Chapter 7 - Utilities to Improve Print Quality
83
Once you have entered data on this screen you must click on the
Input
button FIRST and then click on
Finish
. If you do not follow this
sequence, or you click on any other buttons in between
Input
and
Finish
, your data will not be stored properly and you must rerun this
calibration process.
Auto Bi-Directional Adjustment
You will need to place a standard 8.5” x 11” sheet of paper on a Shirtboard
to perform this procedure. Once the paper is loaded, from the main selection
screen of the Adjustment Program, select the Auto Bi-D Adjustment routine.
On the next screen, select
Perform
and the routine will print automatically and
make the necessary calibrations. You will not need to input any data manually.
When the Auto Bi-Directional Adjustment procedure is complete, you MUST click
on
Finish
for the data to be properly stored. You will then be taken back to the
main selection screen.
PF Roller and Eject Roller Adjustments
(PF Adjustment Utility)
You will need to place a standard 8.5” x 11” sheet
of paper on a Shirtboard to perform each of
these procedures and both are run from the
PF
Adjustment Utility
.
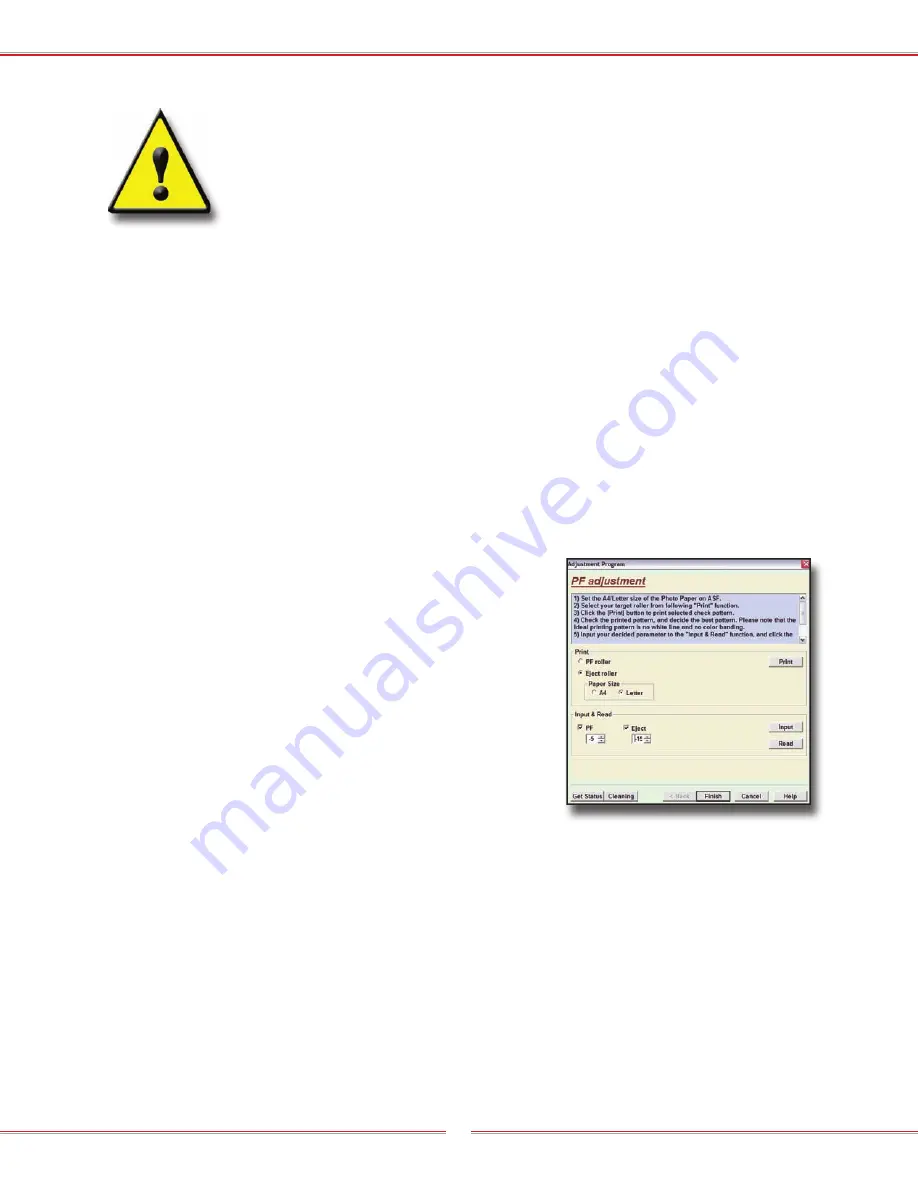
Select the PF Roller Utility and press
. A group
offset boxes will printout along with 7 colored
boxes at the bottom of the page. The offset boxes
will be numbered from -3 to -13 and these are
what is used to calibrate the PF Roller.
Carefully examine the offset boxes and note the
group with NO GAP between the upper and lower one. Place a checkmark
next to
PF
in the
Input & Read
section and enter the number that corresponds
with the two boxes you have selected.
To calibrate the Eject Roller, you will need to place a clean sheet of standard
8.5” x 11” paper on the Shirtboard and select
Eject Roller
and
Letter
for paper
size. Press the
button.
About halfway down the sheet of paper, a thick line will print with a series of
small blocks below it. These blocks will be numbered -15 to -2. Carefully examine
the blocks and select the one that TOUCHES the long bar above it, with NO GAP
or OVERLAP between them. Place a check mark next to
Eject
in the
Input &
PPll
hh
kk
kk
O
O
In
In
ss
FF
c
c
Summary of Contents for Fast T-Jet 3 PLUS
Page 1: ...User s Manual JULY 2008 VERSION 1 1 Tempe Arizona USA ...
Page 2: ......
Page 10: ...T Jet3 PLUS User s Manual Version 1 1 Revised July 2008 xiv ...
Page 16: ...T Jet3 PLUS User s Manual Version 1 1 Revised July 2008 6 ...
Page 64: ...T Jet3 PLUS User s Manual Version 1 1 Revised July 2008 54 ...
Page 66: ...T Jet3 PLUS User s Manual Version 1 1 Revised July 2008 56 ...
Page 90: ...T Jet3 PLUS User s Manual Version 1 1 Revised July 2008 80 ...


