30
- Creating Scenarios (EMP SlideMaker)
♦
Sending Scenarios
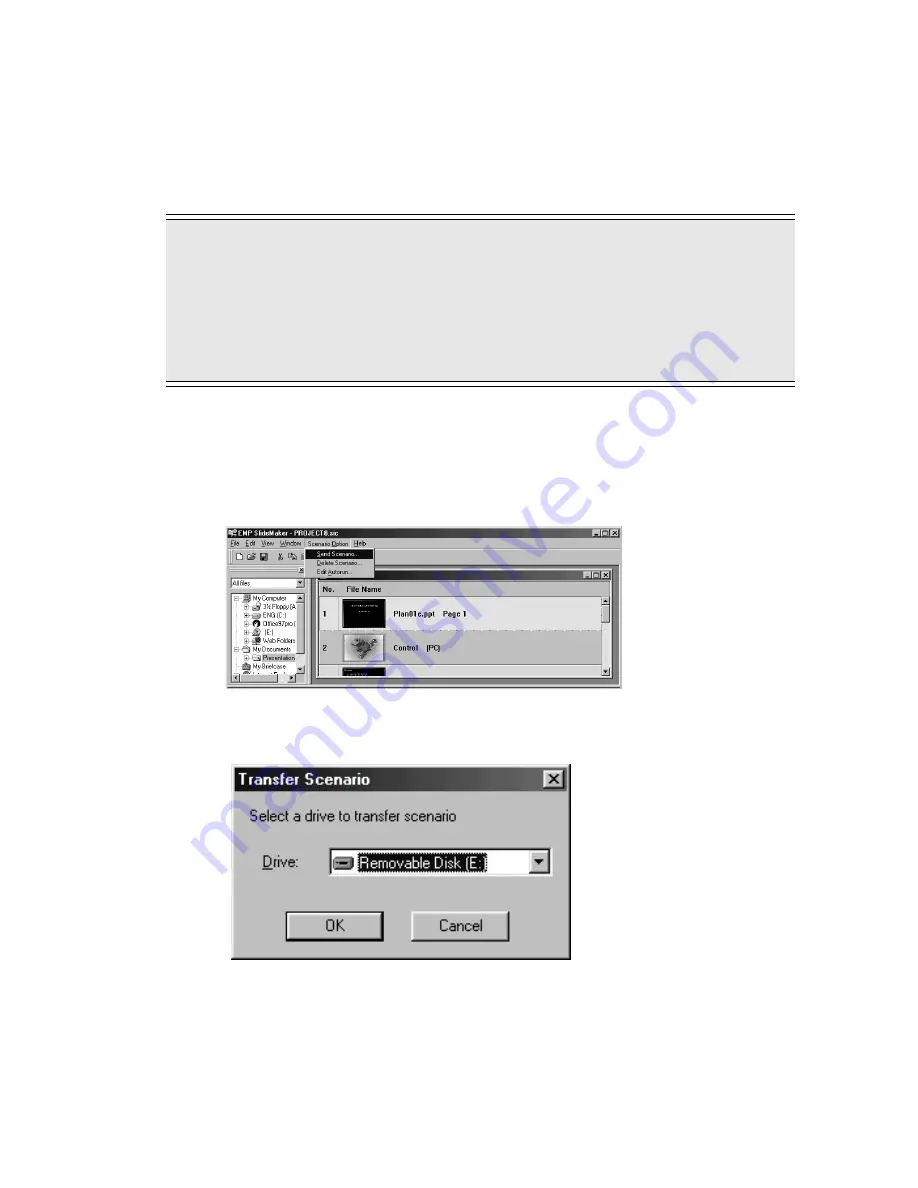
To project a scenario with a projector, it must be sent to a memory card using the "Send Scenario"
function of EMP SlideMaker.
Specify the memory card inserted in the card drive of the computer as the destination.
While sending a scenario, it can be set to project automatically when EasyMP is started, or to
project repeatedly. The function used to automatically project scenarios is called "Autorun".
1
Insert a memory card into the computer.
If a card adapter is required, place the memory card in the card adapter and insert it into
the computer.
2
Select [
Scenario Option
], then [
Send Scenario
].
3
A dialog box for specifying the destination drive will appear. Select the drive in which
the memory card is inserted, and then click the [
OK
] button.
Point
•
Created scenarios cannot be sent unless they are saved using either the "Save" or "Save As"
function.
•
Once a scenario is sent to a memory card, it is saved as a scenario file named "scenario
name.sit". A folder with the same name as the scenario file will be created into which screen
images converted into image files according to the image quality setting will be saved. These
.sit files cannot be edited using EMP SlideMaker.
Summary of Contents for EMP-505
Page 1: ...English User s Guide Deutsch Français ...
Page 2: ......
Page 3: ...English EasyMP User s Guide English ...
Page 10: ...8 Introduction to Functions ...
Page 20: ......
Page 46: ......
Page 56: ...54 Index U Uninstallion 15 USB 46 Z Zoom Image 35 ...
Page 57: ...Français EasyMP Guide de I utilisateur Français ...
Page 64: ...62 Présentation des fonctions ...
Page 74: ......
Page 100: ......
Page 110: ......
Page 111: ...Deutsch EasyMP Benutzerhandbuch Deutsch ...
Page 118: ...116 Einleitung bezüglich Funktionen ...
Page 128: ......
Page 154: ......
Page 160: ......
Page 166: ...164 Index W Wiederholungseinstellungen 139 Z Zelle 132 Zoomen des Bilds 143 ...
Page 168: ...User s Guide ...


