


3-28
Settings for NetWare
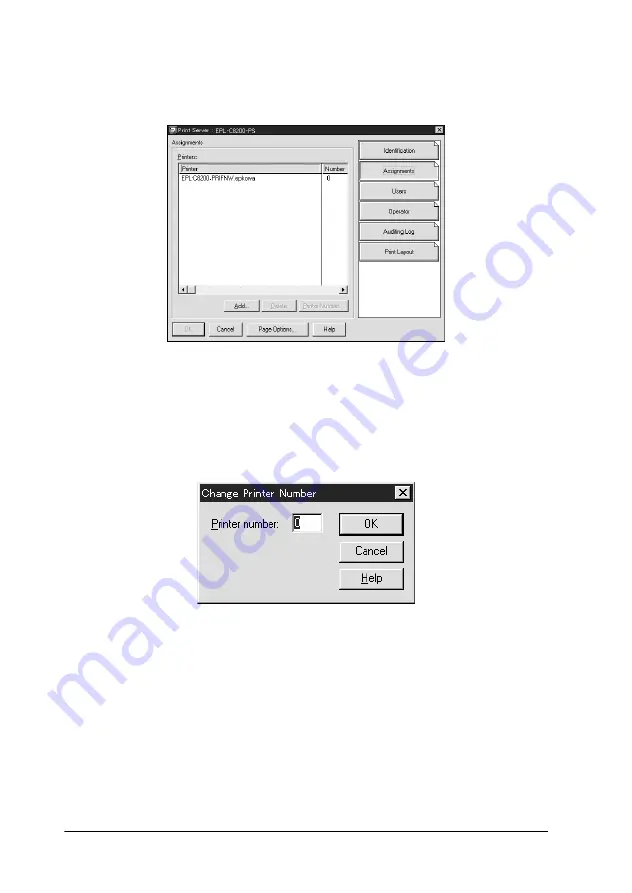
12. In the Print Server dialog box that appears, click
Assignments
and then click
Add
.
13. From the printer object list, select the printer object you want
to assign and click
OK.
14. Go back to the screen in step 12, and click the
Printer Number
button to set the printer number from 0 to 254.
15. To confirm the objects you have assigned, double-click the
Print Server object icon. Click
Print Layout
, and check that the
print server, printer, and print queue are connected.
See your NetWare documentation for more detailed information.
Now go to the next section “Configuring for NetWare using
EpsonNet WinAssist” on page 3-29.
Summary of Contents for AcuLaser C2000
Page 84: ...3 50 Settings for NetWare ...
Page 132: ...6 12 Settings for Macintosh ...
Page 140: ...7 8 Settings for OS 2 ...
Page 150: ...8 10 Settings for UNIX ...
Page 236: ...12 14 EpsonNet Internet Print ...
Page 246: ...13 10 Printer Status Page ...
Page 258: ...14 12 EpsonNet WebManager ...
Page 271: ...A Specifications A 1 Appendix A Specifications Network Software A 2 Network Connectors A 2 ...


