98
Using Optional Equipment
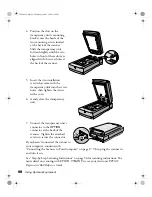
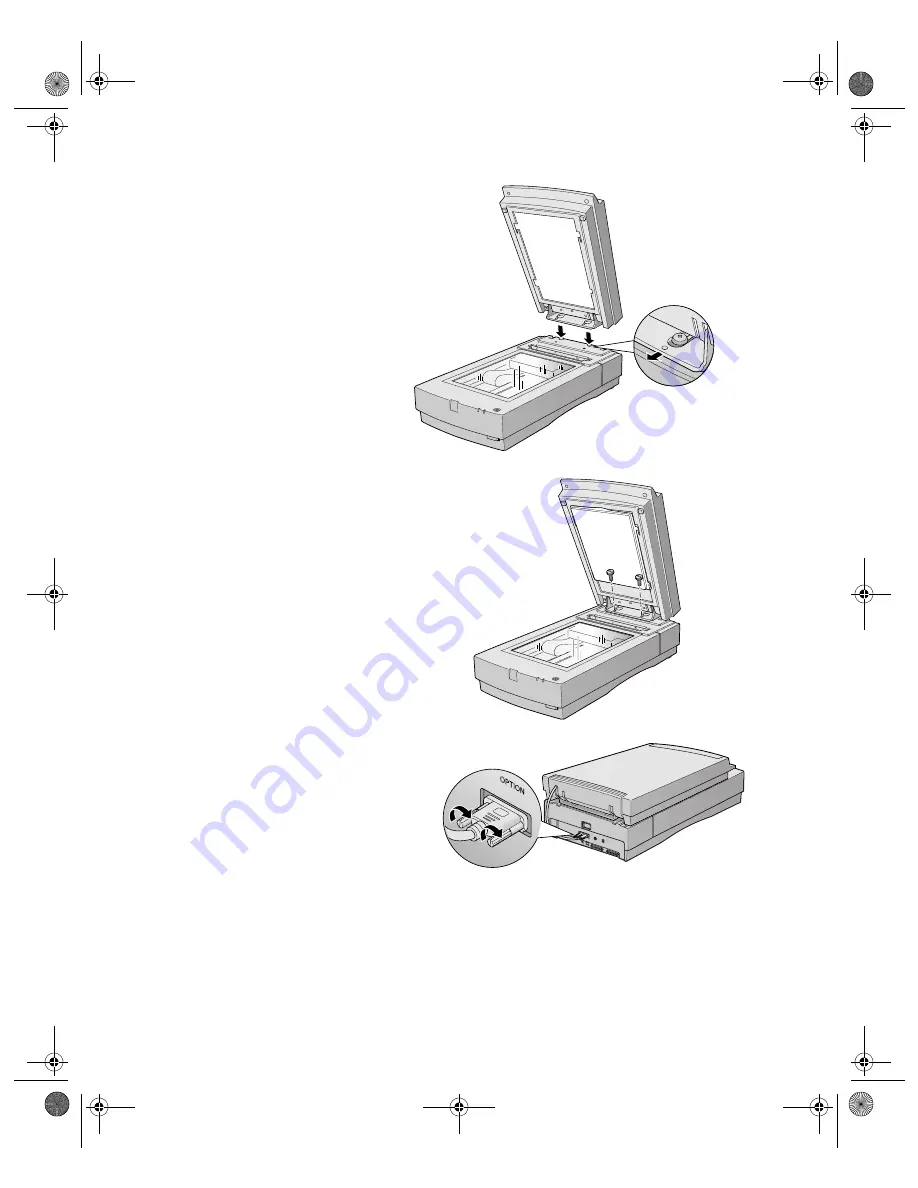
4. Position the slots on the
transparency unit’s mounting
bracket over the heads of the
two mounting screws located
at the back of the scanner.
Slide the transparency unit
forward slightly until the two
holes in front of these slots are
aligned with the screw holes at
the back of the scanner.
5. Insert the two installation
screws that came with the
transparency unit into the screw
holes, then tighten the screws
with a coin.
6. Gently close the transparency
unit.
7. Connect the transparency unit’s
connector to the
OPTION
connector at the back of the
scanner. Tighten the attached
screws to secure the connector.
If you haven’t connected the scanner to
your computer, continue with
“Connecting the Scanner to Your Computer” on page 17. Then plug the scanner in
and turn it on.
See “Step-by-Step Scanning Instructions” on page 56 for scanning instructions. For
more detail on scanning with EPSON TWAIN Pro, see your electronic
EPSON
Expression 1680 Reference Guide
.
1680.book Page 98 Thursday, March 1, 2001 4:28 PM
Summary of Contents for 1680 - Expression Special Edition
Page 1: ...Color Graphics Scanner User s Guide 1680 book Page i Thursday March 1 2001 4 28 PM ...
Page 17: ...10 Welcome 1680 book Page 10 Thursday March 1 2001 4 28 PM ...
Page 117: ...110 Using Optional Equipment 1680 book Page 110 Thursday March 1 2001 4 28 PM ...
Page 149: ...142 Installing the TCP IP Protocol 1680 book Page 142 Thursday March 1 2001 4 28 PM ...


