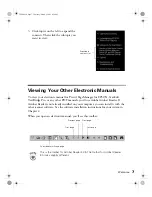
background image

Color Graphics Scanner

User’s Guide

1680.book  Page i  Thursday, March 1, 2001  4:28 PM

Summary of Contents for 1680 - Expression Special Edition

Page 1: ...Color Graphics Scanner User s Guide 1680 book Page i Thursday March 1 2001 4 28 PM ...

Page 2: ...om the use of any options or any consumable products other than those designated as Original EPSON Products or EPSON Approved Products by SEIKO EPSON CORPORATION A Note Concerning Responsible Use of Copyrighted Materials Digital cameras and scanners like photocopiers and conventional cameras can be misused by improper copying of copyrighted material While some countries laws permit limited copying...

Page 3: ... Identifying Scanner Parts 14 Unlocking the Scanner 15 Testing Your Scanner s Operation 16 Connecting the Scanner to Your Computer 17 Connecting to a USB Interface 18 Connecting to a SCSI Interface 19 Connecting to an IEEE 1394 FireWire Interface 21 Installing the Windows Software 22 Installing the Windows Me Software 22 Installing the Windows 2000 Software 28 Installing the Windows 98 Software 34...

Page 4: ...op LE 50 Installing LaserSoft SilverFast 51 Installing MonacoEZcolor 51 Selecting the Expression 1680 as Your Default Scanner 52 Chapter 3 HOW TO SCAN 53 Scanning Tips 53 Selecting Resolution 53 Scaling Resizing Images 54 Scanning Color Images 54 Batch Scanning 54 Recommended Settings 55 Step by Step Scanning Instructions 56 Placing Your Original Document 56 Scanning with EPSON TWAIN Pro 57 Using ...

Page 5: ...he Scanner Server Installation on Windows 95 and Windows NT 4 0 84 Changing the Scan Server Start Up Mode 86 Setting Up Client Computers 87 Installing EPSON TWAIN Pro Network on Windows 87 Installing EPSON TWAIN Pro Network on a Macintosh 89 Using a Network Scanner 91 Starting EPSON Scan Server 92 Starting EPSON TWAIN Pro Network 93 Starting a Scan 94 Stopping a Scan in Progress 94 Chapter 5 USING...

Page 6: ...ting the Scanner 111 Transporting the Transparency Unit 113 Cleaning the Scanner 114 Chapter 7 SOLVING PROBLEMS 115 Lights and Buttons 115 Problems and Solutions 117 Setup Problems 117 Scanner Problems 119 Software Problems 120 Scanning Problems 122 Uninstalling the Expression 1680 Software 127 Uninstalling EPSON TWAIN Pro 127 Uninstalling EPSON TWAIN Pro Network 128 Uninstalling EPSON Scan Server...

Page 7: ...Address for Windows 95 and Windows 98 First Release 138 Installing the TCP IP Protocol on Windows NT 4 0 140 Assigning an IP Address on Windows NT 4 0 141 Appendix C REQUIREMENTS AND NOTICES 143 System Requirements 143 Windows 143 Macintosh 144 Important Safety Instructions 144 Declaration of Conformity 145 FCC Compliance Statement 146 ENERGY STAR Compliance 147 Warranty 147 INDEX 149 1680 book Pa...

Page 8: ...3200 dpi hardware resolution with EPSON s proprietary Micro Step Drive technology and is one of the fastest scanners in its class About Your Scanner Your EPSON Expression 1680 scanner comes with these features Superior image quality with remarkable 1600 3200 dpi hardware resolution 48 bit color and 3 6 Dmax optical density a Start button for easy automated scanning Can be shared by users in a netw...

Page 9: ... networked workgroup EPSON TWAIN Pro Network This network version of EPSON TWAIN Pro lets client computers use the Expression 1680 when it s attached to another computer EPSON Scan Server must be installed on the computer sharing the scanner Adobe Photoshop LE Edit your photos with this version of the ultimate imaging application Add special effects overlay titles and captions restore old photos a...

Page 10: ...del MonacoEZcolor Simplify the process of color management by creating customized color profiles for your scanner monitor and printer with this easy to use ICC profiling tool Not included with the Special Edition model ScanSoft TextBridge Pro Use the premiere OCR Optical Character Recognition software to turn your paper documents into electronic text without retyping Not included with the Special ...

Page 11: ...igator or Microsoft Internet Explorer versions 3 0 or later on your computer to read this guide See page 5 for instructions on viewing your Reference Guide On Screen Help Most of the applications that come with your scanner include on screen help For EPSON TWAIN Pro just click the button or select Help from the menu Electronic Documents Several of the applications that came with your scanner inclu...

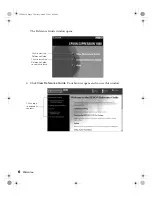
Page 12: ...re You must have a web browser Netscape Navigator or Internet Explorer versions 3 0 or later If you install the manual to your hard drive you can read it anytime For Windows just click Start Programs EPSON and select Exp1680 Guide For Macintosh double click the View Reference Guide icon in the Expression 1680 folder on your hard drive Follow these steps to view the manual 1 Insert your EPSON Expre...

Page 13: ...2 Click View Reference Guide Your browser opens and you see this window Click to install the Reference Guide to your hard drive Click to view the Reference Guide Click a topic to expand its contents 1680 book Page 6 Thursday March 1 2001 4 28 PM ...

Page 14: ... If Acrobat Reader is not already installed on your computer you can install it with the other scanner software See the software installation instructions for your system in Chapter 2 When you open an electronic manual you ll see this toolbar This is the toolbar for Acrobat Reader 4 05 The toolbar for Acrobat Reader 3 0 looks slightly different Expanded contents list Previous page Next page Last p...

Page 15: ...nce For more information see your Acrobat Reader online guide Locate your PDF manuals as follows EPSON Expression 1680 User s Guide You can find a PDF version of this user s guide in the Manuals folder on your Expression 1680 Scanning Tools CD ROM Presto PageManager For Windows click Start Programs Presto PageManager for EPSON PageManager User s Manual For Macintosh double click the User s Guide p...

Page 16: ...der Double click the Documentation folder and finally double click the desired User Guide icon For Macintosh double click the SilverFast CD ROM icon on your desktop and then double click the English folder Double click the Documentation folder and finally double click the desired User Guide icon Registering Please take a minute to complete the electronic registration form If you are installing sof...

Page 17: ...10 Welcome 1680 book Page 10 Thursday March 1 2001 4 28 PM ...

Page 18: ...you have a Macintosh you may prefer to install the scanner software before you connect the scanner to your computer See Installing the Macintosh Software on page 47 If you decide to connect the scanner before you install the software you ll see a message that your scanner driver needs to be installed Just close the message and proceed with the installation instructions If you re installing a trans...

Page 19: ...e Special Edition model of the scanner doesn t include MonacoEZcolor Adobe Photoshop or LaserSoft SilverFast scanner EPSON Expression 1680 Scanning Tools CD ROM power cord EPSON Expression 1680 User s Guide USB cable Adobe Photoshop LE CD ROM MonacoEZcolor CD ROM located in plastic sleeve attached to the MonacoEZcolor User Guide MonacoEZcolor User Guide LaserSoft SilverFast CD ROM 1680 book Page 1...

Page 20: ...r cord and where your cable can reach your computer Keep the scanner away from direct sunlight and strong light sources Be sure there s enough room behind the scanner for the cables and above the scanner so you can fully raise the document cover Avoid places subject to shocks and vibrations or high or rapidly changing temperatures and humidity 5 24 inches 133 mm 13 08 inches 332 mm 22 14 inches 56...

Page 21: ...r document table carriage at home position lights a Start button P Operate button SCSI interfaces transportation lock optional interface slot SCSI ID switch SCSI terminator switch USB interface option connector AC inlet 1680 book Page 14 Thursday March 1 2001 4 28 PM ...

Page 22: ...the scanner To release the transportation lock slide it to the UNLOCK position as shown Always lock the transportation lock before moving the scanner Also be sure the carriage is in the home position shown below See Transporting the Scanner on page 111 for more information unlocked position carriage home position 1680 book Page 15 Thursday March 1 2001 4 28 PM ...

Page 23: ...r cord into a grounded electrical outlet Then open the scanner s document cover so you can see the operation of the carriage 2 Press the P Operate button to turn on the scanner The READY light on the scanner s front panel flashes and the scanner s carriage moves forward then back The READY light stays on when the scanner is ready to scan If you turn off the scanner wait at least 10 seconds before ...

Page 24: ...dows 95 or Windows NT 4 0 you must use a SCSI connection IEEE 1394 FireWire If you have the Professional FireWire model of the Expression 1680 or you ve purchased the optional IEEE 1394 FireWire scanner interface card you can connect the scanner to your Power Macintosh or PC with the IEEE 1394 FireWire cable Your Power Macintosh must have a built in IEEE 1394 FireWire port or an IEEE 1394 FireWire...

Page 25: ...ort 3 Connect the flat end of the USB cable to your computer s USB port or USB hub port If you re using a USB hub connect the scanner to a first tier hub which is the hub closest to the computer If the scanner doesn t work with the hub connect it directly to a USB port on your computer If your scanner and computer are both powered on you see the Add New Hardware Wizard if you re running Windows 98...

Page 26: ...u may also need to change the scanner s SCSI ID setting before you connect it to your computer If you have another SCSI device that uses SCSI ID 2 turn the scanner off and turn the SCSI ID switch on the back of the scanner to a new number Choose a number that doesn t conflict with the ID number of other SCSI devices Don t use SCSI ID 0 1 or 7 If your Macintosh has a built in CD ROM don t use SCSI ...

Page 27: ...onnecting the scanner directly to your computer use a cable no more than 9 8 feet 3 meters long Don t use an external terminator 4 Locate the SCSI terminator switch at the rear of the scanner If the scanner is your only SCSI device or if it s the last device in a SCSI chain leave the terminator switch turned ON If you ve connected your scanner in the middle of a SCSI chain turn the terminator swit...

Page 28: ...ing the card The IEEE 1394 FireWire scanner interface card has two cable connectors You can use either one to connect the scanner directly to your computer At the same time you can use the second connector to connect other IEEE 1394 FireWire devices in a daisy chain or tree configuration You can also connect the scanner to another IEEE 1394 FireWire device so that it s the last IEEE 1394 FireWire ...

Page 29: ...to install Adobe Photoshop LE ScanSoft TextBridge Pro LaserSoft SilverFast or MonacoEZcolor Adobe Photoshop LE ScanSoft TextBridge Pro LaserSoft SilverFast MonacoEZcolor and Presto PageManager are not included with the Special Edition model of the scanner Installing the Windows Me Software Before you begin make sure the Expression 1680 is connected to your computer Also make sure you ve recalibrat...

Page 30: ...st then turn on your computer 2 When you see the window on the right select Specify the location of the driver and then click Next 3 Insert the EPSON Expression 1680 Scanning Tools CD ROM in your drive The Add New Hardware Wizard screen above illustrates a SCSI connection and may look slightly different for USB and FireWire connections 4 Make sure the Search for the best driver for your device Rem...

Page 31: ... when you see a message that installation is complete Continue with the instructions in the next section Installing Other Software on Your Scanning Tools CD ROM Installing Other Software on Your Scanning Tools CD ROM Follow these steps to install Presto PageManager and Adobe Acrobat and complete the Expression 1680 electronic registration form 1 If the Select Language window doesn t appear double ...

Page 32: ...l software for a network scanner go to Chapter 4 Network Scanning If you have the Special Edition model of the scanner Presto PageManager does not appear in the software selection window This software is not included with your scanner 6 Follow the instructions on the screen to install the software If you re done installing software remove the EPSON Expression 1680 Scanning Tools CD ROM and restart...

Page 33: ...anners and Cameras Properties window 2 Double click the EPSON Expression 1680 icon to display the Properties window 3 Click the Test Scanner or Camera button If the scanner is operating properly a Test Successful message displays Click OK to close the message Device Ready appears next to Status on the Properties window 4 Click OK to close the Properties window 1680 book Page 26 Thursday March 1 20...

Page 34: ...Expression 1680 as the default scanner 1 Open the Windows Control Panel and double click the Scanners and Cameras icon 2 Double click the EPSON Expression 1680 icon You see the EPSON Expression 1680 Properties window 3 Click the Utility tab Make sure Select as default scanner for EPSON TWAIN Pro is checked and then click OK 1680 book Page 27 Thursday March 1 2001 4 28 PM ...

Page 35: ...SI or IEEE 1394 driver at the beginning of the installation Follow the instructions on the screen to install your driver or see the documentation that came with your interface card You may be asked to insert your Windows CD ROM during this procedure Make sure you have your Windows CD ROM available or know where to find the Windows source files on your hard drive If you need help locating your sour...

Page 36: ...en click Next 5 Browse to EPSON English Win2000 on your CD ROM drive The example to the right uses E as the CD ROM drive letter Your CD ROM drive letter may be different Click OK to close the Browse window and then click OK 6 Follow the instructions on the screen If you see a message asking for your Windows 2000 CD ROM insert it and click OK or click Browse and locate the Windows 2000 source files...

Page 37: ... instructions in the next section Installing Other Software on Your Scanning Tools CD ROM Follow these steps to install Presto PageManager and Adobe Acrobat and complete the Expression 1680 electronic registration form 1 If the Select Language window doesn t appear double click the My Computer icon on your Windows desktop then double click the Epson CD ROM icon 2 Make sure English is selected and ...

Page 38: ... software for a network scanner go to Chapter 4 Network Scanning If you have the Special Edition model of the scanner Presto PageManager does not appear in the software selection window This software is not included with your scanner 4 Follow the instructions on the screen to install the software If you re done installing software remove the EPSON Expression 1680 Scanning Tools CD ROM and restart ...

Page 39: ... open the Scanners and Cameras Properties window 2 Make sure EPSON Expression 1680 is selected and then click the Properties button 3 Click the Test Scanner or Camera button If the scanner is operating properly a Test Successful message displays Click OK to close the message Device Ready appears next to Status 4 Click OK to close the Properties window 1680 book Page 32 Thursday March 1 2001 4 28 P...

Page 40: ...trol Panel and double click the Scanners and Cameras icon to open the Scanners and Cameras Properties window 2 Make sure EPSON Expression 1680 is selected and click the Properties button You see the EPSON Expression 1680 Properties window 3 Click the Utility tab Make sure Select as default scanner for EPSON TWAIN Pro is checked and then click OK 4 Click OK to close the Properties window 1680 book ...

Page 41: ...installation Follow the instructions on the screen to install your SCSI driver or see the documentation that came with your SCSI card You may be asked to insert your Windows CD ROM during this procedure Make sure you have your Windows CD ROM available or know where to find the Windows source files on your hard drive If you need help locating your source files contact your computer manufacturer 1 T...

Page 42: ...he instructions on the screen 7 Click Finish when you see a message that installation is complete Continue with the instructions in the next section Installing Other Software on Your Scanning Tools CD ROM Follow these steps to install Presto PageManager and Adobe Acrobat and complete the Expression 1680 electronic registration form 1 If the Select Language window doesn t appear double click the My...

Page 43: ...d to your computer If you want to install software for a network scanner go to Chapter 4 Network Scanning If you have the Special Edition model of the scanner Presto PageManager does not appear in the software selection window This software is not included with your scanner 4 Follow the instructions on the screen to install the software If you re done installing software remove the EPSON Expressio...

Page 44: ...as Properties screen above illustrates a USB connection and may look slightly different for SCSI and FireWire connections 2 Make sure EPSON Expression 1680 is selected and then click the Properties button 3 Click the Test Scanner or Camera button If the scanner is operating properly a confirmation message appears Click OK to close the message Device Ready appears next to Status 4 Click OK to close...

Page 45: ...n set up the Expression 1680 as the default scanner 1 Open the Windows Control Panel and double click the Scanners and Cameras icon to open the Scanners and Cameras Properties window 2 Make sure EPSON Expression 1680 is selected and click the Properties button You see the EPSON Expression 1680 Properties window 1680 book Page 38 Thursday March 1 2001 4 28 PM ...

Page 46: ...ed to install your SCSI driver at the beginning of installation Make sure you have your Windows CD ROM available or know where to find the Windows source files on your hard drive Then follow the instructions on the screen or see the documentation that came with your SCSI card for more information If you need help locating your source files contact your computer manufacturer 1 Turn on your scanner ...

Page 47: ... drive EPSON English Win95 The example on the right uses G as the CD ROM drive letter Your CD ROM drive may have a different letter Click OK 4 When you see this window click Finish Continue with the instructions in the next section to install EPSON TWAIN Pro and other software on your Expression 1680 Scanning Tools CD ROM 1680 book Page 40 Thursday March 1 2001 4 28 PM ...

Page 48: ...y Computer icon on your Windows desktop then double click the Epson CD ROM icon You see the Select Language window 2 Make sure English is selected and click OK 3 You see the Software Setup window Click Add Software 4 You see the software selection window A check mark appears beside applications selected for installation If you want to deselect either Presto PageManager or Acrobat Reader click the ...

Page 49: ...the scanner software is installed correctly you see Status Device Ready under Scanner Information Click OK to close the window 7 Click OK to close the setup complete message 8 Follow the instructions on the screen to install the software If you re done installing software remove the EPSON Expression 1680 Scanning Tools CD ROM and restart your computer If you want to install ScanSoft TextBridge Pro...

Page 50: ... know where to find the Windows source files on your hard drive Then follow the instructions on the screen or see the documentation that came with your SCSI card for more information If you need help locating your source files contact your computer manufacturer 1 Turn on your scanner first then turn on your computer 2 Log onto Windows NT Then insert the EPSON Expression 1680 Scanning Tools CD ROM ...

Page 51: ...er does not appear in the software selection window This software is not included with your scanner 6 Follow the instructions on the screen to install EPSON TWAIN Pro When installation is complete you see the window on the right Make sure SCSI is selected and Expression 1680 appears in the Scanner Selection box 7 Click Test to check the connection If the scanner software is installed correctly you...

Page 52: ...ull version of Adobe Photoshop see the Acrobat file titled Upgrade pdf on the Adobe Photoshop LE CD ROM you must have Acrobat Reader installed to view this file 1 Insert the Adobe Photoshop LE CD ROM in your drive 2 Double click the My Computer icon on your Windows desktop then double click the Photosle CD ROM icon 3 Double click the Photosle folder then double click the setup icon 4 Follow the in...

Page 53: ... Insert the MonacoEZcolor CD ROM in your drive 2 Double click the My Computer icon on your Windows desktop then double click the MonacoEZcolor CD ROM icon 3 Double click the Setup exe icon and follow the instructions on the screen When you re done installing the software click Finish and restart your computer Installing ScanSoft TextBridge Pro 1 If necessary insert the EPSON Expression 1680 Scanni...

Page 54: ... the scanner software you ll see a message that your scanner driver needs to be installed if you connect it before installing Close the message and continue with the installation instructions in the next section For instructions on installing software for a network scanner go to Chapter 4 Network Scanning You can connect the scanner using either a SCSI or USB interface If you have the Professional...

Page 55: ...ions You can use tools such as ColorSync 2 5 or above the Adobe Gamma utility included with Adobe Photoshop 5 0 and above or MonacoEZcolor If you don t calibrate your monitor you may get inconsistent scanning results 1 Turn on your Macintosh and turn off any virus protection programs you re using 2 Insert the EPSON Expression 1680 Scanning Tools CD ROM in your drive 3 Double click the EPSON TWAIN ...

Page 56: ...he screen to install Presto PageManager 4 If you want to install Acrobat Reader 4 0 double click the Acrobat Reader folder 5 Double click the English folder 6 Double click the Reader Installer icon and follow the instructions on the screen to install Acrobat Reader 7 When you re done installing Acrobat Reader double click the TextBridge Pro folder 8 Double click the TextBridge Pro Installer folder...

Page 57: ...ou see the Adobe Photoshop Installer banner Click Continue 4 At the next window choose the country you re in and click OK You see the License Agreement 5 Read the agreement and click Accept 6 Follow the instructions on the screen until you see the registration screen Enter your name and company and then enter the serial number of your software including the hyphen exactly as it appears on the CD R...

Page 58: ... and follow the instructions on the screen 6 Click Yes when installation is complete to restart your computer Installing MonacoEZcolor If you have the Special Edition model MonacoEZcolor is not included with your scanner 1 Insert the MonacoEZcolor CD ROM in your drive 2 Double click the MonacoEZcolor CD ROM icon on your desktop 3 Double click the MonacoEZcolor folder and then double click the Mona...

Page 59: ...o your computer you can choose which scanner you want to use as your default Follow these steps to use the EPSON Scanner Selector 1 From the Apple menu click Control Panels EPSON Scanner Selector You see the following window 2 To use your scanner as the default select EPSON Expression 1680 in the scanner list and click OK Your selection remains in effect until you change it 1680 book Page 52 Thurs...

Page 60: ...ble clean and make sure the document is flat against the glass surface Selecting Resolution Resolution refers to how many dots per inch dpi or dots per centimeter dpcm your image contains The best resolution for a scanned image depends on the type of image you re scanning and your final output device As a rule of thumb for most images except line art use a scanning resolution that is approximately...

Page 61: ...on 1680 Reference Guide Scaling Resizing Images If you plan to enlarge your image it s better to enlarge it by scanning at a higher resolution rather than adjusting resolution in your application Each time you modify an image you lose some image quality Keep in mind when you enlarge a small photo such as 35 mm slides or wallet size photos you ll need to scan at a high enough resolution to retain y...

Page 62: ... resolution for printing Photograph Photoshop LE Image Type 48 bit Color HiFi 24 bit Color Std 16 bit Gray HiFi or 8 bit Gray Std 300 dpi Magazine Photoshop LE Image Type 24 bit Color De screening 300 dpi Newspaper text only TextBridge Pro or PageManager Image Type OCR 300 or 400 dpi Text for OCR TextBridge Pro or PageManager Image Type OCR 300 or 400 dpi Text with images TextBridge Pro or PageMan...

Page 63: ...PSON Expression 1680 the transparency unit came with your scanner If you have the Artist or Special Edition models you can order the transparency unit 2 Position the document so the horizontal and vertical edges are carefully aligned with the scales along the sides of the document table 3 Close the document cover slowly Be careful not to move the document You can remove the document cover if you n...

Page 64: ...ight choose Acquire or Select Source instead of Import 3 Open the scanner software For example choose Import from Photoshop s File menu In Windows select TWAIN_32 On a Macintosh select TWAIN_Acquire The EPSON TWAIN Pro main window appears 4 Choose the Document Source Image Type and Destination For example if you re scanning a photograph select Flatbed as your Document Source 24 bit Color Std as yo...

Page 65: ...ion 1680 Reference Guide for information about adjusting settings If you need to remove color cast from your image use the Gray Balance Intensity feature 7 When you ve finished making adjustments click the Scan button The READY light on the front of the scanner flashes while it s scanning In a few moments a scanned image is imported into your host application s window If the READY light continues ...

Page 66: ...does not automatically launch any applications When EPSON Scan Server is running the Expression 1680 connected to the scanner server becomes a network scanner available only to remote users The scanner server cannot use the a Start button features described in this chapter which are only available to a local scanner Setting Up the a Start Button If you didn t install Presto PageManager you need to...

Page 67: ...ton appears in the Scanner events box then deselect any applications you don t want to use in the Send to this application list When you finish a check should appear only beside the application that you want to assign to the a Start button 5 Click Apply then click OK to close the EPSON Expression 1680 Properties window then click OK again to close the Scanners and Cameras Properties window You can...

Page 68: ...kbar 2 Select Preferences You see the EPSON Scanner Monitor window 3 Do one of the following Choose an application in the Launch Application list Browse to another application on your hard drive Select the application and click Open to close the Browse window Your application s path appears in the Launch Application box 4 Click OK to close the EPSON Scanner Monitor window and save your setting Whe...

Page 69: ...window to the right 2 Browse to the application you want to use and open it When your application s icon appears in the Launch Application box click OK Whenever you press the scanner s a Start button the application you assigned launches You can then start EPSON TWAIN Pro Only Presto PageManager automatically starts EPSON TWAIN Pro If you assign another application to the a Start button you must s...

Page 70: ... Scan Buttons Setting from the File menu The Scan Buttons Setting window opens 2 You see an icon for your default printer fax program e mail program and other applications in the Scan Buttons box Click the icon you want to highlight to see its settings 3 Click the Suppress TWAIN User Interface checkbox to select it The settings for your scan become active 4 Choose the Scan Mode Scan Size and Resol...

Page 71: ... box until you see the icon for your printer or program Programs or printers you added appear to the right Select the icon and click OK to assign it to the a Start button A Start button icon appears next to the selected icon in Presto PageManager s Scan Buttons Palette Now you can copy fax e mail print or scan by simply pressing the a Start button You can only assign one function at a time to the ...

Page 72: ...95 or Windows NT 4 0 with Service Pack 3 or higher Client computers can be an IBM compatible PC with a Pentium processor running Windows Me Windows 2000 Windows 98 Windows 95 Windows NT 4 0 or a Power Macintosh or higher system running OS 8 0 or later Both the client computers and the scanner server must have a network interface card installed and must be running the TCP IP protocol see Appendix B...

Page 73: ...go to page 75 If you re running Windows 95 or Windows NT go to page 80 Installing the Scanner Server Software on Windows Me Before you begin make sure the Expression 1680 is connected to your computer Also make sure you ve recalibrated your monitor to factory specifications Depending on how your computer system was originally set up you may be asked to insert your Windows Me CD ROM during driver i...

Page 74: ...lected 5 Browse to EPSON English WinME on your CD ROM drive The example to the right uses D as the CD ROM drive letter Your CD ROM drive letter may be different Click OK to close the Browse window and then click Next 6 Follow the instructions on the screen If you see a message asking for your Windows Me CD ROM insert it and click OK or click Browse and locate the Windows Me source files on your ha...

Page 75: ...Pro Adobe Photoshop LE LaserSoft SilverFast and MonacoEZcolor If you want to install these applications on additional computers please contact the software manufacturer to purchase additional licenses 1 If the Select Language window doesn t appear double click the My Computer icon on your Windows desktop then double click the Epson CD ROM icon 2 Double click the CDSETUP exe icon 3 When the Select ...

Page 76: ...0 attached to another computer 6 Follow the instructions on the screen to install EPSON Scan Server and any other software you selected in the software selection window 7 Follow the instructions in Installing Additional Windows Software on page 45 if you want to install ScanSoft TextBridge Pro Adobe Photoshop LE LaserSoft SilverFast or MonacoEZcolor 8 When you re done installing software restart y...

Page 77: ...0 as the default scanner 1 Open the Windows Control Panel and double click the Scanners and Cameras icon 2 Double click the EPSON Expression 1680 icon You see the EPSON Expression 1680 Properties window 3 Click the Utility tab Make sure Select as default scanner for EPSON Scan Server is checked and then click OK 1680 book Page 70 Thursday March 1 2001 4 28 PM ...

Page 78: ...n your hard disk for example in the Windows folder If you need help contact your computer manufacturer If you ve just installed a SCSI or IEEE 1394 interface card you may be asked to install a driver at the beginning of installation Follow the instructions on the screen to install the best driver then continue with the scanner server installation 1 Turn on your scanner first then turn on your comp...

Page 79: ...he screen to complete the driver installation If you see a message asking for your Windows 2000 CD ROM insert it and click OK or click Browse and locate the Windows 2000 source files on your hard drive then click OK 7 When you see the window to the right click Yes If prompted for the EPSON Scanners Driver Disk 1 reinsert your EPSON Expression 1680 Scanning Tools CD ROM 8 Click Finish when you see ...

Page 80: ...e applications on additional computers please contact the software manufacturer to purchase additional licenses 1 If the Select Language window doesn t appear double click the My Computer icon on your Windows desktop then double click the Epson CD ROM icon 2 Make sure English is selected and click OK The Software Setup window appears 3 Click the Add Software button to display the software selectio...

Page 81: ...ling Additional Windows Software on page 45 if you want to install ScanSoft TextBridge Pro Adobe Photoshop LE LaserSoft SilverFast or MonacoEZcolor 7 When you re done installing software restart your computer Setting Up the Default Scanner on Windows 2000 If you have more than one scanner connected to your computer you can set up the Expression 1680 as the default scanner 1 Open the Windows Contro...

Page 82: ... factory specifications You may be asked to insert your Windows CD ROM during this procedure Make sure you have your Windows CD ROM available or know where to find the Windows source files on your hard drive If you need help locating your source files contact your computer manufacturer 1 Turn on your scanner first then turn on your computer 2 When you see the window on the right insert the EPSON E...

Page 83: ...se 5 Browse to EPSON English Win98 on your CD ROM drive The example to the right uses E as the CD ROM drive letter Your CD ROM drive letter may be different Click OK to close the Browse window and then click Next 6 Follow the instructions on the screen 7 Click Finish when you see a message that installation is complete 1680 book Page 76 Thursday March 1 2001 4 28 PM ...

Page 84: ...ScanSoft TextBridge Pro Adobe Photoshop LE LaserSoft SilverFast and MonacoEZcolor If you want to install these applications on additional computers please contact the software manufacturer to purchase additional licenses 1 If the Select Language window doesn t appear double click the My Computer icon on your Windows desktop then double click the Epson CD ROM icon 2 Make sure English is selected an...

Page 85: ...TWAIN Pro Network if you want to use an Expression 1680 attached to another computer 5 Follow the instructions on the screen to install EPSON Scan Server and any other software you selected in the software selection window 6 Follow the instructions in Installing Additional Windows Software on page 45 if you want to install ScanSoft TextBridge Pro Adobe Photoshop LE LaserSoft SilverFast or MonacoEZ...

Page 86: ...Expression 1680 as the default scanner 1 Open the Windows Control Panel and double click the Scanners and Cameras icon to open the Scanners and Cameras Properties window 2 Make sure EPSON Expression 1680 is selected and click the Properties button You see the EPSON Expression 1680 Properties window 1680 book Page 79 Thursday March 1 2001 4 28 PM ...

Page 87: ... for the first time you ll be asked to install your SCSI driver at the beginning of installation Make sure you have your Windows CD ROM available or know where to find the Windows source files on your hard drive Then follow the instructions on the screen or see the documentation that came with your SCSI card for more information If you need help locating your source files contact your computer man...

Page 88: ... see the window on the right click Next 2 Insert your EPSON Expression 1680 Scanning Tools CD ROM in your drive and click Other Locations 3 Browse to the following location on your CD ROM drive EPSON English Win95 The example on the right uses G as the CD ROM drive letter Your CD ROM drive may have a different letter Click OK to close the Browse window then click OK again 1680 book Page 81 Thursda...

Page 89: ...desktop then double click the Epson CD ROM icon You see the window on the right 6 Make sure English is selected and click OK 7 Click Add Software Continue with the instructions in Finishing the Scanner Server Installation on Windows 95 and Windows NT 4 0 on page 84 1680 book Page 82 Thursday March 1 2001 4 28 PM ...

Page 90: ...If the Select Language window doesn t appear double click the My Computer icon on your Windows desktop then double click the Epson CD ROM icon 4 Make sure English is selected then click OK to display the Software Setup window 5 You see the Software Setup window Click the Add Software button to display the software selection window Continue with the instructions in the next section to finish instal...

Page 91: ... on additional computers please contact the software manufacturer to purchase additional licenses 1 Select EPSON Scan Server A check mark appears beside applications selected for installation Click to select other software you want to install or deselect software you don t want Then click OK Use EPSON TWAIN Pro to scan from the Expression 1680 connected to your computer Only install EPSON TWAIN Pr...

Page 92: ...rmation if the scanner is communicating with the scanner server Click OK to close the window If you want to share a different network scanner with client computers you can access the EPSON Scan Server window at any time by double clicking the EPSON Scan Server icon in the Windows Control Panel Then select the scanner you want in the Scanner Selection list 6 Follow the instructions on the screen to...

Page 93: ...kbar when you start EPSON Scan Server To change from Dialog Box mode to Icon mode click the scanner icon in the upper left corner of the dialog box and select Taskbar Icon from the list To change from Icon mode to Dialog Box mode right click the EPSON Scan Server icon on the taskbar and click Taskbar Icon to deselect it Your setting takes effect when you exit and restart EPSON Scan Server See page...

Page 94: ...work scanner At the same time you can install other software that came with your scanner Your scanner comes with an unlimited license for EPSON TWAIN Pro Network and TWAIN Pro and a single user license for Presto PageManager ScanSoft TextBridge Pro Adobe Photoshop LE LaserSoft SilverFast and MonacoEZcolor If you want to install these applications on additional computers please contact the software...

Page 95: ...e Network Scanner Address box You can only use host names if you have a WINS or DNS server on your network 6 Click Test to test the connection If your computer is communicating with the scanner server and the scanner is on you see a message that the scanner is available Click OK to save your settings If you need to connect to a different network scanner or change the timeout setting you can open t...

Page 96: ...cense for EPSON TWAIN Pro Network and TWAIN Pro and a single user license for Presto PageManager ScanSoft TextBridge Pro Adobe Photoshop LE LaserSoft SilverFast and MonacoEZcolor If you want to install these applications on additional computers please contact the software manufacturer to purchase additional licenses 1 Insert the EPSON Expression 1680 Scanning Tools CD ROM in your drive 2 Double cl...

Page 97: ...r settings 8 Follow the instructions on page 45 if you want to install ScanSoft TextBridge Pro Adobe Photoshop LE LaserSoft SilverFast or MonacoEZcolor 9 When you re done installing software restart your computer If you need to connect to a different network scanner or change the timeout setting you can open the EPSON TWAIN Pro Network window anytime by selecting Control Panels from the Apple menu...

Page 98: ...t may be more convenient to press the scanner s a Start button or to start the scan from the scanner server Then you can scan several images with a single trip to the scanner If you want to scan more than one image place your second image on the document table and press the scanner s a Start button again Repeat this step for every image you want to scan The settings you chose for the first image a...

Page 99: ... Just click the Exit button on the EPSON Scan Server dialog box Before you quit make sure no client computers are trying to use the scanner Don t exit if the status area of the EPSON Scan Server dialog box indicates that you are connecting to a client Wait until you see the message Waiting for connection If you installed EPSON TWAIN Pro on the scanner server so that you could make a direct connect...

Page 100: ...ce window select the EPSON TWAIN Pro Network icon and click OK The command you choose from the File menu differs from one host application to another With other host applications you might choose Import or Select TWAIN_32 Source for example 3 Start EPSON TWAIN Pro Network If your host application is Presto PageManager for EPSON choose Acquire from the File menu When EPSON TWAIN Pro Network starts ...

Page 101: ...e scan the client computer must be running EPSON TWAIN Pro Network to connect to the scanner server Stopping a Scan in Progress You can stop a scan in progress from either the client computer or the scanner server To cancel a scan from the client computer click the Cancel button on the Progress bar To cancel from the scanner server click the Cancel button at the bottom of the EPSON Scan Server dia...

Page 102: ...fessional or Professional FireWire model of the EPSON Expression 1680 the transparency unit came with your scanner If you have the Professional FireWire model the IEEE 1394 FireWire scanner interface card was preinstalled in your scanner You can purchase supplies and accessories from the EPSON Store at 800 873 7766 or visit www epsonstore com U S sales only In Canada please call 800 873 7766 for d...

Page 103: ...ent mat see page 103 Unpacking the Transparency Unit Make sure that all of the following items are included in the transparency unit box If any items are missing or damaged contact your EPSON dealer or contact EPSON at 562 276 4382 in the United States or 905 709 3839 in Canada Keep all the packing materials so you can use them for storage when you are not scanning transparencies Use the transpare...

Page 104: ... labeled STOCK Before transporting the scanner remove the transparency unit reinstall the shipping screw in the hole labeled CLAMP and slide the transportation lock on the back of the scanner to the LOCK position See Transporting the Scanner on page 111 for instructions Installing the Transparency Unit Follow these steps to install the transparency unit on the scanner 1 Make sure the scanner is tu...

Page 105: ...es then tighten the screws with a coin 6 Gently close the transparency unit 7 Connect the transparency unit s connector to the OPTION connector at the back of the scanner Tighten the attached screws to secure the connector If you haven t connected the scanner to your computer continue with Connecting the Scanner to Your Computer on page 17 Then plug the scanner in and turn it on See Step by Step S...

Page 106: ... Store the reflective document mat in the transparency unit pocket when not in use Loading 35 mm film Follow these steps to load 35 mm positive or negative film 1 Place the 35 mm filmstrip guide on a flat surface and remove the cover from one of the strip holders 2 Insert a filmstrip in the holder face down and then replace the cover The glossy smooth side of the film should be facing down and the...

Page 107: ... ring try scanning the film upside down Loading 35 mm slides Follow these steps to load 35 mm slides 1 Load slides in the 35 mm slide holder as shown Make sure the glossy side of each slide faces down and the film emulsion layer faces up 2 Position the slide holder on the document table Align the slide holder with the ruled edges of the document table 3 Close the TPU and begin your scan If you re ...

Page 108: ...th side of the film faces down and the film emulsion layer faces up Then close the cover 3 Repeat steps 1 and 2 for all the film you scan 4 Place the 4 5 inch film guide on the document table Align it with the ruled edges of the document table as shown 5 Close the TPU and begin your scan If you re using EPSON TWAIN Pro to scan make sure to select TPU for Neg Film or TPU for Pos Film as your Docume...

Page 109: ...making sure the glossy smooth side of the film faces down and the film emulsion layer faces up Then close the cover 3 Repeat steps 1 and 2 for all the film you scan 4 Place the film guide on the document table Align it with the ruled edges of the document table as shown 5 Close the TPU and begin your scan If you re using EPSON TWAIN Pro to scan make sure to select TPU for Neg Film or TPU for Pos F...

Page 110: ...ansparency unit If there s a film guide on the document table remove it 2 Slide the mat into place and insert the tabs into the slots on the transparency unit 3 Place your document face down on the document table and close the transparency unit 4 Scan your document To remove the reflective document mat slide it up and out of the slots on the transparency unit 1680 book Page 103 Thursday March 1 20...

Page 111: ...age database Unpacking the Automatic Document Feeder When you unpack your automatic document feeder make sure you have the parts shown below If any items are missing or damaged contact your EPSON dealer or call EPSON at 562 276 4382 in the United States or 905 709 3839 in Canada Don t remove the protective foam block from beneath the ADF until you ve finished installing it screws automatic documen...

Page 112: ...off and unplug the cables 2 Remove your scanner s document cover by grasping the back of the cover as shown and easing the cover up 3 Make sure the document table is clean and dust free 4 Position the automatic document feeder s mounting slots over the two mounting screws located at the back of the scanner Slide the automatic document feeder forward slightly until the two holes in front of these s...

Page 113: ... s mounting hardware and then gently close the automatic document feeder 7 Attach the ADF s connector to the scanner s OPTION interface Secure the connection by tightening the connector screws 8 Close the ADF If you haven t connected the scanner to your computer continue with Connecting the Scanner to Your Computer on page 17 Remove the foam block after tightening the installation screws 1680 book...

Page 114: ...he automatic document feeder and place the first sheet of your document face down on the document table Always close the automatic document feeder before scanning and do not open it during scanning or an error will result Make sure to select Auto Document Feeder as your Document Source in EPSON TWAIN Pro If you want to scan only part of the document area load the first page of the document in the ...

Page 115: ... a built in IEEE 1394 FireWire port or an IEEE 1394 FireWire PCI card and must be running Macintosh OS 8 6 or later with FireWire Update 2 1 or later Your PC must have an OHCI compliant IEEE 1394 port or card and must be running a pre installed version of Windows 2000 or Windows Me This section explains how to install the IEEE 1394 FireWire scanner interface card in your scanner and how to connect...

Page 116: ...nents like the IEEE 1394 FireWire scanner interface card To discharge static electricity touch the scanner s metal frame before handling the card 2 Turn the card over so that the component side is facing down and insert it in the optional interface slot Push gently until the card is firmly seated in the expansion slot inside the optional interface slot 3 Tighten the retaining screws and reconnect ...

Page 117: ...110 Using Optional Equipment 1680 book Page 110 Thursday March 1 2001 4 28 PM ...

Page 118: ...ge 1 Make sure the transportation lock on the back of the scanner is in the UNLOCK position 2 Locate the SCSI ID rotary switch on the back of the scanner Align the dot on the rotary switch with the asterisk 3 If you re using a transparency unit or automatic document feeder remove it and replace the scanner cover 4 Turn on the scanner and wait until the carriage moves to the home position as shown ...

Page 119: ...r and hold it up until the carriage comes to rest in the home position Then slide the transportation lock to the LOCK position If you are using a transparency unit and it is switched on the scanner carriage will not move to the home position Remove the transparency unit first then perform the steps above See the next section for instructions locked position 1680 book Page 112 Thursday March 1 2001...

Page 120: ...ner prepare it for shipping as follows 1 Slowly raise the front of the transparency unit to allow the lamp assembly to slide to the back of the unit Wait until the lamp assembly comes to rest 2 Reinstall the transparency unit s shipping screw in the hole marked CLAMP 1680 book Page 113 Thursday March 1 2001 4 28 PM ...

Page 121: ...clean to prevent colored vertical lines from appearing in your scanned image Always unplug the scanner before cleaning Never use a harsh or abrasive brush or cleaning product to clean the document table A damaged glass surface can decrease the scanning quality Never use alcohol thinner or corrosive solvent to clean the scanner These chemicals can damage the scanner components as well as the case B...

Page 122: ...software manufacturers For additional troubleshooting tips see your electronic EPSON Expression 1680 Reference Guide Lights and Buttons The scanner has two indicator lights and two buttons N on O off F flashing Scanner indicator lights Light Light status Color Scanner status READY N Green Ready to scan images F flashing Green Scanning is in progress ERROR N F rapidly flashing O Red An error occurr...

Page 123: ...nt feeder is flat against the document table Check that your option is securely connected to the option ADF TPU connector at the back of the scanner Finally check that the automatic document feeder isn t out of paper and doesn t have a paper jam If these suggestions don t solve the problem call your EPSON dealer Scanner buttons Button Function P Operate Turns the scanner on and off a Start Automat...

Page 124: ...indows 98 Windows 2000 or Windows Me system The Windows operating system must be preinstalled on your system not upgraded There is no USB support for Windows 95 or Windows NT Make sure your scanner is on If you opened your host application before you turned on the scanner close your application and reopen it Also try restarting your system If your scanner is connected to a USB hub try connecting i...

Page 125: ...ee the instructions for uninstalling software beginning on page 127 You are unable to connect to the scanner when you click the Test button Check to make sure your cable is securely connected to both the scanner and computer Try a different cable If you have a USB connection be sure to use the USB cable that came with your scanner If you have a SCSI connection try using a high quality shielded SCS...

Page 126: ... feeder doesn t have a paper jam and isn t out of paper The scanner doesn t scan your image Make sure the scanner is ready to scan Wait until the READY light stops flashing and remains on Check your image source setting Make sure you selected EPSON TWAIN Pro or EPSON TWAIN Pro Network Run the scanner test to verify the scanner is communicating with your computer For Windows Me Windows 2000 or Wind...

Page 127: ...c document feeder see Fixing Paper Jams on page 108 Software Problems You can t start EPSON TWAIN Pro Make sure the scanner s READY light is on Check to make sure your cable is securely connected to both the scanner and computer Try a different cable If you have a USB connection be sure to use an EPSON USB cable If you have a SCSI connection try using a high quality shielded SCSI cable and be sure...

Page 128: ...If you have an older EPSON scanner and have a previous version of EPSON TWAIN installed uninstall the older version Windows or close any extensions like EPSON Scanner Monitor EPSON Scanner Monitor USB or EPSON Monitor 3 Macintosh If none of these solutions help uninstall your software then reinstall it See the instructions for uninstalling software beginning on page 127 You can t start EPSON TWAIN...

Page 129: ...anuals If you re scanning a large image or scanning at a high resolution your computer may not have enough memory to process the image Check your software installation Make sure that your software is correctly installed and set up If all else fails uninstall your software then reinstall it You can t select any of the following as your Document Source Auto Document Feeder TPU for Neg Film TPU for P...

Page 130: ...erfections will show up in your scan Make sure the document is placed flat against the document table Your scanned image is blurred or distorted Check the position and condition of your document Make sure the document is placed flat against the scanner s document table glass If only part of the image is blurred part of your document may be wrinkled or warped Make sure the document table glass is c...

Page 131: ...may be outside light interfering with the scan Your image scans at an angle Check the position of your document It may be placed at an angle on the document table Align it so the horizontal and vertical edges are carefully aligned with the scales on the top and side of the document table Straight lines in the image come out jagged Make sure the document is aligned with the scales on the top and si...

Page 132: ...tings in your scanner software If you re using a transparency unit or automatic document feeder make sure they re closed when scanning Moiré cross hatch patterns appear in the image when you perform halftone scanning Make the image size slightly smaller Use a transparent sheet between the document and the document table to defocus the image Reposition the document on the document table Try positio...

Page 133: ...original document is inserted face up If you ve selected OCR as your Image Type select None for the Black and White Option in the Image Type window Then adjust the Threshold setting in the Image Controls window Or try changing the Image Type from OCR to Line Art then adjust the Threshold setting You re using a transparency unit and the colors of your negative film preview look strange Make sure yo...

Page 134: ...ndows Control Panel and double click the Scanners and Cameras icon 2 On the Devices tab select EPSON Expression1680 3 Click the Remove button Then click OK to close the window 4 Restart your computer Windows 95 and Windows NT 1 Click Start then click Programs EPSON Scanner EPSON TWAIN Pro Uninstall 2 When you re finished restart your computer Macintosh 1 Insert the EPSON Expression 1680 Scanning T...

Page 135: ...m Windows 95 Windows 98 Windows 2000 Windows Me and Windows NT 1 Click Start then click Programs EPSON Network Scanner EPSON TWAIN Pro Network Uninstall 2 When you re finished restart your computer Macintosh 1 Insert the EPSON Expression 1680 Scanning Tools CD ROM in your drive 2 Double click the EPSON TWAIN Pro Network folder 3 Double click the EPSON TWAIN Pro NET Installer icon Select Remove her...

Page 136: ...a day through the electronic support services and automated telephone services listed in the following table Service Access World Wide Web From the Internet you can reach EPSON Support at http support epson com At this site you can download drivers and other files look at product documentation access troubleshooting information and receive technical advice through e mail Automated Telephone Servic...

Page 137: ...7766 for dealer referral If you need help using another manufacturer s software with an EPSON product see the documentation for that software for technical support information Software Technical Support Software Telephone Fax Online and E mail EPSON TWAIN Pro 562 276 4382 800 922 8911 800 922 8911 fax on demand system http support epson com ScanSoft TextBridge Pro 562 276 4382 800 922 8911 800 922...

Page 138: ... achieved using EPSON s Micro Step Drive technology Maximum interpolated resolution 12800 12800 dpi Speed 1600 dpi draft mode Color 9 2 msec line approx Grayscale 3 1 msec line approx Line Art 3 1 msec line approx Color separation RGB color filters on CCD Reading sequence Monochrome One pass scanning Color byte sequence One pass scanning R G B Color line sequence One pass scanning R G B Zoom 50 to...

Page 139: ...kg Electrical Input voltage range 100 to 120 VAC 90 to 132 VAC 220 to 240 VAC 198 to 264 VAC Rated frequency 50 to 60 Hz Rated current 100 to 120 VAC 0 8 A 220 to 240 VAC 0 4 A Power consumption Operating Approximately 30 W Approximately 50 W with TPU or ADF unit Standby Approximately 10 W Environmental Temperature Operating 41 to 95 F 5 to 35 C 50 to 89 F 10 to 32 C when using ADF Storage 13 to 1...

Page 140: ...394 1995 compatible Power class Power class code 100 No power supply from external sources Fitted with a repeat function with bus power Environmental Temperature Operating 41 to 95 F 5 to 35 C Standby 13 to 140 F 25 to 60 C Humidity without condensation Operating 10 to 80 Standby 10 to 85 Option Interface Connector Interface type For use with the optional automatic document feeder B813212 and tran...

Page 141: ...mental Temperature Operating 41 to 95 F 5 to 35 C Standby 14 to 140 F 20 to 60 C Humidity without condensation Operating 10 to 80 Standby 10 to 85 Automatic Document Feeder B813162 General Paper input output Load face up eject face down Paper quantity 30 pages 55 g m2 paper maximum total thickness under 0 24 inches 6 mm Reliability 100 000 sheets load eject MCBF Dimensions Width 12 2 inches 310 mm...

Page 142: ...ust make sure that TCP IP is enabled in your Extensions Manager Your computer has already been assigned an IP address if you are running a DHCP server so no further setup is necessary Obtain an IP address from your network administrator if you want to enter an address manually If you re running DHCP and WINS Windows only or if you have a DNS server Macintosh or Windows you may find it easier to us...

Page 143: ...ot running a DHCP server To check the protocol follow these steps 1 Open the Control Panel and double click the Network Dial Up Connections icon Then double click the Local Area Connection icon to display the screen to the right 2 Click the Properties button to display the Local Area Properties screen 3 Double click Internet Protocol TCP IP to display the Internet Protocol Properties screen 1680 b...

Page 144: ...ion screen Installing the TCP IP Protocol on Windows 95 and Windows 98 1 Open the Control Panel and double click the Network icon If necessary click the Configuration tab to display the window on the right 2 Check that TCP IP appears in the list of installed network components If it appears in the list go to Assigning an IP Address for Windows 95 and Windows 98 First Release on page 138 If you don...

Page 145: ...etwork is not connected to the Internet you can use an IP address in the following ranges 10 0 0 0 to 10 255 255 255 172 16 0 0 to 172 31 255 255 or 192 168 0 0 to 192 168 255 255 Use a different IP address for every computer on your network If you use IP addresses in the ranges listed above you may need to change them before you connect the network to the Internet Check with your network administ...

Page 146: ...cify an IP address and then enter the IP address and subnet mask If you re using a DHCP server on your network you can assign an IP address automatically by selecting Obtain an IP address automatically and clicking OK 3 Click OK to close the TCP IP Properties window then click OK again to close the Network window and have your IP address assignment take effect Make sure you share the IP address fo...

Page 147: ...ars in the list of network protocols If it appears in the list go to Assigning an IP Address on Windows NT 4 0 on page 141 If you don t see TCP IP Protocol in the list continue with the next step 3 Click the Add button You see the screen to the right 4 Select TCP IP Protocol and click OK 5 Continue with the instructions in the next section to assign an IP address 1680 book Page 140 Thursday March ...

Page 148: ...o the Internet Check with your network administrator If your network uses a DHCP server you don t need to obtain an IP address before beginning this procedure the server finds one for you Follow the steps below to assign the IP address to your computer 1 Select TCP IP Protocol in the Network Protocols list on the Protocols tab and then click the Properties button 2 Click the IP Address tab to disp...

Page 149: ...142 Installing the TCP IP Protocol 1680 book Page 142 Thursday March 1 2001 4 28 PM ...

Page 150: ...ucts for details Windows An IBM compatible PC with a Pentium or higher processor Microsoft Windows 95 Windows 98 Windows Me Windows 2000 or Windows NT 4 0 Service Pack 3 or higher SCSI or USB Windows 98 Windows Me and Windows 2000 only port FireWire IEEE 1394 preinstalled Windows 2000 or Windows Me and an OHCI compliant port or card 32MB RAM 64MB RAM recommended for all systems 50MB available hard...

Page 151: ...apter card with millions of colors recommended EPSON TWAIN Pro supports the Apple ColorSync 2 0 color management system and QuickTime These extensions are automatically installed during the EPSON TWAIN Pro installation Important Safety Instructions Read all of these instructions and save them for later reference Follow all warnings and instructions marked on the scanner Unplug the scanner before c...

Page 152: ... and 15 for Class B Personal Computers and Peripherals and or CPU Boards and Power Supplies used with Class B Personal Computers We EPSON AMERICA INC Located at MS 6 43 3840 Kilroy Airport Way Long Beach CA 90806 2469 Telephone 562 290 5254 Declare under sole responsibility that the product identified herein complies with 47CFR Part 2 and 15 of the FCC rules as a Class B digital device Each produc...

Page 153: ...ease the separation between the equipment and receiver Connect the equipment into an outlet on a circuit different from that to which the receiver is connected Consult the dealer or an experienced radio TV technician for help Warning The connection of a non shielded equipment interface cable to this equipment will invalidate the FCC Certification of this device and may cause interference levels wh...

Page 154: ...ove defective during the warranty period please bring the product securely packaged in its original container or an equivalent to your EPSON Dealer or EPSON Customer Care Center You are responsible for all costs shipping insurance travel time in getting the product to the service location EPSON will at its option repair or replace on an exchange basis the defective unit without charge for parts or...

Page 155: ...D ABOVE UNLESS STATED HEREIN ANY STATEMENTS OR REPRESENTATIONS MADE BY ANY OTHER PERSON OR FIRM ARE VOID IN THE EVENT THE REMEDIES ABOVE FAIL EPSON S ENTIRE LIABILITY SHALL BE LIMITED TO A REFUND OF THE PRICE PAID FOR THE EPSON PRODUCT COVERED BY THIS LIMITED WARRANTY EXCEPT AS PROVIDED IN THIS WRITTEN WARRANTY NEITHER EPSON AMERICA INC NOR ITS AFFILIATES SHALL BE LIABLE FOR ANY LOSS INCONVENIENCE...

Page 156: ...onnecting with FireWire 17 21 connecting with SCSI 17 19 to 20 connecting with USB 17 18 D Default scanner setting up Macintosh 52 Windows 2000 33 74 to 75 Windows 95 85 Windows 98 38 to 39 79 to 80 Windows Me 27 70 Windows NT 44 85 Dial SCSI ID 14 Document position 56 124 Documentation PDF manuals viewing 7 to 9 Reference Guide viewing 5 to 7 E Electrical requirements 132 EPSON help 129 to 130 St...

Page 157: ...automatic document feeder 107 single sheet 56 Lock transportation 15 111 to 112 M Macintosh connecting with FireWire 17 21 FireWire requirements 17 installing client software 89 to 90 installing the software 47 to 48 system requirements 144 USB requirements 18 Magazines scanning 55 Maintenance 111 to 114 Manuals PDF locating 8 to 9 Reference Guide viewing 5 to 7 MonacoEZcolor installing 46 51 user...

Page 158: ... 58 film 99 101 to 102 multiple images at once 54 network 91 to 94 photographs 55 slides 100 transparencies 55 57 99 to 102 using TWAIN Pro 57 to 58 with auto document feeder 57 Scanning color images 54 SCSI cable length 17 connecting the scanner 17 19 to 20 ID number 19 interface specifications 132 to 133 terminator switch 20 Service 129 to 130 Settings software 55 Setup problems 117 to 119 Slide...

Page 159: ...canner 119 to 120 setup 117 to 119 software 120 to 122 testing the scanner 16 testing the scanner connection 26 32 37 42 44 transparency unit 122 TWAIN Pro problems 120 to 122 scanning with 57 to 58 uninstalling 127 to 128 TWAIN Pro Network problems 120 to 122 starting 93 uninstalling 128 to 129 U Uninstalling software 127 to 129 Unlocking the scanner 15 Unpacking automatic document feeder 104 sca...

Reviews: