


1. Installation and Getting Started
Connect and Power on a Lecture Recorder Device
Install Guide
Page 15
Note:
Passive VGA or DVI splitters reduce the quality of the
video signal. Good quality active splitters, (available from
Epiphan) do not usually affect signal quality. You should use a
splitter with the highest available bandwidth.
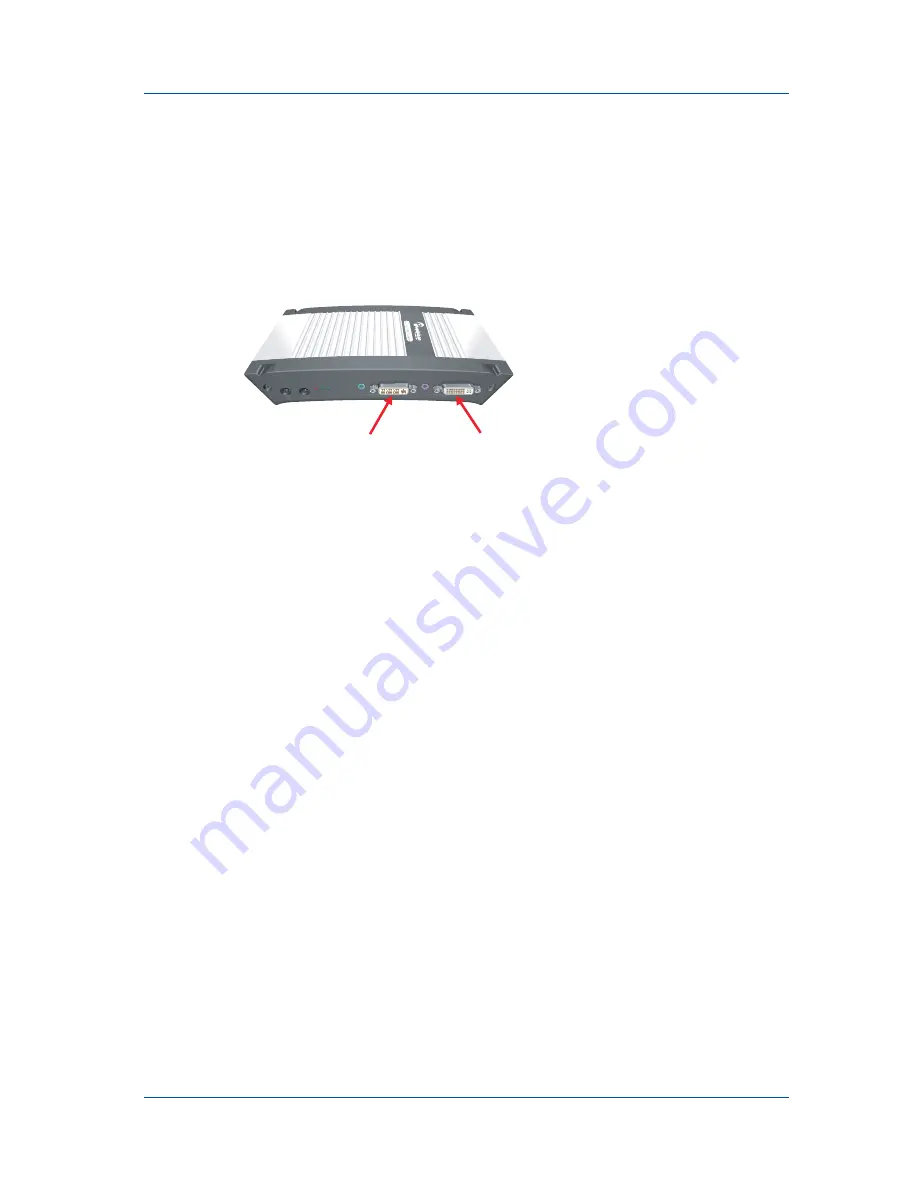
Figure 9: Location of Lecture Recorder INPUT and OUTPUT
ports
2
You can also optionally connect a VGA or DVI monitor or
projector to the Lecture Recorder OUTPUT port to monitor
video as it is recorded.
If you are connecting a VGA monitor, you require a DVI to
VGA converter. You can also use an active splitter to split this
VGA or DVI signal.
3
If you plan to record audio, connect an analog audio source to
the Lecture Recorder INPUT audio port.
You can also monitor the audio input by connecting an audio
amplifier to the OUTPUT audio port.
4
Use a RJ-45 Ethernet cable to connect the Lecture Recorder
Eth 1 port to your 10/100/1000 Base-T Ethernet network.
For best performance, connect the Lecture Recorder device to
a 1000 Base-T Ethernet. The network must be running the
TCP/IP protocol. Ideally the Lecture Recorder device should
be able to connect to the Internet.
5
Connect the power adapter to the Lecture Recorder device.
INPUT
OUTPUT


