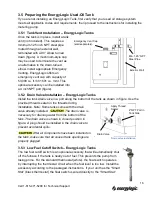
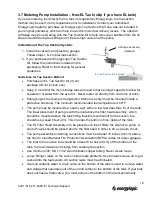
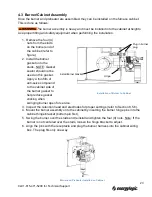
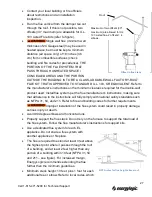

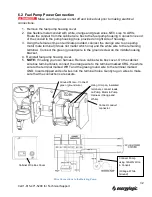


5.3 Draft Gauge Installation (included with some packages)
The draft gauge is a precision inclined-vertical manometer. Permanently installing the
EnergyLogic draft gauge allows you to monitor the draft during operation.
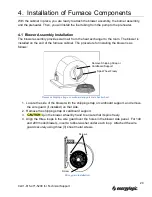
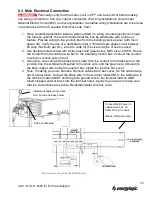
Installation (refer to figures)
1. Mount and level the draft gauge to the furnace cabinet using the screws provided with
the gauge (refer to figure). Note: There is a level built into the gauge.
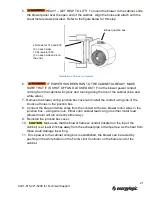
2. Turn Zero Adjustment Knob clockwise until it stops, then turn counterclockwise (3) full
turns to allow for future adjustment.
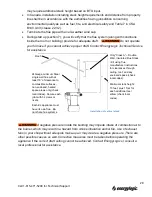
3. Remove gauge Fill Plug and open red fluid bottle provided with gauge.
4. Pour small amounts of fluid (typically 1/4 of the bottle is used) into “fill” opening until it
reaches zero on the scale. Replace the fill plug. Minor adjustments can be made by
adjusting the knob to zero the gauge.
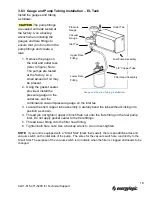
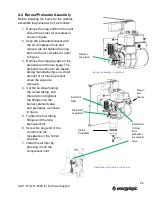
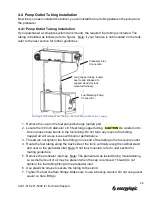
5. If a double flexible tube was included with the gauge, separate the tubes, as only one is
needed. Attach the one end of a tube to the draft gauge port labeled “Low” at top of the
gauge. Note: By doing this, the negative readings will now read positive on the gauge
scale. This is to take advantage of the larger scale on the positive side.
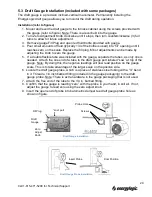
6. Locate the draft gauge probe, which is a piece of stainless steel tubing with a “U” bend
in it. Thread a 1/4 inch barbed fitting (included in the gauge packaging) to the draft
gauge probe. Note: There is extra hardware in the gauge packaging that is not used.
7. Attach the free end of the tube to the 1/4 in. barbed fitting.
8. Confirm that the gauge is reading “zero” with the probe in your hand, in still air. If not,
adjust the gauge to read zero using the zero adjust knob.
9. Insert the open end of probe into barometric damper tee draft gauge probe hole as
shown in figure.
Probe Hole
Screws
“Low” port
Fill Plug
Draft
Gauge
Zero
Adjust
Knob
Draft Gauge Installation
Insert Probe
Final Position
Draft Gauge Probe Installation
29
Call 1-615-471-5290 for Technical Support
Summary of Contents for EL-140H
Page 2: ......
Page 51: ...45 Call 1 615 471 5290 for Technical Support ...
Page 90: ...10 2 Carlin 50200E Primary Control 84 Call 1 615 471 5290 for Technical Support ...
Page 91: ...85 Call 1 615 471 5290 for Technical Support ...
Page 93: ...87 Call 1 615 471 5290 for Technical Support ...
Page 94: ...88 Call 1 615 471 5290 for Technical Support ...
Page 95: ...89 Call 1 615 471 5290 for Technical Support ...