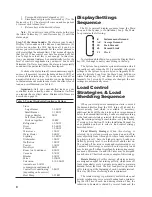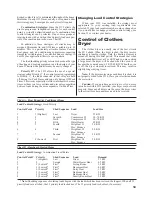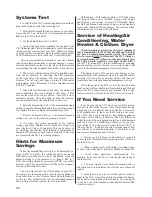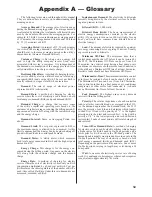
8
Display Brightness Key (10):
This key is used to
adjust the display brightness and is used in conjunction
with the Decrease key (7) or Increase key (8) to set the
display brightness for the best visibility under existing
lighting conditions.
Alarm Volume Key (11):
This key is used with the
Decrease key (7) or Increase key (8) to control the alarm
volume and allows you to adjust the volume to high,
medium, low or off to meet various sound conditions.
Display Mode Key (12):
This key allows you to
select the display mode desired in the Mode display and
KW Demand/Time display windows. Each press of the key
rotates between Instantaneous, Average or Peak demand
limit and Clock modes.
Reset Peak Key (13):
When in Peak demand mode,
this key allows you to reset the highest average (peak)
demand recorded since the last reset. This can be reset at
any time and is for owner information only.
Control Panel Instructions (14):
These instructions,
printed on the Control/Display Unit, enable you to make
all appropriate demand control and time setting changes.
Circuit Assignments (15):
This space is used to record
the loads controlled by each circuit of the 9312 and is fi lled
in using the information supplied by the installer or dealer
in the back of this manual.
Basic Operation
Your 9312 has been designed for ease of operation and
to provide effi cient energy use. Please carefully read the
following instructions concerning basic system operation
as they will enable you to maximize effi cient energy use
and minimize your electric bill.
Step 1, Turning On the Unit:
Your 9312 should already
have been turned on by the installing electrician. If not,
there should be a circuit breaker in your circuit breaker
panel labeled “9312” or “Energy Sentry”. If this circuit
breaker is off, it should be turned on. If the circuit breaker
cannot be located, call the installing electrician.
Step 2, Setting Your Demand Limit:
Please refer to the
Control/Display Unit pictured in Figure 2 for this and all
succeeding steps. To set demand limit:
1. Press
and hold the Display key (12) until “dL”
shows in the Mode Display (1).
2. Press
and hold the Demand Limit key (9).
3. Simultaneously
press the Decrease key (7) or the
Increase key (8) until the desired demand limit is reached.
The numbers in the KW Demand/Time Display (2) will
count up or down as you push these buttons.
4. Release keys at the desired setting.
There is no single On-Peak demand setting that will
be suitable for everyone. The level of demand required to
satisfy comfort, economy, and convenience will vary with
the uniqueness of each house, its occupants’ energy use,
and the utility’s averaging period.
To arrive at the best demand setting for you, requires
some trial and error (see Table 2). The 9312 has a demand
limit setting range of 2.0 to 49.5 KW in .5 KW increments.
A good starting demand limit is 5 KW. If you need more
energy to maintain comfort, increase the KW level by only
.5 KW. If, after an hour or two, this is not enough, increase
it by .5 KW again until you are comfortable. Don’t expect
instantaneous results. Thermal recovery of a home may
take several hours. However, you can help by turning off
all non-critical loads in your home. Once the demand limit
is increased, you will be billed a higher rate.
Note:
Remember that once the meter registers peak
demand, it will not come down until it is reset to zero each
month by the meter reader. (See “Hints for Maximum
Savings” on page 11).
Because your are billed under a TOU Demand Rate,
you should change the KW Demand Limit on your Control/
Display Unit once a month or seasonally as appropriate.
Typical demand limit ranges, by month, for an average
all-electric home are listed in Table 2.
Table 2: Typical KW Values by Month
Summer
Winter
Month
(A/C)
(Heating)
January
4-6 KW
7-10 KW
February
4-6
7-10
March
5-7
6-9
April
5-8
5-7
May
6-10
5-6
June
6-10
5-6
July
6-10 KW
5-6 KW
August
6-10
5-6
September 6-8
5-7
October
5-7
6-8
November 4-6
7-9
December 4-6
7-10
Step 3, Monitoring Your Actual Demand
: To select
Instantaneous (id), Average (Ad) or Peak demand (Pd):
1. Press
Display key (12) once for each display
change desired.
2. The
Mode Display (1) will show which demand
mode is selected: Instantaneous demand (id), Average
demand (Ad), or Peak demand (Pd). As you scroll through
this Main Loop, you will also see the Demand Limit (dL)
and Clock (CL) displays.
Step 4, Reset Peak:
This step is optional depending upon
the time interval for which a record of your highest average
(peak) is desired. To reset peak:
1. Press
the Display key until the Mode Display
reads “Pd” for Peak demand (See Step 3).
2. Press
and release the Peak Reset key (13). A zero
will briefl y be displayed in the KW Demand/Time Display
(2). This value will then jump to the current average which
becomes your new peak. As the average increases, the
peak demand will also increase and be recorded.
Step 5, Adjusting Display Brightness:
Display bright-
ness may vary with existing lighting conditions. Set as
follows:
1. Press
and hold the Display Bright key (10).
2. Simultaneously
press the Decrease key (7) or
the Increase key (8) until the desired intensity is reached.
3. Release keys at the desired display intensity.
Step 6, Adjusting Alarm Volume:
Alarm volume may be
varied depending upon the desired alarm level as follows:


