U
SING THE
R
OBOT
T
HE
S
ETTINGS
M
ENU
29
4)
Press .
5)
Highlight
Edit
.
6)
Press .
7)
Use the arrow keys to highlight
Follow sched.
then press
to uncheck the button.
7.4.2 Cutting Heads
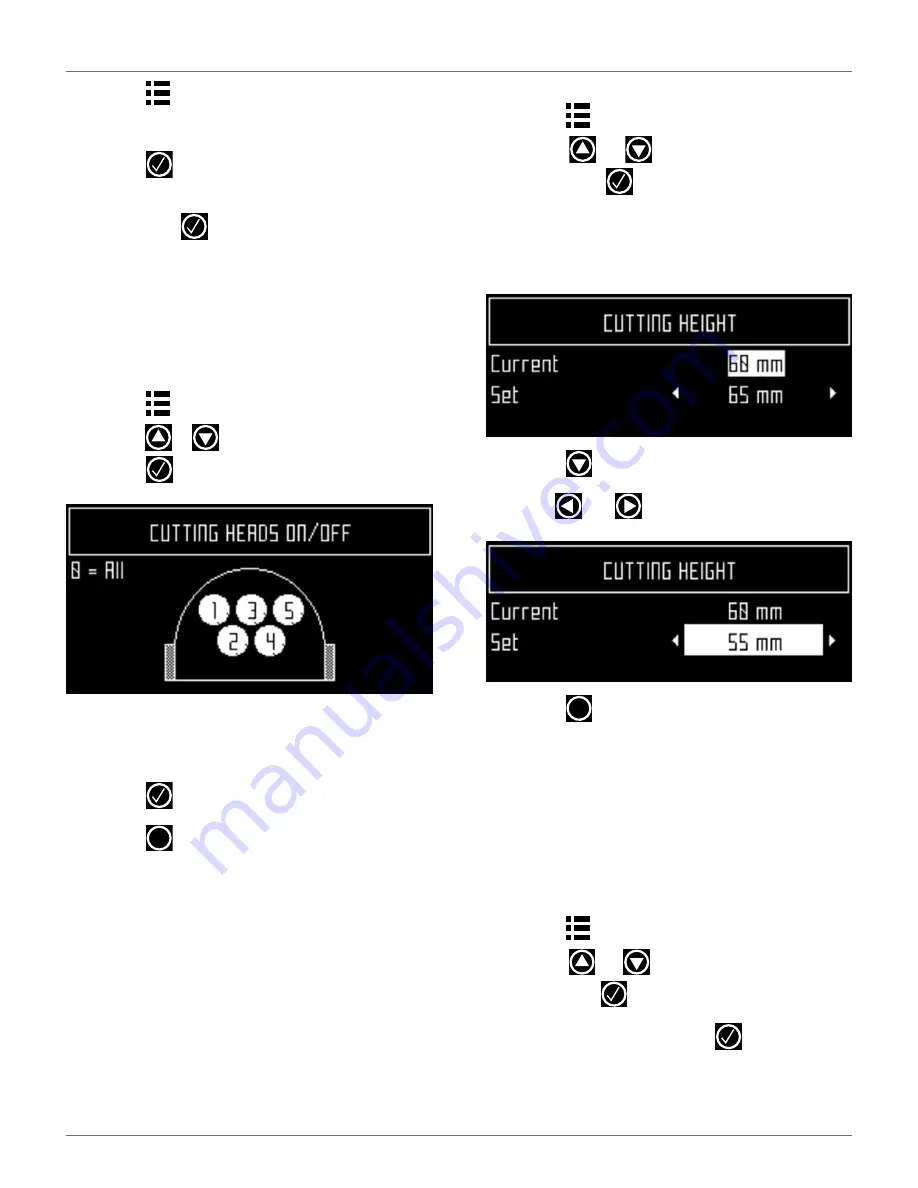
The robot is supplied with five cutting heads which,
under normal conditions, should all be used. When
there is a problem with a cutting head, use this menu
to disable it.
To enable or disable specific cutting heads:
1)
Press .
2)
Press
or
to
highlight
Cutting heads
, then
press
. The following screen appears:
3)
Press the number key(s) that corresponds to the
cutting head(s) to enable or disable it. NOTE:
Press 0 on the numeric keypad to select all
cutting heads.
4)
Press .
5)
Press
to return to the main menu.
To enable a disabled cutting head, repeat the proce-
dure above, selecting the disabled head.
7.4.3 Cutting Height
Use this command to set the height of the blades.
•
lowest cutting height is 0.8 in. (20.0 mm)
•
highest cutting height is 4.7 in. (120.0 mm)
The cutting height is adjusted in 0.20 in. (5.0 mm) incre-
ments.
To set the cutting height:
1)
Press .
2)
Press
or
to
highlight
Cutting height
,
then press
. The following screen appears,
which shows the current cutting height. NOTE: If
this value is negative, a reset of the parameters
has taken place and the cutting height needs to
be re-calibrated.
3)
Press
to highlight the
Set
value.
4)
Use
and
to scroll to the required value.
5)
Press
to return to the main menu.
7.4.4 System Locking
Use this command to lock the use of the robot. The
command is useful if the field area is in use during the
time when the robot is scheduled to be mowing. The
robot will remain locked until the system is unlocked.
NOTE: It is also possible to create PIN code which must
be entered before specific commands can be issued.
To lock the system:
1)
Press .
2)
Press
or
to highlight
System locking
,
then press
.
3)
Highlight
OK
, then press
. The following
screen will appear. Enter the robot’s PIN code to
access the menu again.
X
X
DRAFT
05-23-2019


