


4- & 8-Channel Digital Video Recorder
71
Highlighting the
+
and pressing the button allows you to add a new set of search parameter.
Set up the desired search parameter. Refer to the
Appendix – Text-In Search Examples
for further
information on setting up search parameters. The column can be used to delete a set of search
parameter or entire sets of search parameters.
Highlight
Case Sensitive
and press the button. This will toggle between On and Off. When
this feature is On, the search will find only those text strings in which the case matches.
Highlight
Load
and press the button to load saved search option settings. Select the desired
search option settings.
Highlight
Save
and press the button to save the current search option settings. A virtual
keyboard appears that you can use to enter the search option name.
Once you set your desired search conditions, highlight
Search
and press the button to display
the search results in the
Text-In
Search
screen. Selecting
Cancel
exits the screen without saving
the changes.
Clip-Copy
Video clips can be copied on an external USB hard disk or flash drive. The copied video clips
can be viewed on computers running Microsoft Windows 98, ME, 2000, XP or Vista. Refer to
the
Appendix – USB Hard Disk Drive Preparation
for information on preparing the external drive
for clip copy.
Selecting
A-B Clip-Copy
from the Export menu in the Search menu or pressing the
BACK UP
button on the remote control during playback will set the starting point of the video to be clip
copied, and the icon displays at the bottom-left corner of the screen. Selecting
A-B Clip-Copy
again from the Export menu in the Search menu or pressing the
BACK UP
button again will set
the ending point of the video to be clip copied by displaying the
Clip-Copy
screen.
Select
Clip-Copy
from the Export menu in the Search menu, press the
BACK UP
button on the
remote control while in the Live Monitoring mode or press and hold the
BACK UP
button for more
than three seconds while in the Search mode, and the
Clip-Copy
screen appears to allow clip copy
setup.
Highlight the box beside
Channels
and press the button. You can select the cameras that you
would like to include in your video clip.
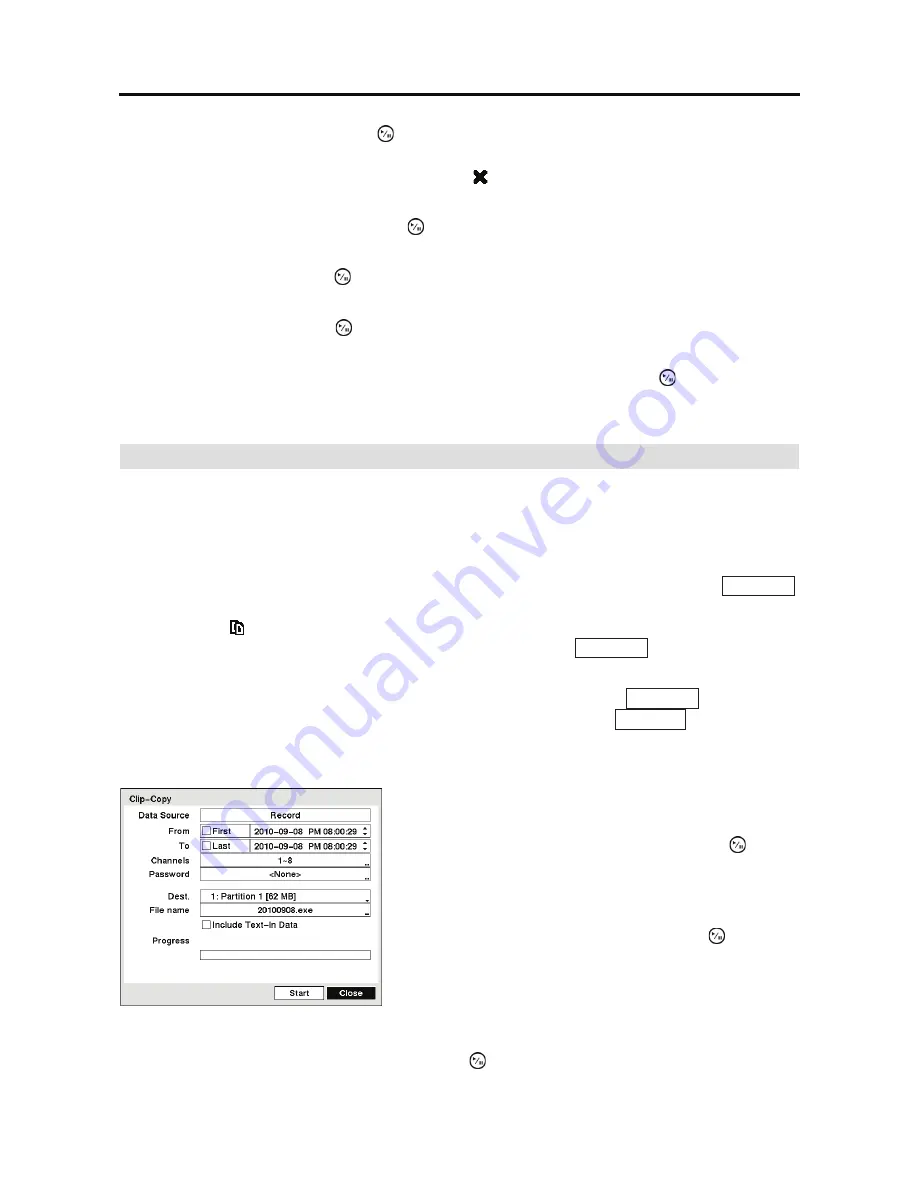
Figure 69 Clip-Copy screen.
You can search video from the first to last recorded
images, or you can set the start and stop times and dates.
Highlight the box beside
From
and press the (Play/
Pause) button to toggle between On and Off. When set
to Off, you can enter a specific Date and Time. When
set to On, the search will be from the first recorded image.
Highlight the box beside
To
and press the button to
toggle between On and Off. When set to Off, you can
enter a specific Date and Time. When set to On, the
search will be from the last recorded image.
Summary of Contents for E-DVR-104
Page 1: ......
Page 2: ......
Page 62: ...User s Manual 54 ...


