background image

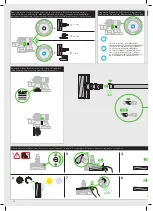
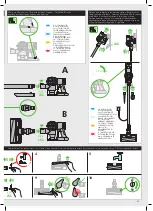
BLOCKAGES – THERmAL CUT-OUT

• 

This appliance is fitted with an automatically resetting thermal cut-out.

• 

Large items may block the tools or nozzle. If any part becomes blocked the 

appliance may overheat and automatically cut-out.

• 

Leave to cool down for 1-2 hours before checking the filter or for blockages.

• 

Ensure the appliance is disconnected from the charger before looking for 

blockages. Failure to do so could result in personal injury.

• 

Clear any blockage before restarting.

• 

Refit all parts securely before using.

• 

Clearing blockages is not covered by your guarantee.

CHARGING AND STORING

• 

This appliance will switch ‘OFF’ if the battery temperature is below 3°C 

(37.4°F). This is designed to protect the motor and battery. Do not charge the 

appliance and then move it to an area with a temperature below 3°C (37.4°F) 

for storage purposes.

• 

To help prolong battery life, avoid recharging immediately after a full discharge. 

Allow to cool for a few minutes.

• 

Avoid using the appliance with the battery flush to a surface. This will help it run 

cooler and prolong battery run time and life.

DIAGNOSTICS – BATTERy

When in use, trigger pressed:

When charging battery:

BATTERy SAFETy INSTRUCTIONS

• 

If the battery needs replacing please contact the Dyson Helpline.

• 

Use only Dyson chargers for charging this Dyson appliance.

• 

The battery is a sealed unit and under normal circumstances poses no safety 

concerns. In the unlikely event that liquid leaks from the battery do not touch the 

liquid and observe the following precautions:


– Skin contact – can cause irritation. Wash with soap and water.


– Inhalation – can cause respiratory irritation. Expose to fresh air and seek 

medical advice.


– Eye contact – can cause irritation. Immediately flush eyes thoroughly with 

water for at least 15 minutes. Seek medical attention.


– Disposal – wear gloves to handle the battery and dispose of immediately, 

following local ordinances or regulations.

CAUTION

The battery used in this device may present a risk of fire or chemical burn if 

mistreated. Do not disassemble, short contacts, heat above 60°C (140°F), or 

incinerate. Keep away from children. Do not disassemble and do not dispose of 

in fire.

DISPOSAL INFORmATION

• 

Dyson products are made from high grade recyclable materials. Recycle 

where possible.

• 

The battery should be removed from the product before disposal.

• 

Dispose of or recycle the battery in accordance with local ordinances 

or regulations.

• 

This marking indicates that this product should not be disposed with other 

household wastes throughout the EU. To prevent possible harm to the 

environment or human health from uncontrolled waste disposal, recycle it 

responsibly to promote the sustainable reuse of material resources. To return 

your used device, please use the return and collection systems or contact 

the retailer where the product was purchased. They can take this product for 

environmentally safe recycling.

EN

GUARANTEE TERmS AND CONDITIONS

DySON CUSTOmER CARE

THANK yOU FOR CHOOSING TO BUy A DySON APPLIANCE

After registering your free 2 year guarantee, your Dyson appliance will be 

covered for parts and labour for 2 years from the date of purchase, subject 

to the terms of the guarantee. If you have any questions about your Dyson 

appliance, call the Dyson Helpline with your serial number and details of where/

when you bought the appliance.  

Most questions can be solved over the phone by one of our trained Dyson 

Helpline staff.

Alternatively, visit www.dyson.com for online help, general tips and useful 

information about Dyson.

Your serial number can be found on your rating plate which is on the main body 

of the appliance behind the clear bin.

If your Dyson appliance needs a service, call the Dyson Helpline so we can 

discuss the available options. If your Dyson appliance is under guarantee, and 

the repair is covered, it will be repaired at no cost.

PLEASE REGISTER AS A DySON 

APPLIANCE OWNER

To help us ensure you receive prompt and efficient service, please register as a 

Dyson appliance owner. There are two ways to do this:

• 

Online at www.dyson.com

• 

Telephone the Dyson Helpline.

This will confirm ownership of your Dyson appliance in the event of an insurance 

loss, and enable us to contact you if necessary.

LImITED 2 yEAR GUARANTEE

TERmS AND CONDITIONS OF THE DySON 2 yEAR LImITED GUARANTEE

WHAT IS COVERED

• 

The repair or replacement of your Dyson appliance (at Dyson’s discretion) if it 

is found to be defective due to faulty materials, workmanship or function within 

2 years of purchase or delivery (if any part is no longer available or out of 

manufacture Dyson will replace it with a functional replacement part).

• 

Where this machine is sold outside of the EU, this warranty will only be valid if 

the appliance is used in the country in which it was sold.

• 

Where this machine is sold within the EU, this warranty will only be valid (i) if 

the appliance is used in the country in which it was sold or (ii) if the appliance is 

used in Austria, Belgium, France, Germany, Ireland, Italy, Netherlands, Spain or 

the United Kingdom and the same model as this appliance is sold at the same 

voltage rating in the relevant country.

WHAT IS NOT COVERED

Dyson does not guarantee the repair or replacement of a product where a 

defect is the result of:

• 

Accidental damage, faults caused by negligent use or care, misuse, neglect, 

careless operation or handling of the appliance which is not in accordance with 

the Dyson Operating Manual.

• 

Use of the appliance for anything other than normal domestic 

household purposes.

• 

Use of parts not assembled or installed in accordance with the instructions 

of Dyson.

• 

Use of parts and accessories which are not genuine Dyson components.

• 

Faulty installation (except where installed by Dyson).

• 

Repairs or alterations carried out by parties other than Dyson or its 

authorised agents.

• 

Blockages – please refer to the Dyson Operating Manual for details of how to 

look for and clear blockages.

• 

Normal wear and tear (e.g. fuse, brush bar etc.).

• 

Use of this appliance on rubble, ash, plaster.

• 

Reduction in battery discharge time due to battery age or use (where 

applicable).

If you are in any doubt as to what is covered by your guarantee, please 

contact Dyson.

SUmmARy OF COVER

• 

The guarantee becomes effective at the date of purchase (or the date of delivery 

if this is later).

• 

You must provide proof of (both the original and any subsequent) delivery/

purchase before any work can be carried out on your Dyson appliance. Without 

this proof, any work carried out will be chargeable. Keep your receipt or 

delivery note.

• 

All work will be carried out by Dyson or its authorised agents.

• 

Any parts which are replaced by Dyson will become the property of Dyson.

• 

The repair or replacement of your Dyson appliance under guarantee will not 

extend the period of guarantee.

• 

The guarantee provides benefits which are additional to and do not affect your 

statutory rights as a consumer.

ABOUT yOUR PRIVACy

• 

Your information will be held by Dyson and its agents for promotional, 

marketing and servicing purposes.

• 

If your personal details change, if you change your mind about any of your 

marketing preferences or if you have any queries about how we use your 

information, please contact the Dyson Helpline.

• 

For more information on how we protect your privacy, please see our privacy 

policy on the Dyson website.

FR/BE/CH

UTILISATION DE VOTRE APPAREIL DySON

VEUILLEZ LIRE ATTENTIVEmENT LES CONSIGNES DE SÉCURITÉ 
ImPORTANTES DE CE mANUEL DySON AVANT DE CONTINUER.

FONCTIONNEmENT

• 

Ne pas utiliser à l’extérieur ni sur des surfaces humides, ne pas aspirer d’eau ou 

d’autres liquides – risque de choc électrique.

• 

Vérifier que l’appareil est en position verticale pendant son utilisation. De la 

poussière et des débris peuvent s’échapper de l’appareil s’il est retourné. 

• 

Placer l’appareil hors tension pour vérifier l’absence d’obstructions.

• 

Destiné uniquement à l’intérieur de la maison et de la voiture. Ne pas utiliser 

pas l’appareil lorsque la voiture est en mouvement ou lorsque vous conduisez.

Solid blue: 'ON'.

Flashing blue: No power, charge battery.

Flashing amber: No power, temporary fault 

(e.g. too hot/cold).

Flashing red: Fault (contact Dyson Helpline).

Solid blue: Charging.

Lights off: Charging complete.

Solid amber: Not charging, temporary fault 

(e.g. too hot/cold).

Flashing red: Fault (contact Dyson Helpline).

17

Summary of Contents for SV06 205983-01

Page 1: ...c h h e u t e I h r e G a r a n ti e R e g i s tr e e r u w g a r a n ti e v a n d a a g R e g i s tr e l a g a r a n t a h o y m i s m o R e g i s tri o g g i s t e s s o l a g a r a n z i a R e g i...

Page 2: ...AS POR ELEGIR UN APARATO DYSON Despu s de registrar la garant a su aparato Dyson estar cubierto en piezas y mano de obra durante 2 a os desde la fecha de compra sujeto a los t rminos de la garant a Si...

Page 3: ...n u pour tre utilis par de jeunes enfants ou des personnes handicap es physiques sensorielles ou mentales ou qui manquent d exp rience ou de connaissances moins d tre supervis s ou de recevoir des ins...

Page 4: ...AUSHALT GEEIGNET NL BE BELANGRIJKE VEILIGHEIDSINSTRUCTIES LEES ALLE INSTRUCTIES EN WAARSCHUWINGEN IN DEZE GEBRUIKSHANDLEIDING EN OP HET APPARAAT ALVORENS DIT TE GEBRUIKEN Bij het gebruik van elektrisc...

Page 5: ...RIPORTATE ALL INTERNO DEL PRESENTE mANUALE E SULL APPARECCHIO Quando utilizzate un apparecchio elettrico dovete attenervi sempre alle precauzioni fondamentali tra cui le seguenti ATTENZIONE Gli avvis...

Page 6: ...e apparater skal man altid tage visse sikkerhedsforbehold ADVARSEL Disse advarsler g lder for selve apparatet og hvor det er relevant alle redskaber tilbeh r opladere eller netadaptere FOR AT mINDSKE...

Page 7: ...kulmia vasten Sijoita virtajohto sivuun kulkuteist siten ettei sen p lle astuta eik siihen kompastuta l ved imuria sen virtajohdon yli 10 l irrota pistotulppaa vet m ll virtajohdosta Irrota laite s h...

Page 8: ...INGER F R DU TAR I BRUK DETTE PRODUKTET m DU LESE ALLE INSTRUKSJONER OG ADVARSLER I DENNE H NDBOKEN OG P SELVE PRODUKTET Ved bruk av elektriske apparater m du f lge noen grunnleggende forholdsregler d...

Page 9: ...ODAS AS INSTRU ES E mARCAS DE ATEN O DESTE mANUAL E NO APARELHO Quando utilizar um aparelho el ctrico devem se sempre seguir umas precau es b sicas incluindo as seguintes AVISO Estes avisos dizem resp...

Page 10: ...dden 10 Dra inte i sj lva sladden n r du ska dra ur kontakten H ll i kontakten f r att dra ut den inte i sladden Anv ndning av en f rl ngningssladd rekommenderas inte 11 Anv nd den inte f r att suga u...

Page 11: ...ZI KULLANmADAN NCE BU KILAVUZDAK VE C HAZIN ZER NDEK T m TAL mATLARI VE UyARI ARETLER N OKUyUN Elektrikli bir cihazi kullanirken a a idakiler de dahil temel nlemlere daima uyulmalidir UyARI Bu uyar la...

Page 12: ...uche Diagnostiek Diagn stico Diagnostica Diagnostika Power mode and run time Mode de puissance et autonomie Betriebsmodus und Laufzeit Inschakelmodus en gebruikstijd Modo de potencia y tiempo de funci...

Page 13: ...ES DYSON GER TS Zie UW DYSON APPARAAT GEBRUIKEN Ver C MO UTILIZAR SU APARATO DYSON Vedere USO DELL APPARECCHIO DYSON DYSON Glejte UPORABA VA E NAPRAVE DYSON Charging Chargement Ger t wird geladen Opla...

Page 14: ...ren op verstoppingen Eliminaci n de obstrucciones Ricerca delle ostruzioni Iskanje blokad Clearing brush bar obstructions Enlever les obstructions dans la brosse Reinigung der B rstwalze Borstelversto...

Page 15: ...ery month Laver le filtre l eau froide une fois par mois minimum Waschen Sie den Filter mindestens einmal im monat mit kaltem Wasser aus Was het filter ten minste eenmaal per maand met koud water Lave...

Page 16: ...E CLEAR BIN Ensure the appliance is disconnected from the charger before removing the clear bin Be careful not to pull the ON trigger Remove the wand and floor tool Push the red button by the clear bi...

Page 17: ...yson com Telephone the Dyson Helpline This will confirm ownership of your Dyson appliance in the event of an insurance loss and enable us to contact you if necessary LImITED 2 yEAR GUARANTEE TERmS AND...

Page 18: ...UR TRANSPARENT V rifiez que l appareil est d branch du chargeur avant de retirer le collecteur transparent Veillez ne pas tirer sur la g chette ON Retirez l accessoire tube et brosse Appuyez sur le bo...

Page 19: ...ENREGISTREZ VOUS COmmE PROPRIETAIRE D UN DySON mERCI D AVOIR CHOISI UN APPAREIL DySON Pour nous aider vous garantir un service rapide et efficace veuillez vous enregistrer comme propri taire Dyson Vou...

Page 20: ...Verwendung des Ger ts nicht zu stark auf die D se damit diese nicht besch digt wird Bleiben Sie auf empfindlichen B den mit der Bodend se nicht auf der gleichen Stelle Bei gewachsten B den kann der E...

Page 21: ...takt kann zu einer Reizung f hren Sp len Sie die Augen sofort mindestens 15 Minuten lang mit Wasser aus Konsultieren Sie einen Arzt Entsorgung tragen Sie beim Umgang mit dem Akku Schutzhandschuhe und...

Page 22: ...of reparatiewerk uit anders dan hetgeen in deze Dyson gebruikshandleiding wordt toegelicht of door de Dyson Helpdesk wordt geadviseerd Gebruik uitsluitend onderdelen die door Dyson zijn aanbevolen Als...

Page 23: ...voordat u het apparaat in gebruik neemt Het verwijderen van verstoppingen wordt niet gedekt door de garantie OPLADEN EN OPBERGEN Dit apparaat zal automatisch worden uitgeschakeld als de temperatuur va...

Page 24: ...do el disparador y presione el bot n M xima potencia Se encender el bot n M xima potencia Para desactivar el modo M xima potencia mantenga presionado el disparador y presione el bot n M xima potencia...

Page 25: ...jetos afilados cuando intente eliminar las obstrucciones Para acceder a los bloqueos del cepillo retire la placa base use una moneda para desajustar el tornillo marcado con un candado Si no es posible...

Page 26: ...INSTALLAZIONE DELLA DOCKING STATION Utilizzare i componenti di montaggio appropriati per il tipo di parete e assicurare il corretto montaggio della docking station Verificare che dietro l area di mon...

Page 27: ...che possono creare lievi irritazioni alla pelle Lavatevi le mani dopo aver maneggiato le setole Rimontare tutte le parti dell apparecchio prima dell uso La rimozione delle ostruzioni non coperta dall...

Page 28: ...he non appartenenti alla Comunit Europea i Dati a soggetti terzi che rientrino in una delle seguenti categorie altre societ del gruppo Dyson agenti Dyson e ogni terzo che agisca in nome e per conto di...

Page 29: ...bu Pokud p strojem vys v te jemn prach nebo pou v te li jej p ev n v re imu Vysok konstantn s n m e b t zapot eb pr t filtr ast ji Omyjte filtr ve studen vod Oplachujte vodou vn j st filtru dokud z n...

Page 30: ...Anvend kun dele som er anbefalet af Dyson Hvis du ikke g r dette kan det ugyldigg re din garanti Opbevar apparatet indend rs Det m ikke anvendes eller opbevares under 3 C Kontroll r at apparatet har...

Page 31: ...SEL Det batteri der anvendes i denne maskine kan ved forkert brug udg re en brandfare eller fare for tsning M ikke skilles ad kortsluttes opvarmes over 60 C eller forbr ndes Opbevares utilg ngeligt fo...

Page 32: ...staminen Ole erityisen varovainen imuroidessasi portaita l aseta laitetta tuolille p yd lle tms l paina suulaketta liikaa k yt n aikana ettei se vaurioidu l j t laitteen suulaketta yhteen kohtaan help...

Page 33: ...vit se v litt m sti paikallisten m r ysten mukaisesti HUOm T ss imurissa k ytetty akku voi aiheuttaa tulipalon tai kemikaalivuodon vaaran jos sit k sitell n v rin l pura akkua aiheuta oikosulkua tai...

Page 34: ...34 Dyson DySON B Dyson Dyson 3 C 37 4 F ON ON ON 24 ON 24 ON ON...

Page 35: ...n 15 140 F 60 C Dyso n GR Dyso n Dyso n Dyso n Dyso n DySON DySON Dyso n Dyso n 800 111 3500 Dyso n 2 DySON Dyso n 2 Dyso n i ii TI Dyso n Dyso n Dyso n Dyso n Dyso n Dyso n Dyso n o Dyso n 800 111 35...

Page 36: ...azonnal r tse ki a tart lyt nem szabad t lt lteni Az tl tsz portart ly ki r t se el tt vegye le a k sz l ket a t lt r l gyeljen nehogy v letlen l bekapcsolja a k sz l ket Az tl tsz portart ly ki r t s...

Page 37: ...en jrahasznos that anyagokb l k sz lnek K rj k k sz l k t k r ltekint en selejtezze le s lehet leg gondoskodjon az jrahasznos t s r l Miel tt a term ket leselejtezi t vol tsa el bel le az elemet Az ak...

Page 38: ...t Trykk inn den r de knappen ved den klare beholderen Trykk n gang for pne understellet p beholderen Trykk n gang til for l sne den klare beholderen fra selve st vsugeren Ta forsiktig ut den klare beh...

Page 39: ...brukerkj pslovens rammer velge erstatte denne med en fungerende erstatningsdel Der dette produktet selges utenfor EU er garantien gyldig kun n r produktet installeres og brukes i det landet der den bl...

Page 40: ...podstaw przezroczystego pojemnika CZ CI ZmyWALNE Urz dzenie zawiera cz ci zmywalne kt re wymagaj regularnego czyszczenia Nale y post powa zgodnie z poni szymi instrukcjami myCIE TURBOSZCZOTEK Urz dzen...

Page 41: ...dzenie b dzie u ywane na terenie Austrii Belgii Francji Irlandii Holandii Hiszpanii Niemiec Wielkiej Brytanii lub W och oraz gdy w odpowiednim kraju sprzedawany jest taki sam model urz dzenia o takim...

Page 42: ...caixar no lugar certo Feche o dep sito transparente de modo a que ele encaixe na devida posi o e fique bem fixo PE AS LAV VEIS O seu aparelho tem pe as lav veis que exigem uma limpeza regular Siga as...

Page 43: ...cer o n mero de s rie da m quina data e lugar de compra factura de compra ou o alvar de entrega c pia e qualquer outro documento adicional Guarde estas informa es num lugar seguro para se assegurar de...

Page 44: ...44 DySON Dyson Dyson Dyson 3 C 37 4 F MAX ON 24 24 1 2 ON...

Page 45: ...n Dyson 8 800 100 100 2 info russia dyson com 10 00 19 00 Dyson Dyson SV06 100 28 6 20 6 16 3 5 0 4 68 9 87 1180 x 250 x 208 2 1 EAC Dyson 16 20 9 info russia dyson com 8 800 100 100 2 EU Dyson 2009 2...

Page 46: ...bara delar som rekommenderas av Dyson Om du inte g r det kan garantin upph vas F rvara maskinen inomhus Anv nd eller f rvara den inte i temperaturer under 3 C Se till att maskinen har rumstemperatur...

Page 47: ...nvisningar om hur du g r det Ta bort igens ttningen och s tt tillbaka borsthuvudena p det s tt som visas i avsnittet Tv tta borsthuvudena Se till att f stanordingen r helt vriden och att borsthuvudena...

Page 48: ...primerno namestitveno opremo za tip stene in zagotovite da je zdru itvena postaja varno pritrjena Prepri ajte se da za namestitvenim obmo jem ni nobenih cevi plin voda zrak ali elektri nih kablov ic a...

Page 49: ...ncija ne pokriva POLNJENJE IN SHRANJEVANJE Naprava se bo izklopila e bo temperatura baterije padla pod 3 C 37 4 F Ta funkcija iti motor in baterijo Sesalnika nikoli ne napolnite in nato shranite v pro...

Page 50: ...kaplamalar kilim ve hal lar n z s p rmeden nce reticilerinin tavsiye etti i temizleme talimatlar n kontrol edin Cihazda kullan lan f r a ba l k belli hal cinslerine ve zeminlere zarar verebilir S p rm...

Page 51: ...sonu lanabilir Yeniden al t rmadan nce t m t kan kl klar giderin Kullanmadan nce t m par alar yerine g venli bir ekilde yerle tirin T kan kl klar n giderilmesi garanti kapsam nda de ildir ARJ ETmE VE...

Page 52: ...yna kla na n ha sa rla r Dyso n ta ra f nda n ya p la n yerle tirme ha ri Ba k m ve ta mira tla r n Dyso n yetkili temsilcisi ha ricinde ya p lma s Blo ka j Elektrikli s p rgedeki blo ka jla r n na s...

Page 53: ...53...

Page 54: ...54...

Page 55: ...55...

Page 56: ...ht cz 491 512 083 Solight Holding s r o Svatoplukova 47 796 01 Prost jov DE Dyson Kundendienst kundendienst dyson de 0800 31 31 31 8 Dyson Servicecenter DVG Birkenmaarstr 50 53340 Meckenheim DK Witt A...

Reviews: