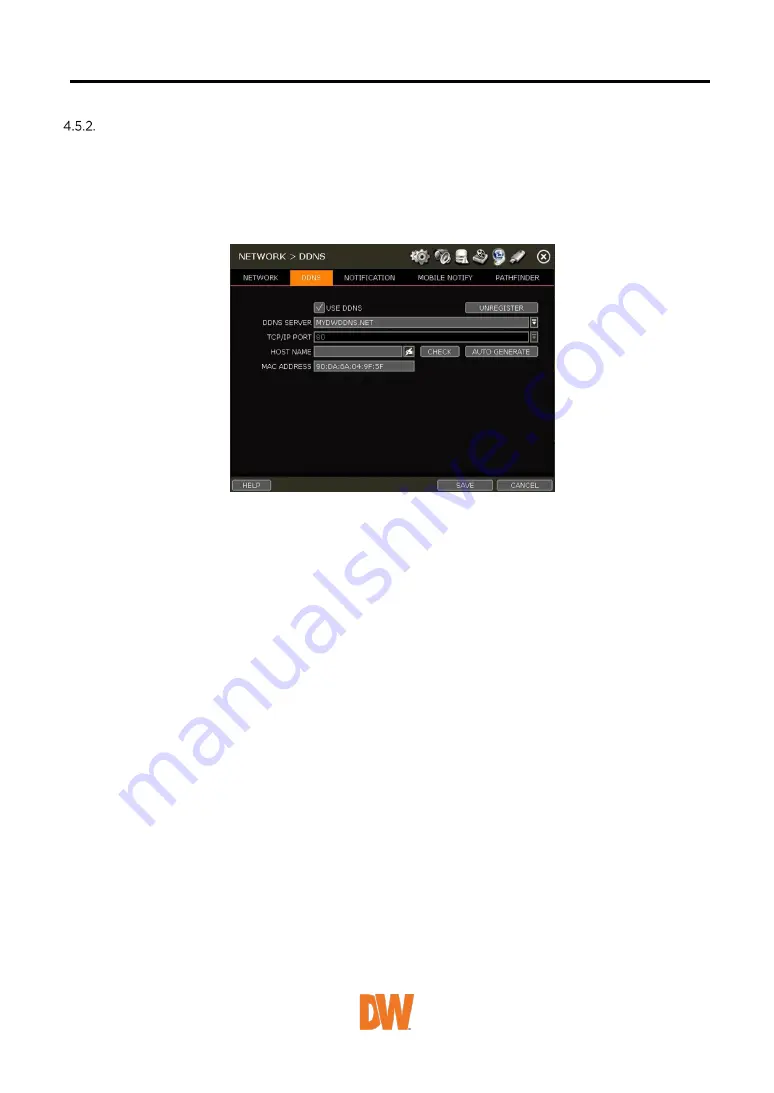
DDNS
Use a public DDNS server or the DDNS server run by the NVR maker (dynlink.net).
DDNS SERVER
Digital Watchdog® offers free and dependable DDNS service support. This allows you to assign the
NVR a URL address rather than a long-complicated IP Address. This simplified the connection
process to the NVR. The DDNS service is supported by Digital Watchdog® and is free of charge for
our customers. To setup DDNS
Input necessary information based on your network environment. And then click the [SAVE] button.
•
Enable Use DDNS box
•
DDNS SERVER: Select MYDWDDNS.NET or DYNLINK.NET
•
TCP/IP PORT: The default is 80.
•
HOSTNAME: Assign a domain name for your NVR (ex, NVROFFICE). If the same domain name
is assigned, the message still pops up when you click [CHECK]. The hostname can be
automatically assigned by clicking [AUTO GENERATE]
IP MAPPING and EXTERNAL IP
If you are using IP Mapping and Port Forwarding (e.g., using a router for internet connection), enable
both [Use Device IP Mapping] and [Use External IP] for proper connection.
SETTING UP THE REMOTE SOFTWARE (CMS)
In the menu of [Option > Setting], input DDNS Address and Port number.
The address of the DDNS SERVER is “mydwddns.net / dynlink.net” and the Port is “80”.
SETTING AT M/S I/E
Users can type the NVR’s mac a mydwddns.net / dynlink.net.
In case you are using a subdomain name, type the domain name + mydwddns.net / dynlink.net
Ex) 1. If Mac address is “00:1C: 84:01:00:02”
input as http://001c84010002.mydwddns.net or
“http://001c84010002.dynlink.net”
2. If the domain name is “DVROFFICE”
input as “http:// DVROFFICE.mydwddns.net” or “http://
DVROFFICE.dynlink.net”


