Installation
Page 13 of 58
057-281 ISSUE: 1
3 INSTALLATION
WARNING!: LIVE PARTS exist within the AVR. To avoid damage to persons and/or
property, only qualified personnel, having full understanding of the application must install the
product.
The DSEA108 is designed to be mounted on the control panel chassis or within the alternator housing
utilising the integral mounting holes. For dimension and mounting details, see the section entitled
Specifications, Dimensions
elsewhere in this document.
3.1 USER CONNECTIONS
3.1.1 CONNECTOR A
– GENERATOR CONNECTIONS
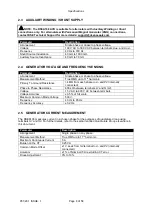
Terminal
Function
Recommended Size
AUX +
Connection to the positive terminal of the generator Auxiliary
Winding.
2.5 mm² (AWG13)
AUX -
Connection to the negative terminal of the generator Auxiliary
Winding.
2.5 mm² (AWG13)
F+
Connection to the positive terminal of the generator Exciter
Field Winding.
2.5 mm² (AWG13)
F-
Connection to the negative terminal of the generator Exciter
Field Winding.
2.5 mm² (AWG13)
S1
Connection to the Droop CT S1 terminal.
1.5 mm² (AWG17)
S2
Connection to the Droop CT S2 terminal.
1.5 mm² (AWG17)
L1
Connection to any of the generator AC output phases
1.0 mm² (AWG18)
N (L2)
Connection to generator AC output neutral or additional phase 1.0 mm² (AWG18)
3.1.2 CONNECTOR B
– EXTERNAL VOLTAGE BIAS INPUT
Terminal
Function
Recommended Size
P1
Connection to one side of a remote 5 k
Ω adjustment
potentiometer.
1.0 mm² (AWG18)
P2
Connection to one side of a remote 5 k
Ω adjustment
potentiometer.
1.0 mm² (AWG18)
A+
-10 V to 10 V remote adjustment input positive
terminal.
1.0 mm² (AWG18)
A-
-10 V to 10 V remote adjustment input negative
terminal.
1.0 mm² (AWG18)
Connector A
Generator Connections
Connector B
External Voltage Bias Inputs


