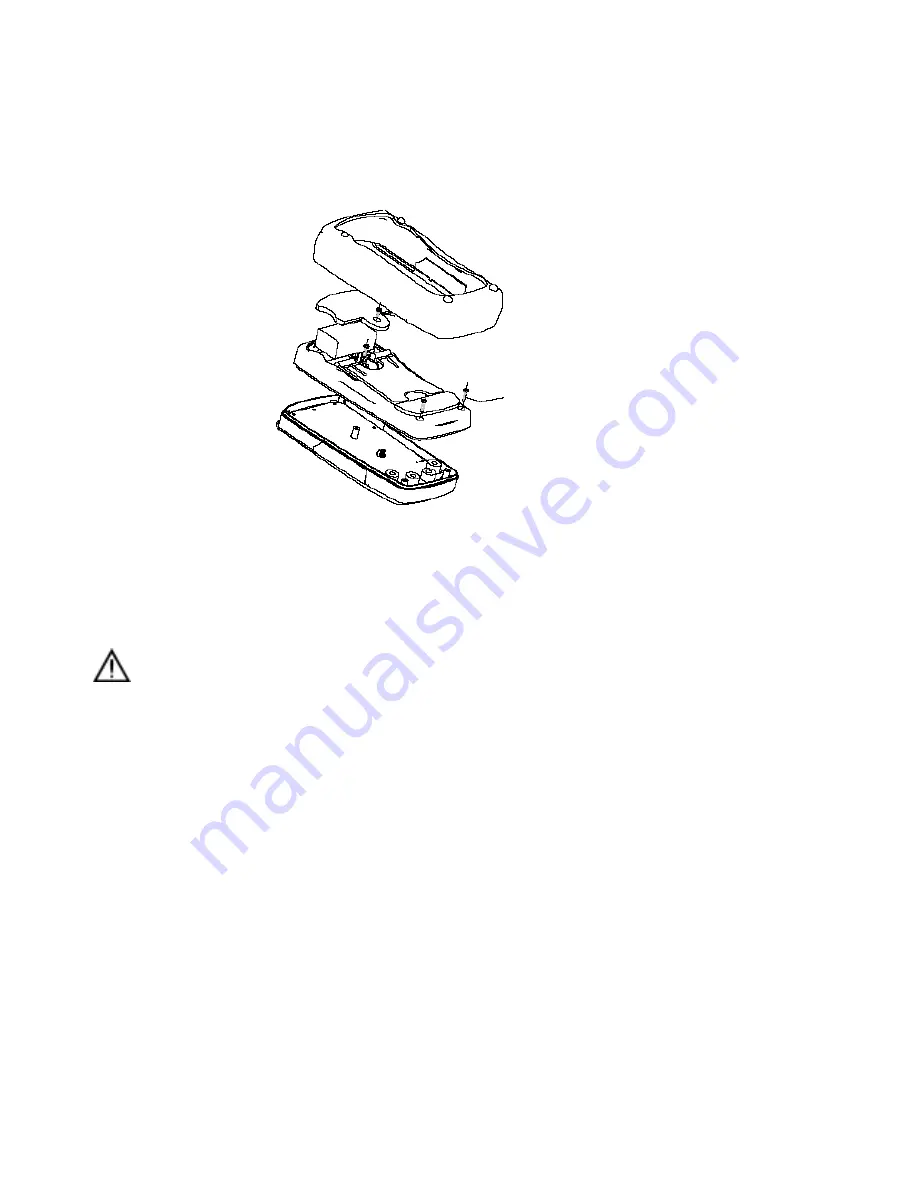
B. Replacing the Fu ses
(figure 11)
Warning
To avoid electrical sho ck or arc blast, or p ersonal injury or d amage to the Meter, u se specifi ed fuses
ONL Y in accord ance with the following procedur e.
To replace the Meter’s f use:
21. Disconnect the connection bet ween the testing leads and the circuit under test, and remov e the testing leads
away f rom the input terminals of the Meter.
22. Press the Meter power off .
23. Rem ov e the holster f rom the Meter.
24. Rem ov e the screw f rom the battery compartment, and then tak e out the battery door.
25. Rem ov e the screw inside the battery compartment and also t he other two screws f rom the cas e bottom, and then
separate the case bottom form the c ase top.
26. Rem ov e the f use by gently prying one end loose, and then take out the f use f rom its brack et.
27. Install ONLY replacement f uses wit h the identical ty pe and specif ication as follows and make sure the fuse is
f ixed firmly in the bracket.
0.315A, 250V f ast ty pe f use, Ø 5 x 20 mm.
28. Rejoin the battery door and the c ase top, and install t he screw.
29. Rejoin the battery door f rom the battery compartm ent, and install the screw.
30. Rejoin the holster and the Meter.
Replacem ent of f uses is seldom required. Burning of a fuse alway s results from the improper operation.
SCREW


