●
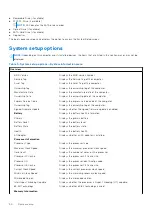
Removable Drive (if available)
●
STXXXX Drive (if available)
NOTE:
XXX denotes the SATA drive number.
●
Optical Drive (if available)
●
SATA Hard Drive (if available)
●
Diagnostics
The boot sequence screen also displays the option to access the System Setup screen.
System setup options
NOTE:
Depending on this computer and its installed devices, the items that are listed in this section may or may not be
displayed.
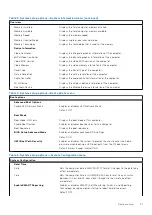
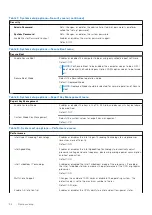
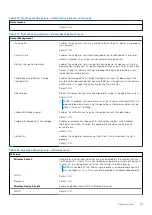
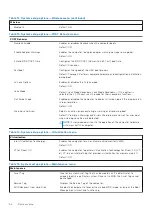
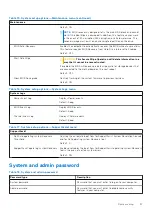
Table 3. System setup options—System information menu
Overview
BIOS Version
Displays the BIOS version number.
Service Tag
Displays the Service Tag of the computer.
Asset Tag
Displays the Asset Tag of the computer.
Ownership Tag
Displays the ownership tag of the computer.
Manufacture Date
Displays the manufacture date of the computer.
Ownership Date
Displays the ownership date of the computer.
Express Service Code
Displays the express service code of the computer.
Ownership Tag
Displays the ownership tag of the computer.
Signed Firmware Update
Displays whether the signed firmware update is enabled.
Battery
Displays the battery health information.
Primary
Displays the primary battery.
Battery Level
Displays the battery level.
Battery State
Displays the battery state.
Health
Displays the battery health.
AC Adapter
Displays whether an AC adapter is installed.
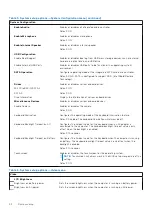
Processor Information
Processor Type
Displays the processor type.
Maximum Clock Speed
Displays the maximum processor clock speed.
Core Count
Displays the number of cores on the processor.
Processor L2 Cache
Displays the processor L2 Cache size.
Processor ID
Displays the processor identification code.
Processor L3 Cache
Displays the processor L3 Cache size.
Current Clock Speed
Displays the current processor clock speed.
Minimum Clock Speed
Displays the minimum processor clock speed.
Microcode Version
Displays the microcode version.
Intel Hyper-Threading Capable
Displays whether the processor is Hyper-Threading (HT) capable.
64-Bit Technology
Displays whether 64-bit technology is used.
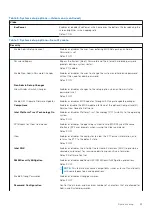
Memory Information
90
System setup
Summary of Contents for Inspiron 7590 2in1
Page 17: ...Removing the base cover 17 ...
Page 22: ...22 Removing the battery ...
Page 24: ...Post requisites Replace the base cover 24 Replacing the battery ...
Page 26: ...26 Removing the memory modules ...
Page 28: ...Post requisites Replace the base cover 28 Replacing the memory modules ...
Page 30: ...30 Removing the wireless card ...
Page 32: ...Post requisites Replace the base cover 32 Replacing the wireless card ...
Page 36: ...36 Removing the I O board ...
Page 38: ...Post requisites Replace the base cover 38 Replacing the I O board ...
Page 45: ...Post requisites Replace the base cover Replacing the solid state drive 45 ...
Page 51: ...Removing the hard drive 51 ...
Page 56: ...56 Removing the touchpad ...
Page 58: ...58 Replacing the touchpad ...
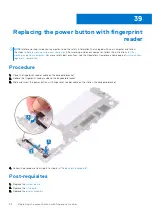
Page 66: ...Post requisites 1 Replace the fan 2 Replace the base cover 66 Replacing the display assembly ...
Page 70: ...70 Removing the system board ...
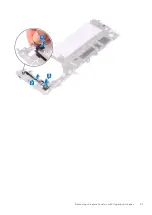
Page 81: ...Removing the power button with fingerprint reader 81 ...
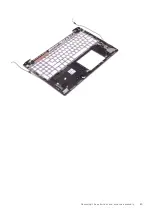
Page 85: ...Removing the palm rest and antenna assembly 85 ...

