


Steps
NOTE:
The display bezel is adhered to the display panel with adhesive. Insert a plastic scribe into the recesses near both
hinge caps to start the prying process to release the display bezel. Pry along the outside edge of the display bezel and work
your way around the entire display bezel until the display bezel is separated from the display cover.
CAUTION:
Carefully pry and remove the display bezel to minimize the risk of display panel damages.
1. Insert a plastic scribe into the recesses near both hinge caps to start the prying process to release the display bezel.
2. Pry along the outside edge of the display bezel and work your way around the entire display bezel until the display bezel is
separated from the display cover.
3. Lift the display bezel from the display assembly.
Installing the display bezel
Prerequisites
If you are replacing a component, remove the existing component before performing the installation procedure.
About this task
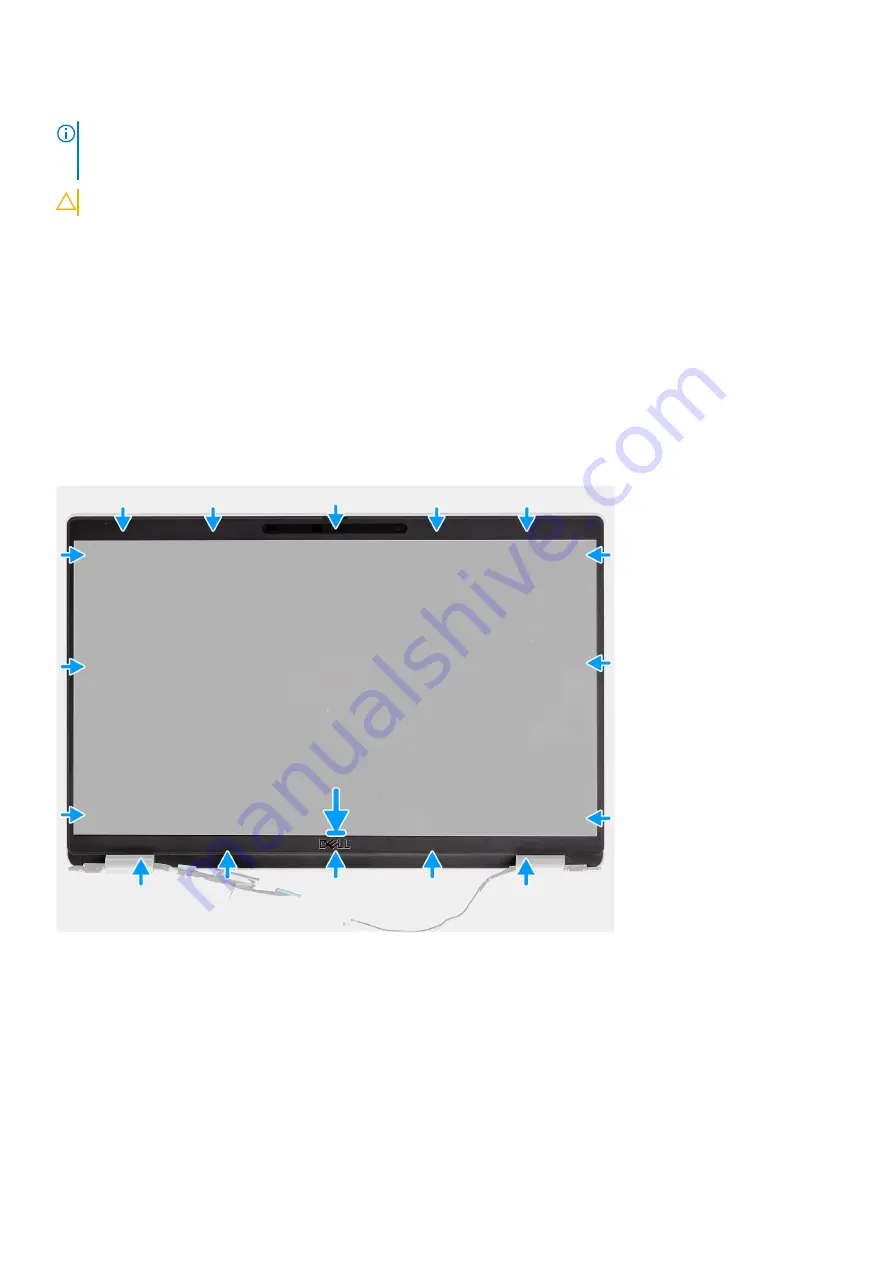
The following image indicates the location of the display bezel and provides a visual representation of the installation procedure.
Steps
1. Align and place the display bezel on the display assembly.
2. Gently snap the display bezel into place.
Next steps
1. Install the
.
2. Install the
3. Install the
.
4. Install the
.
76
Removing and installing components
Summary of Contents for Inspiron 5421
Page 6: ...Chapter 6 Getting help 127 Contacting Dell 127 6 Contents ...
Page 14: ...Major components of your system 1 Base cover 14 Removing and installing components ...
Page 21: ...Removing and installing components 21 ...
Page 70: ...70 Removing and installing components ...
Page 72: ...72 Removing and installing components ...
Page 73: ...Removing and installing components 73 ...
Page 78: ...78 Removing and installing components ...
Page 79: ...Removing and installing components 79 ...
Page 82: ...82 Removing and installing components ...