


Steps
1. Remove the two (M2x3) screws that secure the eDP cable bracket to the system board.
2. Lift the eDP cable bracket away from the system.
3. Peel the tape that secures the display cable to the system board.
4. Using the pull tab, disconnect the display cable from the connector on the system board.
5. Disconnect the eDP cable from the connector on the system board and unroute it from the routing guide.
6. Disconnect the IR camera cable from its connector on the system board (for models shipped with an IR camera).
7. Disconnect the touchscreen cable from its connector on the system board (for models shipped with a touchscreen).
8. Peel the adhesive tape partially and unroute the WLAN and WWAN antenna cables from the routing guides on the system
board.
9. Open the display assembly to a 180 degrees and flip over the system, and then place the system on a flat surface.
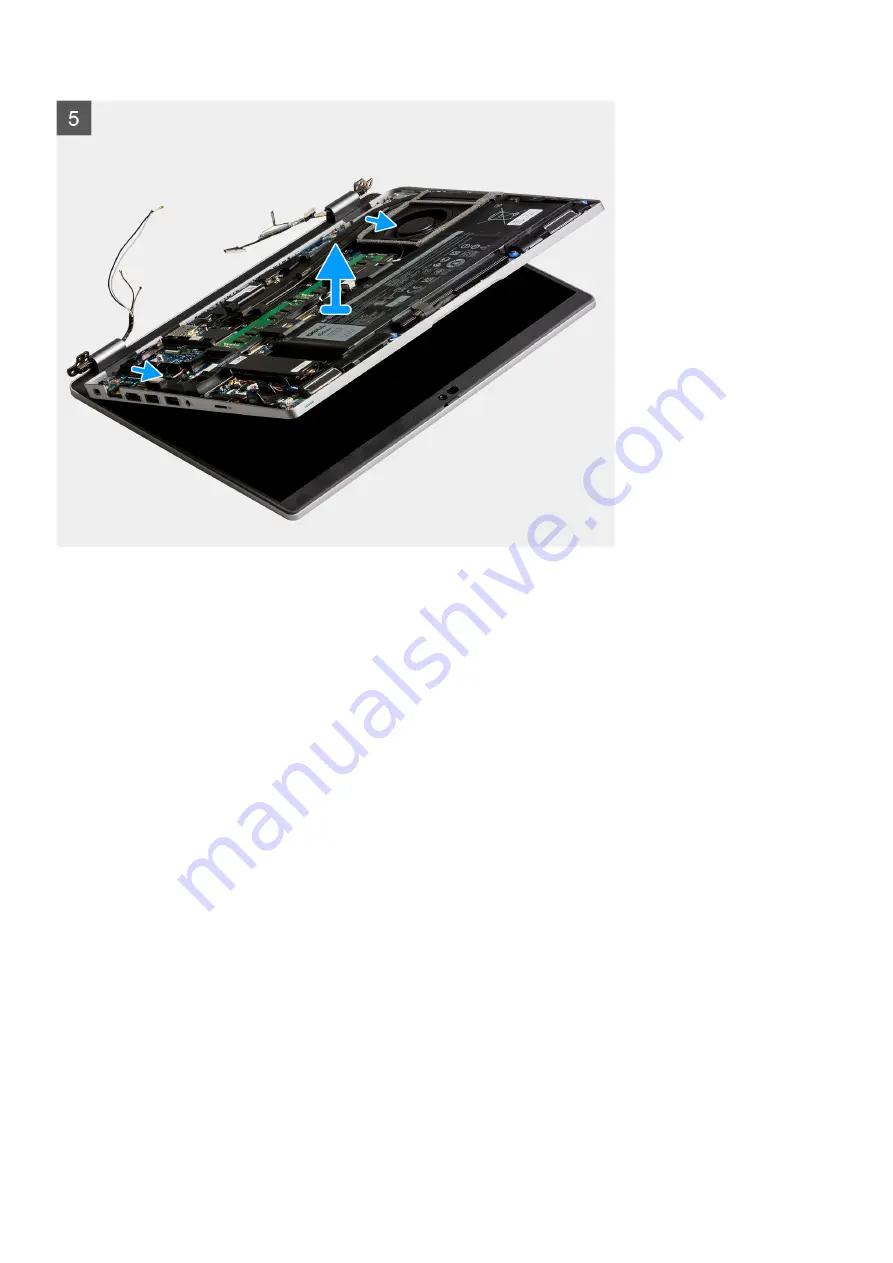
10. Remove the four (M2.5x5) screws that secure the display hinges to the system board.
11. Remove the display assembly from the system.
Installing the display assembly
Prerequisites
If you are replacing a component, remove the existing component before performing the installation procedure.
About this task
The following image indicates the location of the display assembly and provides a visual representation of the installation
procedure.
Removing and installing components
71
Summary of Contents for Inspiron 5421
Page 6: ...Chapter 6 Getting help 127 Contacting Dell 127 6 Contents ...
Page 14: ...Major components of your system 1 Base cover 14 Removing and installing components ...
Page 21: ...Removing and installing components 21 ...
Page 70: ...70 Removing and installing components ...
Page 72: ...72 Removing and installing components ...
Page 73: ...Removing and installing components 73 ...
Page 78: ...78 Removing and installing components ...
Page 79: ...Removing and installing components 79 ...
Page 82: ...82 Removing and installing components ...