
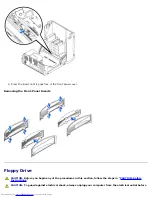


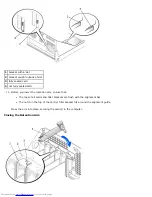


1
heat sink
2
lever
3
hinge
4
retention base
5
notch
7. Lower the airflow shroud over the heat sink.
If you installed a microprocessor replacement kit from Dell, return the original heat-sink assembly and microprocessor
to Dell in the same package in which your replacement kit was sent.
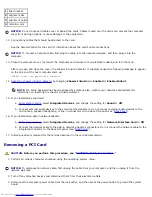
8. Reconnect the cooling fan power cable to the
FAN connector
on the system board.
9. Reconnect the power cable to the
12VPOWER connector
on the system board.
10. Close the computer cover.
NOTICE:
To connect a network cable, first plug the cable into the network wall jack, and then plug it into the
computer.
11. Connect your computer and devices to electrical outlets, and turn them on.
After you open and close the cover, the chassis intrusion detector, if enabled, causes the following message to appear
on the screen at the next computer start-up:
ALERT! Cover was previously removed.
12.
Reset the chassis intrusion detector
by changing the
Chassis Intrusion
option to
Enabled
or
Enabled-Silent
.
NOTE:
If a setup password has been assigned by someone else, contact your network administrator for
information on resetting the chassis intrusion detector.
Summary of Contents for GX260 - Optiplex Pentium 4 2.0GHz 512MB 40GB CD
Page 6: ......
Page 29: ......
Page 37: ...Back to Contents Page ...
Page 40: ...information on resetting the chassis intrusion detector Back to Contents Page ...
Page 73: ......
Page 76: ......
Page 86: ...2 padlock ring 3 two release buttons one on each side Back to Contents Page ...
Page 111: ......
Page 128: ...1 release buttons 2 security cable slot 3 padlock ring Back to Contents Page ...
Page 155: ...Back to Contents Page ...
Page 186: ...Back to Contents Page ...
Page 210: ...Back to Contents Page ...
Page 232: ...BSMI Notice Taiwan Only ...


