CAUTION:
To prevent damage to the memory module or the memory module socket during installation, do not bend or flex
the memory module. You must insert both ends of the memory module simultaneously.
2
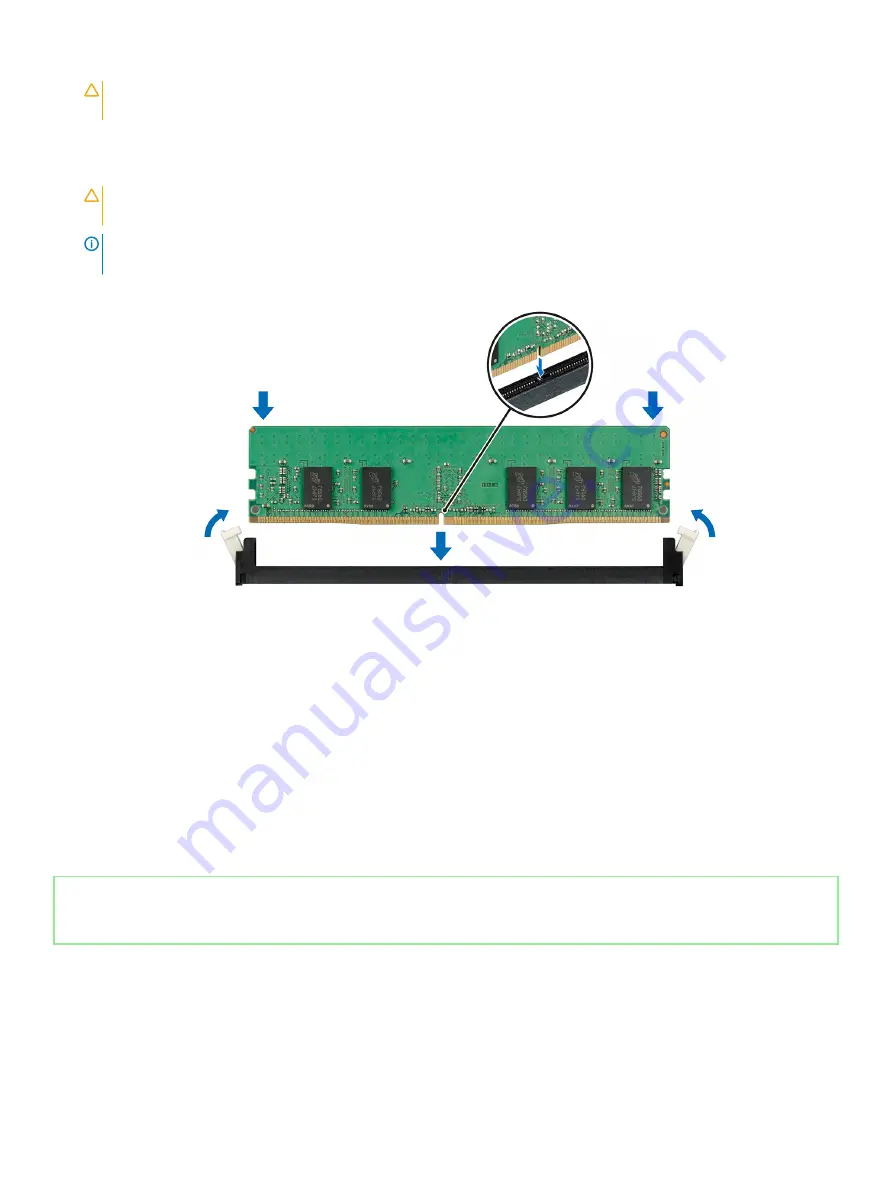
Open the ejectors on the memory module socket outward to allow the memory module to be inserted into the socket.
3
Align the edge connector of the memory module with the alignment key of the memory module socket, and insert the memory module
in the socket.
CAUTION:
Do not apply pressure at the center of the memory module; apply pressure at both ends of the memory module
evenly.
NOTE:
The memory module socket has an alignment key that enables you to install the memory module in the socket in only
one orientation.
4
Press the memory module with your thumbs until the socket levers firmly click into place.
Figure 51. Installing a memory module
Next steps
1
Install the air shroud.
2
If applicable, install the mid drive tray.
3
Follow the procedure listed in
After working inside your system
.
4
To verify if the memory module has been installed properly, press F2 and navigate to
System Setup Main Menu > System BIOS >
Memory Settings
. In the
Memory Settings
screen, the System Memory Size must reflect the updated capacity of the installed
memory.
5
If the value is incorrect, one or more of the memory modules may not be installed properly. Ensure that the memory module is firmly
seated in the memory module socket.
6
Run the system memory test in system diagnostics.
Identifier
GUID-9A58915E-4255-4B51-9BFD-D6A42874870D
Status
Released
Processors and heat sinks
The processor controls memory, peripheral interfaces, and other components of the system. The system can have more than one
processor configuration.
The heat sink absorbs the heat generated by the processor, and helps the processor to maintain its optimal temperature level.
106
Installing and removing system components


