46
Networking Guide
Viewing your DVR on your Computer
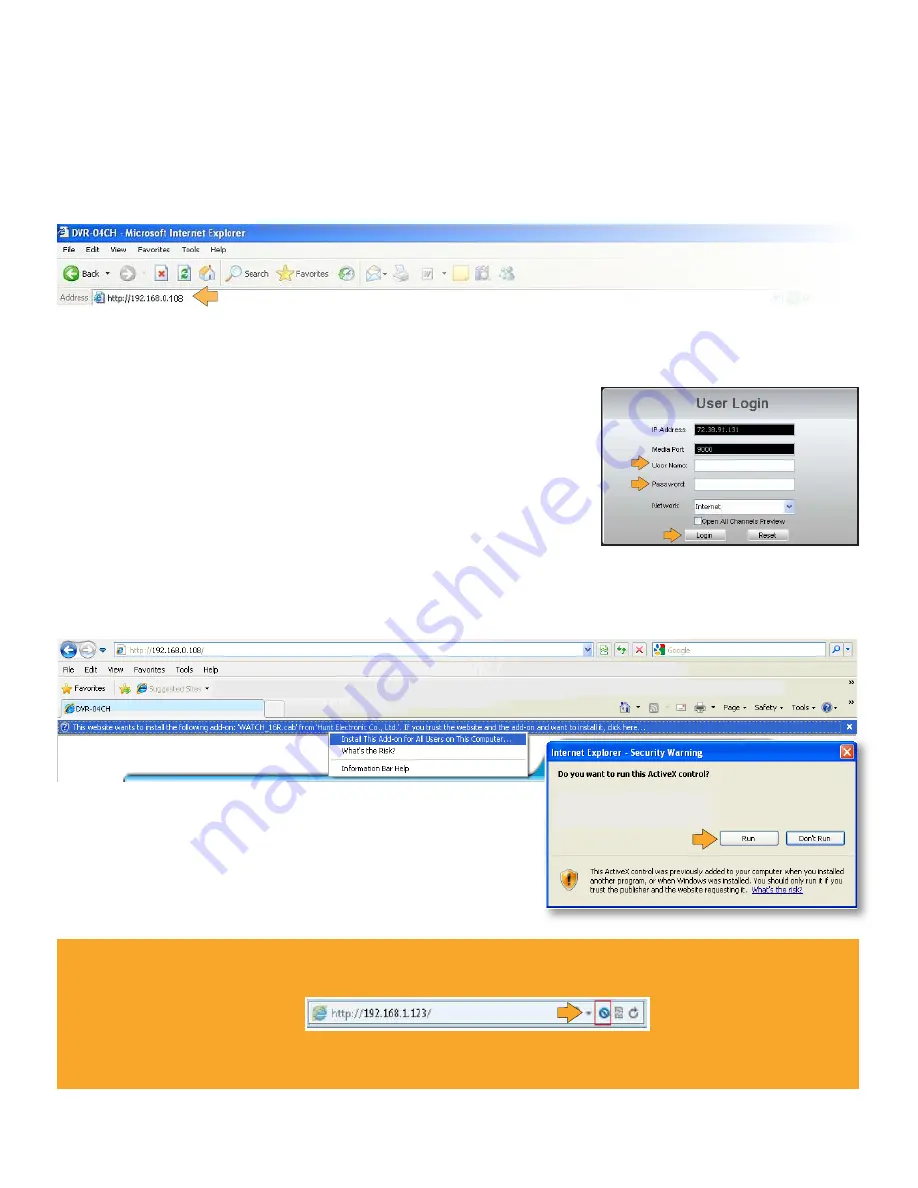
Now that the computer is installed with the necessary ActiveX changes listed above, you are ready to start viewing
the DVR using your computer. Open Internet Explorer and type the IP address of the DVR into the address bar using
the following format: http://192.168.0.108 (sample IP only) then press ENTER.
If the computer and the DVR are connected to the same router you can use the internal IP address to view the DVR.
If the computer is not connected to the same router and is at a remote location you will need to use the external IP
address of the DVR to view it from that computer.
Log into the DVR (Using Internet Explorer):
1. By default, the DVR will require a user to input a username and
password before being able to view the DVR online.
The default username is: admin and the password is: 123456
Installing the ActiveX controls:
2. There will be a yellow information bar that pops up below the address bar in Internet Explorer. Click on the
yellow information bar and then select INSTALL THIS ADD-ON FOR ALL USERS ON THIS COMPUTER…. Please be
patient as the installation process can take 1-2 minutes.
3. If your ActiveX settings are set correctly you will see the
following dialogue box.
4. Click RUN.
Once everything has installed and loaded, you will see the web
player and the connected cameras.
Note: If you are using IE version 10+ you may have some difficulty in the initial setup of DVR access. If you are seeing a
blue screen with no option to install Active X. Please check the address bar for the icon shown. Once clicked, it will give the
option to disable Active X filtering.
IE 11- Access your tools section on IE and add the DVR’s IP address to the compatibility view settings. Once this has been
completed please try to connect to the DVR’s external IP address again.
Summary of Contents for Pro Widescreen DVR
Page 1: ...Pro Widescreen DVR User Manual ...
Page 72: ...WWW DEFENDER USA COM ...


