Local Configurations
36
Parameter
Description
Redundancy
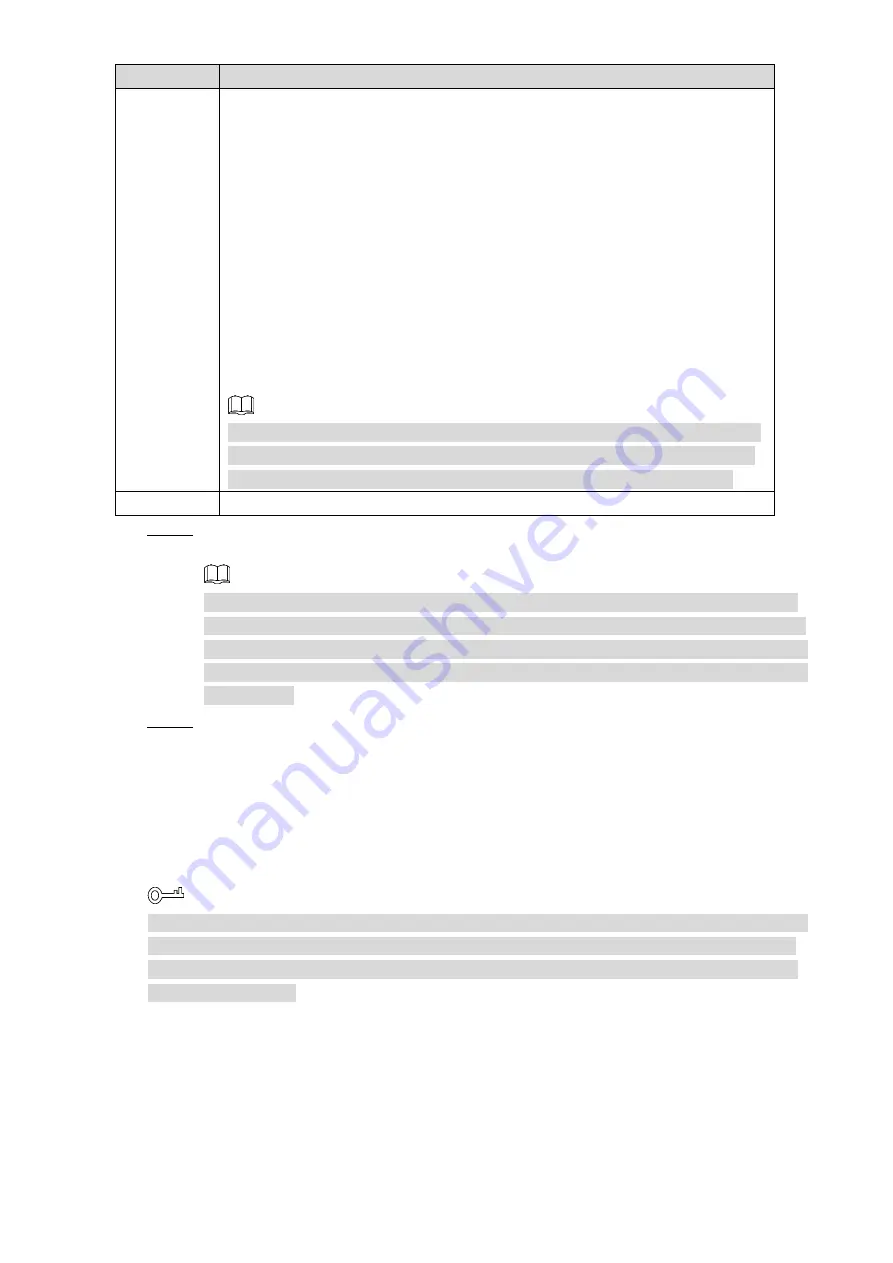
This function can help better secure your data safety. To use this function,
make sure there are several HDDs are connected to the Device with at least
one HDD is set to be redundancy HDD. Select the
Redundancy
check box,
and then you can back up the recorded files to different HDD simultaneously.
When one HDD is damaged, you can get the data from the other.
1. Set one HDD to be redundancy HDD. For details, see
2. Select
Main Menu > SETTING > SCHEDULE
, and then select the
Redundancy
check box.
If the corresponding channel is not recording, the redundancy
function gets effective from next scheduled recording.
If the corresponding channel is recording, the current recorded file
will be packed and saved according to the new settings.
On the
Record
interface, you need to select the
Schedule
check box or the
Manual
check box for corresponding channel. The redundancy HDD works
like a backup HDD for recorded videos, but it will not back up snapshots.
Copy
Click
Copy
to copy the settings to other channels.
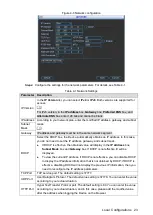
Configure the period and alarm type. The alarm type includes
Regular
,
MD
, and
Step 3
Alarm
.
If the
MD
check box and the
Alarm
check box are selected, the corresponding alarm
linkage should be enabled. For details, see "4.3.4 Configuring Alarm Events Settings."
For example, if the alarm type is
MD
, select
Main Menu > SETTING > DETECT
, select
Motion Detect
in the
Event Type
list, and then select the corresponding channel in the
Channel
list.
Click
Save
.
Step 4
Function Modules Operations
4.2
4.2.1 Preview
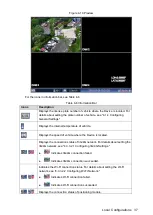
After the Device is turn on, the multi-channel live view interface is displayed. See Figure 4-19.
On the live view interface, the added remote device can be dragged to other channel if needed.
For example, if you want to switch the image between Channel 1 and Channel 4, use the left
mouse button to drag the image in Channel 1 to Channel 4, and then release the button. The
images are switched.


