


Quick Start Guide
31
●
Add users one by one.
When you want to assign access permissions to one person, you can add users
individually. For details on how to assign access permissions, see "5.2.7 Adding Area
Permissions".
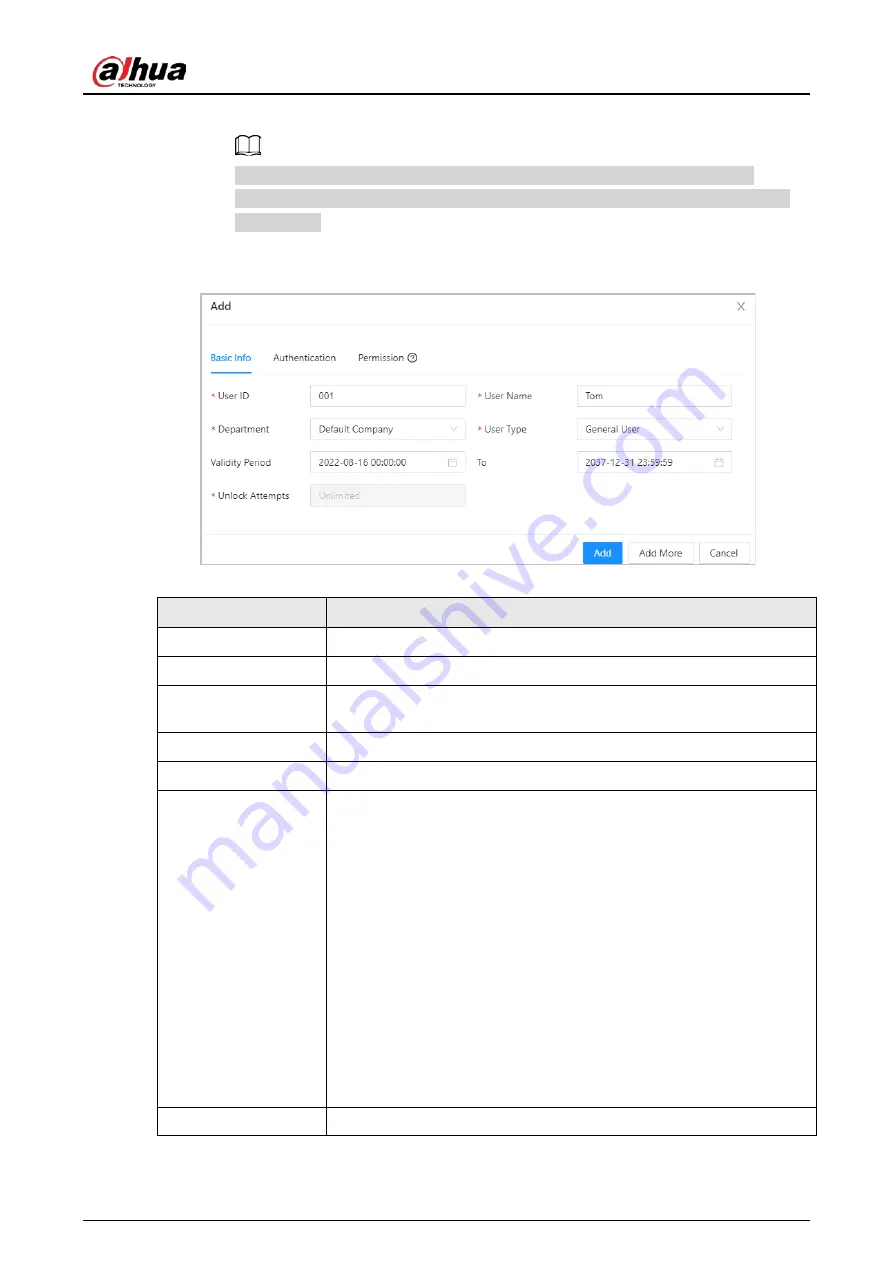
1. Click
Add
, and then enter the basic information for the user.
Figure 5-13 Basic information on the user
Table 5-5 parameters description
Parameter
Description
User ID
The ID of the user.
Department
The department that the user belongs to.
Validity Period
Set a date on which the access permissions of the person will become
effective.
To
Set a date on which the access permissions of the person will expire.
User Name
The name of the user.
User Type
The type of the user.
●
General User
: General users can unlock the door.
●
VIP User
: When VIP unlocks the door, service personnel will receive
a notice.
●
Guest User
: Guests can unlock the door within a defined period or
for set number of times. After the defined period expires or the
unlocking times runs out, they cannot unlock the door.
●
Patrol User
: Patrol users will have their attendance tracked, but
they have no unlocking permissions.
●
Blocklist User
: When users in the blocklist unlock the door, service
personnel will receive a notification.
●
Other User
: When they unlock the door, the door will stay
unlocked for 5 more seconds.
Unlock Attempts
The times of unlock attempts for guest users.
2. Click
Add
.


