Display Controller Installation
26
7.
Align the display controller(s) for your B
ARCO
C
ORONIS
Display
System with the slot(s) and press it(them) in firmly until the
card(s) is(are) fully seated.
Note:
The next step applies only to the MXRT 5100, MXRT
7100, and MXRT 7200.
8.
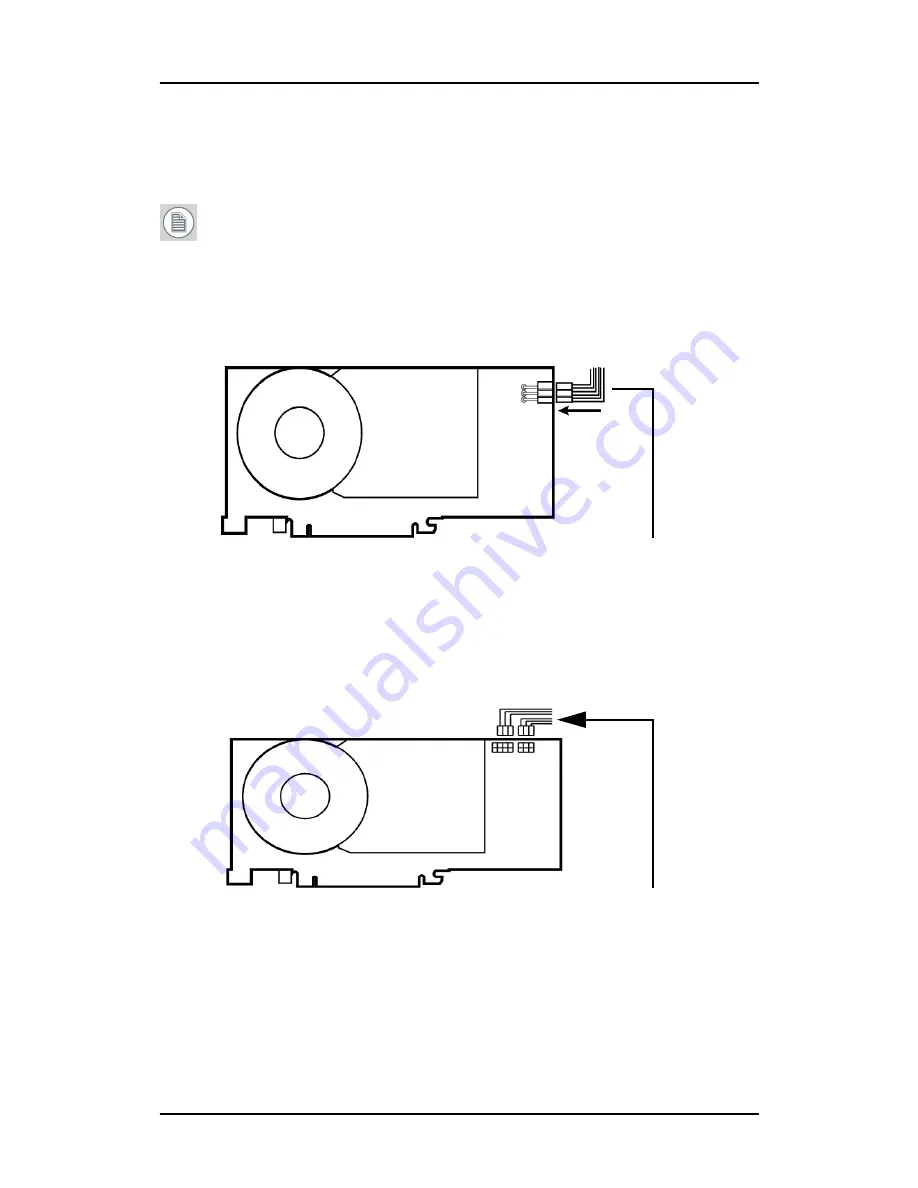
Connect the power cable(s) to the 6-pin power connection(s) on
the graphics card. Make sure the cables are not interfering with
anything inside the computer (for example, a cooling fan).
Figure 4: Power connection for the MXRT 5100, 7100, & 7300 controllers
Figure 5: Power connection for the MXRT 7200 controller
6-pin graphics controller
power cable
6-pin graphic controller
power cables - connect
2 cables as shown
Summary of Contents for MDCC 2121
Page 1: ...Getting Started Guide Coronis Supported displays MDCC 2121 MDCC 3120 MDCG 2121 MDCG 3120...
Page 2: ...This page intentionally left blank 2 This page intentionally left blank...
Page 4: ...This page intentionally left blank 4...
Page 7: ...Preface 7 Preface...
Page 21: ...Display controller installation 21 Display controller installation...
Page 31: ...Display installation 31 Display installation...
Page 48: ...Connecting the signal cables 48 Figure 27 External DC power supply 7 8...
Page 54: ...Cleaning instructions This page intentionally left blank 54...
Page 55: ...Software installation 55 Software installation...
Page 68: ...Driver and Software Installation This page intentionally left blank 68...
Page 71: ...Troubleshooting 71 Troubleshooting...
Page 76: ...Configuring Windows This page intentionally left blank 76...
Page 77: ...Technical Specifications 77 Technical Specifications...
Page 84: ...Technical Specifications This page intentionally left blank 84...
Page 90: ...Warranty Statement This page intentionally left blank 90...
Page 91: ...Warranty Statement This page intentionally left blank 91...
Page 92: ...Warranty Statement This page intentionally left blank 92...
Page 93: ...Warranty Statement This page intentionally left blank 93...


