89
Instruction Manual
AFQm
21
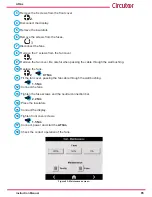
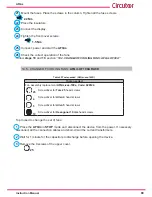
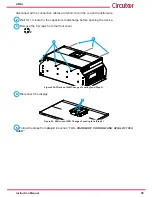
Mount the fuses. Place the screws in the column. Tighten all the fuse screws.
2�2 Nm
22
Place the insulators.
23
Connect the display.
24
Tighten the front cover screws.
1�5 Nm
25
Connect, power and start the
AFQm
.
26
Check the correct operation of the fans.
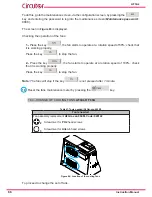
Follow
steps 18
and
19
, section
“10.3. CHANGE OF COOLING FANS: AFQm OF 30A”
10.5.- CHANGE OF COOLING FANS:
AFQm
OF 100A RACK
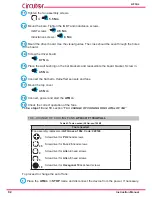
Table 42:Tools needed (AFQm-xxx-100R)
Tools needed
Fan assembly replacement
AFQm-xxx-100x, Code: 920124
25
Screwdriver for
Torx 25
head screws
4
Screwdriver for
Allen 4
head screws
5
Screwdriver for
Allen 5
head screws
10
Screwdriver for
Hexagonal 10 mm
head screws
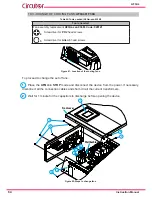
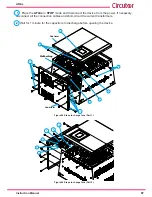
To proceed to change the set of fans:
1
Place the
AFQm
in
STOP
mode and disconnect the device from the power. If necessary,
disconnect all the connection cables and short-circuit the current transformers.
2
Wait for 1 minute for the capacitors to discharge before opening the device.
3
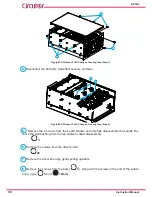
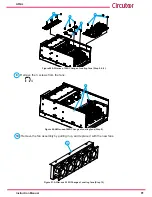
Remove the 8 screws of the upper cover.
25
Summary of Contents for AFQm Series
Page 1: ...INSTRUCTION MANUAL Active Parallel Multi Function Filter AFQm M217B01 03 19B...
Page 2: ...2 AFQm Instruction Manual...
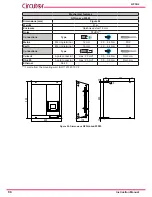
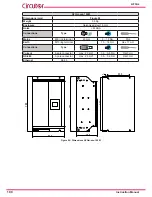
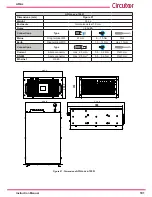
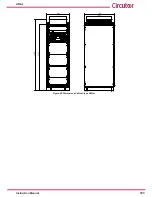
Page 103: ...103 Instruction Manual AFQm 608 812 1755 665 465 1890 Figure 98 Dimensions Cabinet type AFQm...
Page 105: ...105 Instruction Manual AFQm 14 CE CERTIFICATE...
Page 106: ...106 AFQm Instruction Manual...
Page 107: ...107 Instruction Manual AFQm...

