19 / 39
FISIOLASER IRD/IRD 2
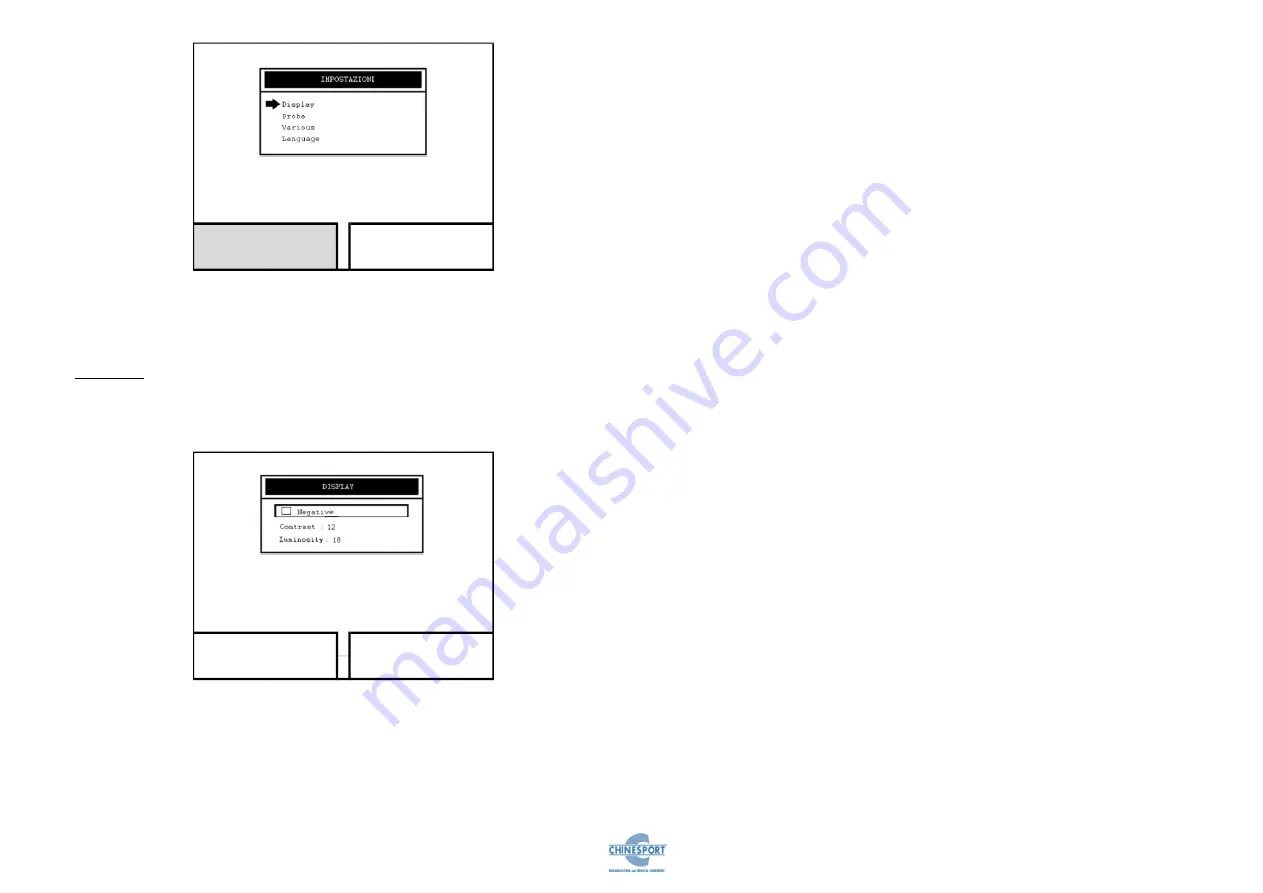
Fig. 9
If you turn the Encoder control knob you can choose the function.
The choice is confirmed by pressing the knob
DISPLAY
Rotate the encoder knob until to position the cursor on the DISPLAY menu , then
press the encoder knob for to confirm the choice ; it appear to video the next screen
(see fig. 10):
Fig. 10
In correspondence of this screen is possible to adjust the brightness and contrast
settings , and to activate too the “negative” functionality , that allows to invert the
fore-colour and the back-colour .
For to adjust the contrast settings , please follow these instructions :
1.
press the function taste relative to the SETTINGS button in the main menu
2.
rotate the encoder knob until to position the cursor on “Contrast” menu
3.
press the encoder knob on the selected menu for enable the modification
routine
4.
rotate the encoder knob ( in clockwise way for increasing values , in counter-
clockwise way for decreasing values ) until to reach the desired value that
you want to assign at the selected parameter
5.
press the encoder knob for to confirm the value to assign at the selected
parameter and to exit by the modification routine
For to adjust the brightness settings , please follow these instructions :
6.
press the function taste relative to the SETTINGS button in the principal
menu
7.
rotate the encoder knob until to position the cursor on “Brightness” menu
8.
press the encoder knob on the selected menu for enable the modification
routine
9.
rotate the encoder knob ( in clockwise way for increasing values , in counter-
clockwise way for decreasing values ) until to reach the desired value that
you want to assign at the selected parameter
10.
press the encoder knob for to confirm the value to assign at the selected
parameter and to exit by the modification routine
For to enable the “Negative” functionality , please follow these instructions :
11.
press the function taste relative to the SETTINGS button in the principal
menu
12.
rotate the encoder knob until to position the cursor on “Negative” menu
13.
press the encoder knob on the selected checkbox for to enable the
functionality desired
This action trains the appearing of a check point to the inner of the selection box ,
and generate a chromatic inversion between the fore-colour and the back-colour .
14.
For to restore the visualization modality , press again the encoder knob .
In order to store the settings that best suit the visibility conditions of room , press the
SAVE button .
Otherwise , press the CANCEL button for to return to the screen of fig. 9 .
Exit
Save
Exit


