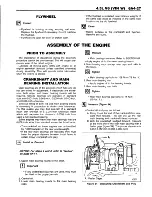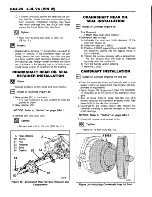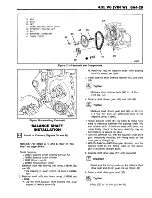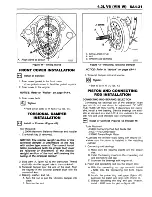
FLYWHEEL
Inspect
• Flywheel for burning, scoring, warping, and wear.
Replace the flywheel if necessary. Do not machine
the flywheel.
• Flywheel ring gear for worn or broken teeth.
• If the flywheel is replaced, new balance weights of
the same size must be installed in the same hole
locations as the old flywheel.
Clean
• Mating surfaces of the crankshaft and flywheel.
Remove any burrs.
ASSEMBLY OF THE ENGINE
PRIOR TO ASSEMBLY
The importance of cleanliness during the assembly
procedure cannot be overstressed. Dirt will cause pre
mature wear of the rebuilt engine.
Lubricate all moving parts lightly with engine oil or
engine assembly lubricant (unless specified otherwise)
during assembly. This will provide initial lubrication
when the engine is started.
CRANKSHAFT AND M AIN
BEARING INSTALLATION
Main bearings are of the precision insert type and do
not use shims for adjustment. If clearances are exces
sive, both upper and lower bearing inserts will be
required. Service bearings are available in standard
size and 0.001-inch, 0.002-inch, 0.009-inch, 0.010-inch,
and
0
.
020
-inch undersize.
Selective fitting of both rod and main bearing inserts
is necessary in production to obtain close tolerances.
For this reason you may find one-half of a standard
insert with one-half of a
0
.
001
-inch undersize insert
which will decrease the clearance 0.0005 inch from
using a full standard bearing.
Some engines may have rear main bearings that are
0.008 inch wider than standard across the thrust faces.
• The crankshaft on these engines can be identified
by “ .008”stamped on the rear counterweight.
• If the rear main bearings are replaced, they must
have the proper distance between thrust faces to
obtain proper crankshaft end play.
“►4*
Install or Connect
NOTICE: For step s 4 and 6, refer to “Notice”
on page 6A4-1.
1. Upper main bearing inserts to the block.
Important
• If any undersized bearings are used, they must
be fitted to the proper journals.
2. Crankshaft.
3. Lower main bearing inserts to the main bearing
caps.
Measure
• Main bearing clearance. Refer to SECTION
6
A.
• Apply engine oil to the main bearing inserts.
4. Main bearing caps (except rear cap) and bolts to
the block.
Tighten
• Main bearing cap bolts to 106 N-m (78 lbs. ft.).
5. Rear main bearing cap.
• Apply engine oil to the bearing inserts.
6
. Rear main bearing cap bolts.
£
Tighten
Rear main bearing cap bolts to 14 N-m
(10
lbs. ft.).
| j |
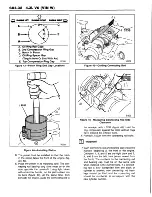
Measure (Figure 34)
Crankshaft end play, as follows:
A. Firmly thrust the end of the crankshaft first rear
ward then forward. This will line up the rear
main bearing and crankshaft thrust surfaces.
B. With the crankshaft wedged forward, measure
at the front end of the rear main bearing with a
feeler gage (figure 34). The proper clearance is
0.051-0.152 mm (0.002-0.006 inch).
\ / "
A. Feeler Gage
V0577
Summary of Contents for Light Duty Truck 1994 Series
Page 1: ......
Page 11: ...VIEW A p n n n j VIEW C F7554 Figure 10 Hydra Matic 4L60 E Transmission I D Location ...
Page 24: ...NOTES ...
Page 26: ... ...
Page 69: ...NOTES ...
Page 71: ...3 2 STEERING ...
Page 73: ......
Page 84: ......
Page 102: ...40 ...
Page 130: ...NOTES ...
Page 146: ...NOTES ...
Page 162: ...NOTES ...
Page 166: ...Figure 5 Removing the Pinion Flange Figure 6 Pressing the Drive Pinion from the Cage ...
Page 178: ...Figure 3 Spreading the Differential Case Figure 4 Removing the Differential ...
Page 190: ...NOTES ...
Page 202: ...NOTES ...
Page 206: ...F5785 ...
Page 212: ...B Button Moved Out of Bearing Bore F5791 ...
Page 228: ...NOTES ...
Page 232: ......
Page 234: ......
Page 236: ...Adjuster 63 Bolt 64 Lock Figure 10 Turning the Adjuster Plug K3 Models ...
Page 237: ...Figure 13 Removing the Pinion Seal 39 Bearing Cup Figure 16 Removing the Inner Bearing Cap ...
Page 261: ...F7475 ...
Page 267: ...B Button Moved Out of Bearing Bore F5791 ...
Page 294: ...NOTES ...
Page 300: ...NOTES ...
Page 318: ...NOTES ...
Page 322: ...SR207LN2 EDS ...
Page 324: ......
Page 326: ...OVERHEAD OILING AND RETURN MAIN OIL GALLERY N30005 6A2 J EDS ...
Page 368: ...103 153 127 V1200 ...
Page 370: ......
Page 372: ......
Page 374: ...F9375 Figure 7 Engine Lubrication Diagram Engines Without Balance Shaft ...
Page 376: ...Figure 9 Engine Lubrication Diagram Engines With Balance Shaft ...
Page 399: ...V2974 ...
Page 410: ......
Page 412: ...195 196 201 174 252 163 165 164 244 3706r3924 ...
Page 452: ......
Page 454: ...163 164 V1202 ...
Page 456: ...20 21x 302 210 4 0 41 2 5 2 5 1 2 51 4 2 e3 54 3 9 252 252 S 255 255 25 6 256 209 V1196 ...
Page 458: ...100 1 8 4 185 183 177 v 75 201 3706r1204 ...
Page 460: ......
Page 510: ......
Page 512: ...V2131 ...
Page 514: ...110 106 106 103 90 93 89 88 87 86 v 7 7 7 7 j A _ 111 f t 2 a a s 53 49 L 47 46 3706r4751 ...
Page 566: ...NOTES ...
Page 574: ...NOTES ...
Page 618: ...SPECIAL TOOLS ...
Page 620: ...NOTES ...
Page 672: ......
Page 682: ......
Page 686: ......
Page 694: ...RH0213 4L60 E ...
Page 695: ...657 659 m i J 8092 H J 34196 4 3 34196 5 657 658 665 J 23907 J 7004 1 J 8092 RH0214 4L60 E ...
Page 696: ...J 8092 J 34196 4 33 31 J 8092 RH0215 4L60 E ...
Page 697: ...SPECIAL TOOLS ...
Page 698: ...SPECIAL TOOLS ...
Page 758: ...RH0194 4L80 E ...
Page 764: ......
Page 770: ...SPECIAL TOOLS ...
Page 771: ...SPECIAL TOOLS CONT ...
Page 772: ......
Page 775: ......
Page 776: ......
Page 785: ......
Page 804: ...NOTES ...
Page 806: ......
Page 808: ......
Page 822: ...3707r5079 ...
Page 840: ......
Page 848: ...NOTES ...
Page 852: ......
Page 860: ...F5435 ...
Page 866: ......
Page 878: ...F9167 ...
Page 882: ...16 FrontOutputShaft 18 DrivtQNr 19 DrivenGm t 20 DriveChain 22 FrontOutputBearing V2836 ...
Page 890: ...F9168 ...
Page 908: ......
Page 919: ......


