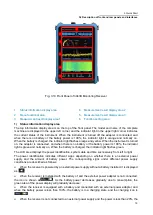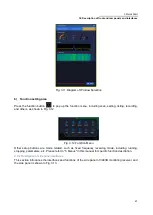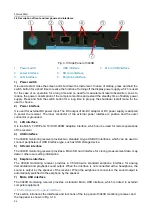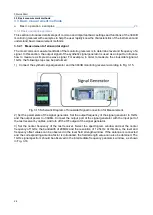
3 Quick Start
3.1 Get Prepared
14
light above the button, so as to indicate the current remaining battery power. Please charge the
battery in time when only one indicator light is on.
3) Battery charging
The battery can be charged when the 3943B monitoring receiver is shut down or in operation. Charging
steps are as follows:
a) First, place the battery to be charged in the instrument.
b) Use the accompanying AC-DC adapter to connect the external power supply.
c) If the battery is charged when the instrument is turned off, the power indicator light in the upper right
corner of the front panel of the instrument is yellow and flashing, indicating that the battery is being
charged, and the indicator light is yellow and normally on after charging. If the battery is charged when
the instrument is turned on, the power indicator light is green and flashing, indicating that the battery is
being charged, and the indicator light is green and normally on after charging. At this time, the battery
icon on the right side of the system status bar of the instrument display screen shows that the battery is
full.
In addition, for the battery with the battery power of >5%, it takes about 3 hours to fully charge the battery
when the instrument is turned off.
4) Other precautions
When the instrument is not used for a long time, the battery should be removed and stored
separately, and the battery should be discharged and charged once every three months. Please
ensure that the battery power is 60%~70% during storage to ensure the battery life.
When the adapter is no longer in use, do not connect it to the power supply.
Do not charge the battery with a charger that is not specified and has no safety certification. Do not
charge the battery for more than 24 hours. Overcharging will shorten the battery life.
If the battery is not used after being fully charged, it will discharge itself after a long time. The battery
should be charged when needed.
If the battery is odoriferous, discolored, deformed or abnormal during storage, charging or storage,
please stop using the battery.
Do not short-circuit the positive and negative poles of the battery, and do not damp the battery to
avoid dangers.
Do not drop the battery, cut off the battery or try to remove the battery.
Properly recycle or dispose the battery. Do not throw the battery in the garbage dump.
Don't throw the battery into the fire.
3.1.4 Startup, shutdown and screen off
The startup, shutdown and screen off methods and precautions of the instrument are as follows:
1) Start up
Before the initial energization, please confirm the power supply parameters and power line. For details,
please refer to the ―precautions before energization‖ in 3.1.2 of this manual.
Step 1.
Connect the power supply of the adapter or install the battery with the battery power of more
than 15%.
Step 2.
Turn on the side power switch, as shown in Fig. 3.5. Do not connect any device to the monitoring
receiver before startup. Start the instrument under normal conditions. Press and hold the power switch in
the lower left corner of the side panel for about 3s, and the power indicator light will turn green. Release
the switch key and the boot interface will appear. After executing a series of self-inspection procedures,
start running the main measurement program.


