background image

Air

Life

®

 nCPAP Driver Service Manual 

 2008, Cardinal Health 

Page 66 of 81                            


42. Re-connect the Air source and allow at least 60 seconds for the valves to adjust and re-stabilize. 
 

  Verify that the system returns to the original FiO

2

 setting 


43. Press the Alarm/Mute button to clear the latched alarm. Do not proceed until the alarms clear and 

the system has re-stabilized. 

 
44. Disconnect the Oxygen source. 
 
45. Verify an audible alarm occurs (High priority, red flashing). 
 
46. Verify that ‘Oxygen Pressure Low’ appears in the message bar (alternating between low oxygen 

pressure and low FiO

2

). 

 
47. Verify that CPAP pressure is maintained utilizing the air source. Note that the FiO

2

 will be 21% and 

the Low FiO

2

 alarm will be active. 

 
48. Re-connect the Oxygen source and allow at least 60 seconds for the system to re-stabilize. 
 
49. Verify that the system returns to the original FiO

2

 setting. 

 
50. Press the Alarm/Mute button to clear alarm. 
 
51. If all alarm conditions were met and the auto-recovery returned the system to original condition, 

then circle PASS. Otherwise circle FAIL. 


Low Pressure/ Disconnect Alarm Test: 


52. Occlude both prongs and set CPAP to 5 cm H

2

O.  Allow valves to stabilize for at least 60 seconds. 

FiO

2

 may be set to 21% for this test. 

 
53. Remove the occlusion of the prongs (or remove the prongs from the generator). 
 
54. Verify that a medium priority audible alarm is actived (yellow flashing LED) and ‘Disconnect’ or “Low 

Pressure” alarm text appears in the message bar within 15 seconds (normal alarm delay). 

 
55. Verify that the flow rate displayed by the Driver is at “Target” flow +/- 3 lpm. 
 
56. If the Low Pressure/ Disconnect alarm activated within 15 seconds, then circle PASS. If this test 

fails, verify that both prongs are open. If no alarm occurs, then circle FAIL. 

 
High Pressure Alarm Test: 


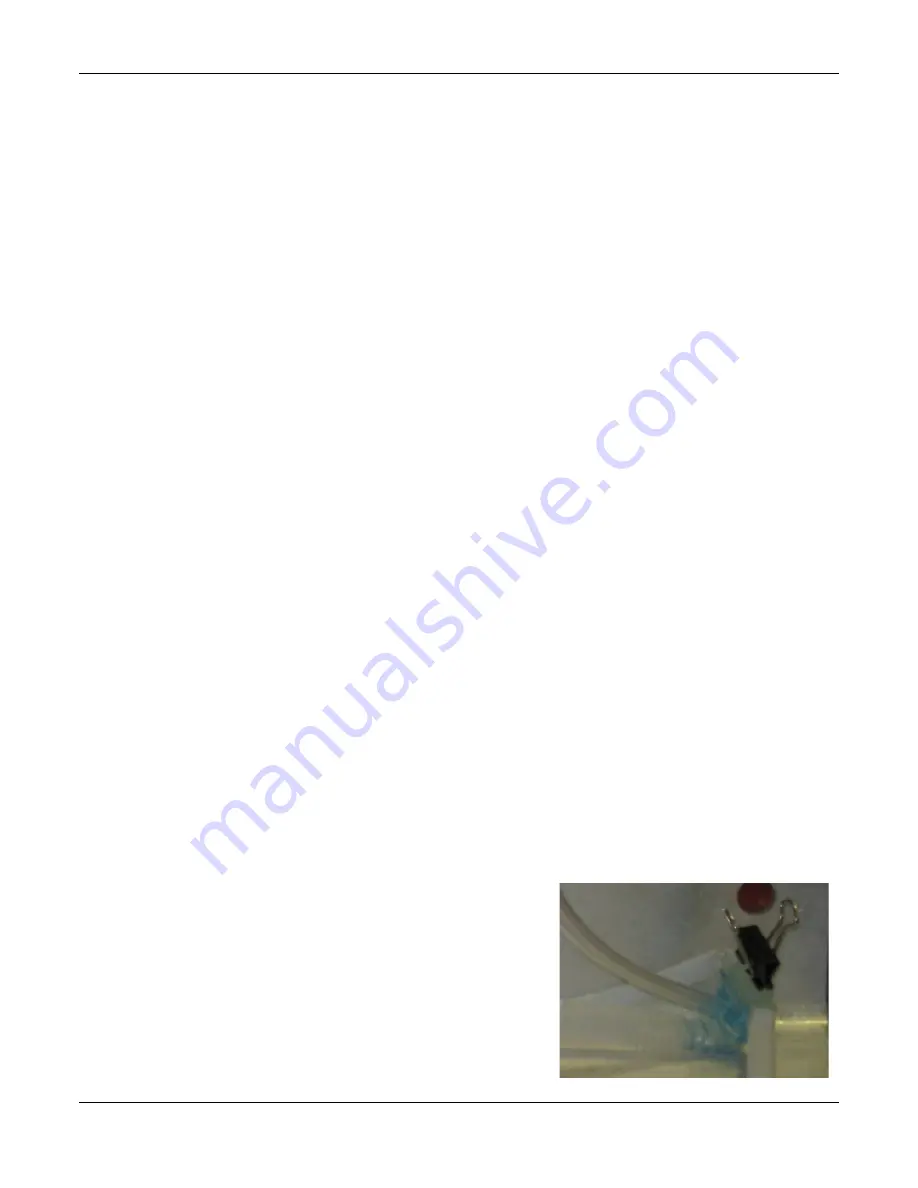
57. Completely remove the white exhaust tubing from the 

generator’s exhaust Port. 

 
58. Occlude the prongs and set CPAP to 5 cm H

2

O.  Allow 

valves to stabilize for approximately 60 seconds. 

 
59. Completely occlude the exhaust port momentarily and then 

release the occlusion. 


Summary of Contents for AirLife nCPAP

Page 1: ...nCPAP System Hardware Service Manual Driver Model 006900 Firmware Version 2 02 Cardinal Health McGaw Park IL 60085 USA Distributed in Canada by Source Medical Corporation Mississauga Ontario LT5 1C2...

Page 2: ...ALARM SYSTEM 11 4 1 NON LATCHING AND LATCHING ALARM SIGNALS 11 4 2 ALARM SITUATIONS 11 4 2 1 Supply Gas Pressure Alarm 11 4 2 2 High Pressure Alarm 11 4 2 3 Elevated Pressure Alarm 12 4 2 4 Low Pressu...

Page 3: ...NSOR ASSEMBLY 45 12 7 REMOVE THE OUTLET FITTING ASSEMBLY 47 12 8 REMOVE THE CONTROL KNOB SELECTOR SWITCH 48 12 9 REPLACE THE MAIN BOARD PCA 01 CONTRAST ADJUSTMENT 49 12 10 REPLACE THE BOTTOM CASE 51 1...

Page 4: ...er interface displays oxygen concentration CPAP level flow rate trending power and alarm conditions The device utilizes both audible and visual indicators for alarm conditions including text on the LC...

Page 5: ...ets to accommodate other gas sources 2 3 CPAP Pressure Control Monitoring Pressure Control Range 2 10 cm H2O Monitor Range 1 11 cm H2O accuracy 1 cm H2O Pressure is displayed as 1 or 11 when outside t...

Page 6: ...ncrements of 25 Low battery alarms occur at approximately 24 minutes of operation remaining Medium Priority alarm and at approximately 12 minutes of operation remaining High Priority alarm CAUTION The...

Page 7: ...red Equipment Type BF IPX 1 This equipment is rated for continuous operation This equipment is not suitable for use in the presence of flammable anesthetics CAUTION Although this device meets the requ...

Page 8: ...ssage Bar 5 FiO2 Display 6 Alarm Priority LEDs Fault LED on top Warning LED on bottom 7 Alarm Mute LEDs 8 Alarm Mute Reset Button Press Release for Mute Reset or to clear a latched alarm Press hold fo...

Page 9: ...3 0 Amp 250 Volt size 5 x 20 mm 3 Power Switch Switch does not disconnect driver from main power supply 4 Medical Oxygen Inlet 5 Medical Air Inlet 6 Serial Number 7 Nationally Recognized Testing Labor...

Page 10: ...AirLife nCPAP Driver Service Manual 2008 Cardinal Health Page 10 of 81 Figure 4 Splash Screen Displayed only at Startup Example Screen Figure 5 Icon Legend...

Page 11: ...ur during operation 4 2 1 Supply Gas Pressure Alarm An audible and visual High Priority Source Pressure alarm will activate if the inlet pressure of one or both of the gas sources are outside of the s...

Page 12: ...a pressure line or patient interface that has come loose or that is disconnected The alarm is set to activate when both conditions are met according to the following chart Measured Flow lpm Measured C...

Page 13: ...ttery is not charging properly The system verifies proper charging at start up and routinely during operation There is a 5 second delay for this alarm 4 2 10 Oxygen Calibration Alarm An audible and vi...

Page 14: ...r statements that could allow for more efficient or convenient operation or service of the equipment The following are warnings cautions and notes that will appear within this document Please become f...

Page 15: ...the driver may result in increased emissions and or decreased Immunity of the AirLife nCPAP System Driver WARNING The patient accessories for use with the AirLife nCPAP Driver are for single patient...

Page 16: ...ne WARNING There is always a risk when using oxygen that the O2 level in the arterial plasma will reach an unacceptable level This driver should always be used in conjunction with a pulse oximeter to...

Page 17: ...ce and should not be used in the vicinity of the device CAUTION Using the driver without the proper filters can allow dirt or moisture to enter the system This will damage the electronic blender leavi...

Page 18: ...ed to it Note Always disconnect the machine from facility power oxygen and medical air before performing any maintenance procedures Note To enhance patient safety and comfort use only with heated humi...

Page 19: ...Patient Treatment Mode the main screen in order to allow time for patient setup If the patient setup takes longer than 120 seconds the alarms can be muted for an additional 120 seconds by pressing the...

Page 20: ...05 Viasys 777085 102 777213 773386 102 773387 102 11541 12204 773388 101 103 773389 102 104 Generator Set Nasal Prongs are included with the Generator Set Hamilton 33201 Cardinal Health 006925 006930...

Page 21: ...mbly with the three 3 8 mounting screws and lock washers included with the driver Torque the screws to 7 in lb 7 2 Attach Driver to Stand Securely attach the driver to a stand or other mounting system...

Page 22: ...driver enters Patient Treatment Mode the main screen verify that the following default values are indicated on the main screen CPAP Set 5 cmH2O FiO2 Set 21 O2 Flow Rate Target 8 lpm Battery charging l...

Page 23: ...essing the Control Knob when the section you wish to change is highlighted 3 A prompt will appear in the Message Bar at the top of the display showing the current settings for that feature Rotate the...

Page 24: ...ly 3 seconds The operator can exit the mode by pressing the Alarm Mute Reset button or the system will automatically exit the mode and resume normal operation after 20 minutes While in Standby Mode th...

Page 25: ...o activate the Trend Screen 3 Rotate the knob to select the desired Trending time 4 8 12 or 24 hours Displayed data are not actively updating 4 Press and release the knob to return to the main display...

Page 26: ...dentify equipment that is authorized for use WARNING The driver should only be used after qualified personnel or a technician has authorized it for use 8 1 Battery The battery included in the driver r...

Page 27: ...t medical air and oxygen hoses to the back of the driver Then connect the hoses to their respective high pressure sources regulated between 41 66 psig nominal 50 psig Plug the AC Adaptor into the back...

Page 28: ...w If a Low Pressure Alarm is active verify that the flow does not exceed 3 lpm over Target Flow Occlude the prongs and verify that the CPAP level returns to 5 1 cm H2O and the FiO2 returns to 35 3 wit...

Page 29: ...and O2 Inlet Screens No routine inspection 12 months 11 3 Power Cord AC Adaptor Visual inspection prior to each start up Electrical inspection annually 60 months n a Oxygen Sensor Filters Internal No...

Page 30: ...ench 7 16 open end wrench or nut driver T 10 Torx Driver Air Filter Bowl Removal Tool Assembly P411197 supplied by Cardinal Health Torque Wrench The following is a list of the torque specifications to...

Page 31: ...onnect oxygen and medical air Eye protection is required when servicing this machine WARNING The power switch does not disconnect the driver from the main power supply This can only be accomplished by...

Page 32: ...uctions are included here only if you wish to change the orientation 1 Place nCPAP driver upside down on a clean dry surface 2 Use a 9 64 Allen wrench to remove the 3 8 mounting screws and lock washer...

Page 33: ...h an Allen wrench has been supplied to assist in the filter bowl removal process part number P411197 2 Insert the pronged end of the Filter Bowl Removal Tool onto the filter bowl and gently turn the t...

Page 34: ...proportional valves inside the driver 1 Remove the single 10 Allen head screw located between the air and oxygen fittings 2 Slide the Inlet Block out of the manifold and locate the screen in each man...

Page 35: ...tive appears in the Message Bar 5 Measure the Oxygen Bleed Flow exiting the Oxygen Sensor Bleed Port located on the underside left rear of the driver refer to Figure 3 in section 3 CAUTION Do not bloc...

Page 36: ...supply cable to ensure complete isolation Disconnect oxygen and medical air Eye protection is required when servicing this machine WARNING The power switch does not disconnect the driver from the mai...

Page 37: ...ttom Case 1 Turn the unit upside down on a clean dry level surface 2 Use a 9 64 Allen wrench to loosen and remove the four 4 8 screws that secure the Top Case to the Bottom Case 3 Turn the unit right...

Page 38: ...to unscrew the white luer lock ring from the Oxygen Sensor Filters 2 Unscrew the Oxygen Sensor Filters from the Oxygen Sensor Elbow 3 Lock two 2 new Oxygen Sensor Filters together by twisting the mati...

Page 39: ...g measures should be followed while performing this process 1 Gently pull the Front Panel Assembly forward so you have room to work 2 Avoid touching the LCD Backlight Power Supply If the driver is not...

Page 40: ...ssembly from the Bottom Case 8 Disconnect the Valve Drive Cable from the Bulkhead to Valves Cable Step 3 Disconnect the Power Cable Assembly 4 Disconnect the Main to Bulkhead Cable from the Main Board...

Page 41: ...er Cable Assembly is mounted at the rear of the Bottom Case behind the Battery Assembly It is held in place by friction from the foam pads on the Battery Assembly 2 Disconnect negative terminal of Pow...

Page 42: ...f 81 7 Reverse procedure to install replacement battery 8 Always dispose of the battery according to local regulations 9 10 11 12 13 14 Disconnect positive terminal 4 Push Bulkhead Connector through D...

Page 43: ...ad to Valves Cable through the slot in the Divider Oxygen Sensor Assembly 3 Disconnect the white luer lock ring from the Oxygen Sensor Filters 4 Use a 9 64 Allen wrench to remove the two 2 socket head...

Page 44: ...e order to install replacement Manifold Assembly refer to section 13 6 10 Torque the two mounting screws to 7 in lbs Disconnect luer lock 3 Pinch push connector through Divider 1 2 Remove 2 mount scre...

Page 45: ...andling measures should be followed while performing this process 3 Tilt the Front Panel Assembly forward to gain access to the Divider Oxygen Sensor Assembly 4 Avoid touching the LCD Backlight Power...

Page 46: ...lectronic components that are ESD sensitive ESD control and handling measures should be followed while performing this process 11 Remove the Divider Oxygen Sensor Assembly from the Bottom Case Disconn...

Page 47: ...5 and 12 6 2 Use a T 10 Torx driver to loosen and remove the mounting screw that secures the Outlet Fitting Assembly to the Bottom Case CAUTION This assembly contains electronic components that are E...

Page 48: ...ress fit Remove it by simply pulling it off its post a flat head screwdriver may be required to help loosen knob 2 Loosen and remove retaining nut and lock washer with 7 16 open ended wrench 3 Push th...

Page 49: ...the AC outlet CAUTION This assembly contains electronic components that are ESD sensitive ESD control and handling measures should be followed while performing this process 1 Remove Front Panel Assem...

Page 50: ...nnector 2 Disconnect ribbon cables 4 Mounting screws 3 Contrast adjustment 5 To install the new Main Board PCA 01 reverse the order of the above steps 6 When installed the LCD contrast may be adjusted...

Page 51: ...AP driver affixed to the Bottom Case 12 10 Replace the Bottom Case If the Bottom Case is cracked or broken it must be replaced Ensure that the serial number sticker of the nCPAP driver is transferred...

Page 52: ...to align the notch on the switch with the key in the case 2 Insert the lock washer and the nut Tighten to 12 in lbs using a 7 16 wrench 3 Position the Control Knob on the post taking care to align the...

Page 53: ...the Bottom Case at a downward angle CAUTION This assembly contains electronic components that are ESD sensitive ESD control and handling measures should be followed while performing this process 2 In...

Page 54: ...ould be followed while performing this process 1 Attach the silicone tubing to the fitting on the Bottom Case 2 Connect the Oxygen Sensor Cable to Remote Sensor Board PCA 02 at CN14 3 Position the Div...

Page 55: ...the Inlet Pressure Board PCA 03 3 Connect the Inlet Pressure Board Cable connected to the Remote Sensor Board PCA 02 at connector CN16 to connector CN22 on the Inlet Pressure Board PCA 03 4 Carefully...

Page 56: ...nected to the Divider Oxygen Sensor Assembly 8 Ensure that all joints between the two 2 Oxygen Sensor Filters and the Oxygen Sensor Elbow have remained tight Connect luer lock to Oxygen Sensor Filters...

Page 57: ...r Cable Assembly 1 Connect the black wire to the negative battery terminal and the red to positive 2 Slide the Power Inlet Panel behind the battery between the ribs in the Bottom Case Properly Install...

Page 58: ...14 pin connector that will connect to the Bulkhead to Valves Cable already attached to the Divider Oxygen Sensor Assembly Pin 1 is identified by a triangle etched into the bottom surface of the fourte...

Page 59: ...Tilt the front panel back taking care to tuck the wiring above or below the standoffs on the Divider Oxygen Sensor Assembly 7 Plug the Valve Drive Cable into the Bulkhead to Valves Cable 8 Verify and...

Page 60: ...Bottom Case ensuring that all cables and hoses are not pinched or kinked 3 Looking from the front of the driver ensure all metal panels slide into their respective slots in the Top Case Lower the Top...

Page 61: ...is recommended that the unit be plugged into facility power for a minimum of 16 hours to allow the battery to fully charge before the driver is put into service The battery will charge when the unit i...

Page 62: ...the single audible beep is activated immediately after power up Use an external timer initiated concurrently with the audible beep in order to plan for the automatic oxygen calibration routines that...

Page 63: ...ing the power on self test the device automatically performs the following actions and displays PASS or FAIL Record the results of the tests by circling PASS or FAIL on the data sheet Checks the Patie...

Page 64: ...bing inside the Driver for loose connections and or kinks in the tubing and re test the bleed flow 20 If the bleed flow falls within specification circle PASS If the bleed flow is not within the state...

Page 65: ...e measured by the Driver on the LCD display is within 2 lpm of the flow measured by the independent flow meter The accuracy of the independent flow meter must be considered by adding its measurement t...

Page 66: ...1 If all alarm conditions were met and the auto recovery returned the system to original condition then circle PASS Otherwise circle FAIL Low Pressure Disconnect Alarm Test 52 Occlude both prongs and...

Page 67: ...least 250 cmH2O 66 Record and verify that the pop off pressure on the manometer is within the specifications noted on the data sheet 67 Record PASS or FAIL Battery Tests 68 The charging system for th...

Page 68: ...olt icon present in battery icon Plug icon illuminated Green LED at plug decal illuminated Charge displayed PASS FAIL Power Loss Notification Single Audible Beep Battery Percentage displayed PASS FAIL...

Page 69: ...Pressure Alarms Alarm Confirmation Data Successful Auto Recovery Results Audible Alarm Activated High Priority Red LED Returned to Set FiO2 Low Air Inlet Pressure Message Bar Confirmation Air Pressure...

Page 70: ...e nasal prongs and mask Check supply gases High Pressure 12 cm H2O for 2 seconds or 18 cm H2O instantaneously High Audible alarm Red flashing Fault LED Message Bar The patient delivery valve closes an...

Page 71: ...ar Red Power LED Plug in the AC Adaptor Battery Charge Fault High Audible alarm Red flashing Fault LED Message Bar Red Power LED LCD indicator System will be required to have the AC Adaptor connected...

Page 72: ...een The most likely fault modes and potential actions to remedy the condition are also included Warning Screen Description Possible Fault Suggested Action Power On Self Test Warning Screens Air and or...

Page 73: ...filter bowl media and O2 sensor filters Service or replace the Manifold Assembly Check for occluded Oxygen Sensor Bleed Port Insufficient bleed flow 0 9 lpm at 50 psig Check for clogged inlet filter s...

Page 74: ...xcessive sensor drift Service or replace the O2 sensor assembly Oxygen source has become disconnected tank has run out or the hose fittings are leaking excessively Follow on screen commands and reconn...

Page 75: ...ice and service repair the Manifold Assembly Air source pressure exceeds the maximum specified Fix Air source pressure and or regulate the inlet pressure between 41 66 psig Indicates that the Air sour...

Page 76: ...AirLife nCPAP Driver Service Manual 2008 Cardinal Health Page 76 of 81 16 PNEUMATIC DIAGRAM...

Page 77: ...er is intended for use in the electromagnetic environment specified below The customer or user of the AirLife nCPAP System Driver should assure that it is used in such an environment Emissions Test Co...

Page 78: ...urge Note 2 1 kV differential mode 2 kV common mode 1 kV differential mode 2 kV common mode Mains power quality should be that of a typical commercial or hospital environment IEC 61000 4 8 Power Frequ...

Page 79: ...uipment marked with the following symbol NOTE 1 At 80 MHz and 800 MHz the higher frequency range applies NOTE 2 These guidelines may not apply in all situations Electromagnetic propagation is affected...

Page 80: ...d 1 2 P 80 MHz to 800 MHz d 1 2 P 800 MHz to 2 5 GHz d 2 3 P 0 01 0 12 0 12 0 23 0 1 0 38 0 38 0 73 1 1 20 1 20 2 30 10 3 80 3 80 7 30 100 12 00 12 00 23 00 For transmitters rated at a maximum output...

Page 81: ...cident iii operated under conditions other than normal use iv the prescribed periodic maintenance and or services have not been performed as specified in the relevant manual There are no warranties th...

Reviews: