


25
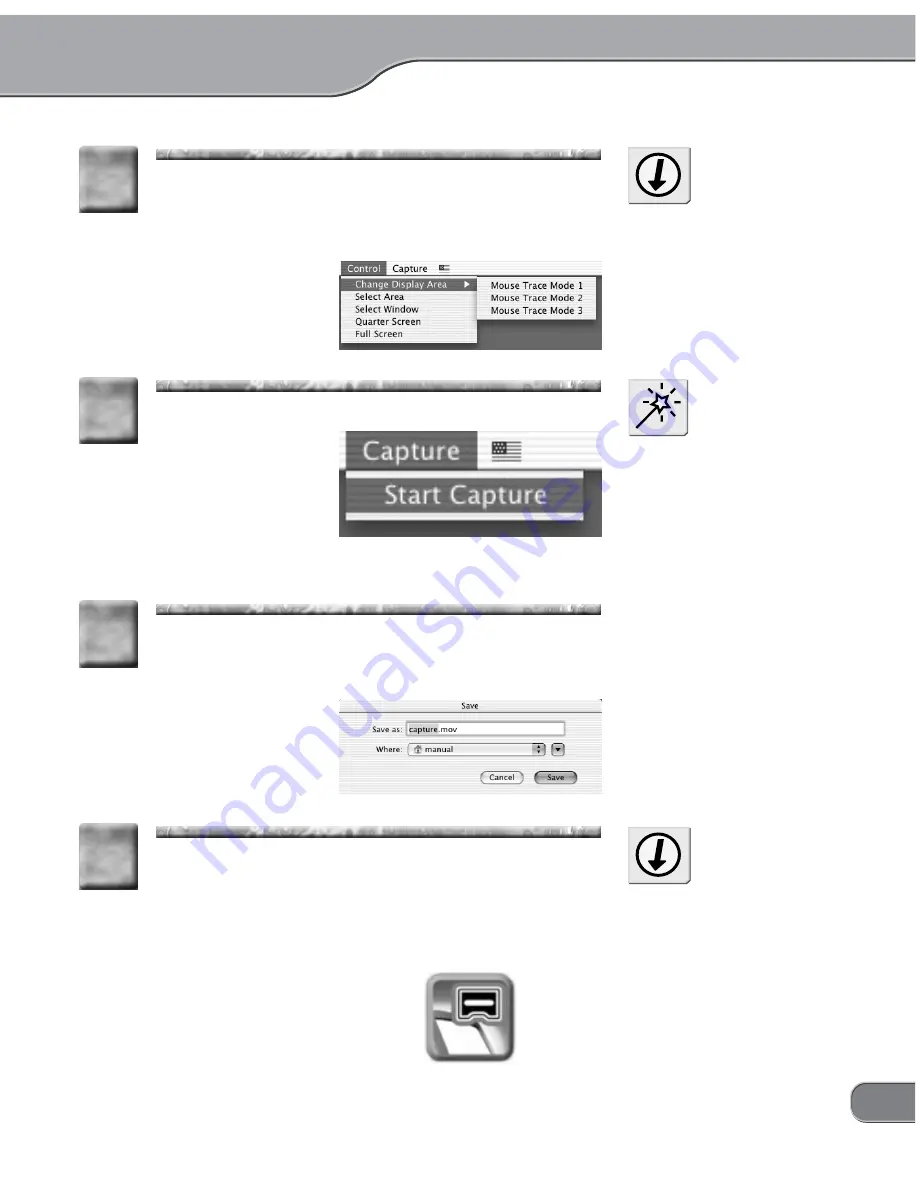
Click the [Control] menu, and then select the area
you want to capture.
* For more info on the display area, refer to "Menus" in
"Twin Commander menus and screens" (P.46).
6
6
If a TV monitor has been con-
nected to the TwinPact 100, you
can check the display area on the
TV monitor as necessary.
Tip
Click [Start Capture] from the [Capture] menu.
> The [Save] screen will appear.
7
7
NOTE
If the [Show save dialog when
starting to capture] option has not
been check marked in the [Cap-
ture] tab page of the [Preferences]
screen, the TwinPact 100 starts
capturing immediately.
Enter your desired filename to save. If you want to
change the saving location, click the pull-down menu
and specify your desired location.
8
8
Click the [Save] button.
> The [Save] screen is closed and the Twin Commander
will start capturing images on the computer screen into
the computer.
> While images are being captured, the icon on the Dock
blinks in red.
9
9
If the destination folder specified
to save the capture in does not
exist, the [Capture Settings]
screen appears again.
Tip
Summary of Contents for TwinPact 100
Page 1: ...User Manual...
Page 10: ......
Page 11: ......
Page 33: ...23 Click OK 11 11 Playback the captured video and check the content 12 12...


